Requirements
- Unity 5+ and a created project.
- Facebook account for testing.
- Facebook SDK imported into the project.
- Registered PlayFab title.
- PlayFab SDK imported into the project with a configured title reference.
- Familiarity with Login basics and Best Practices.
Implementation
Registering a Facebook application
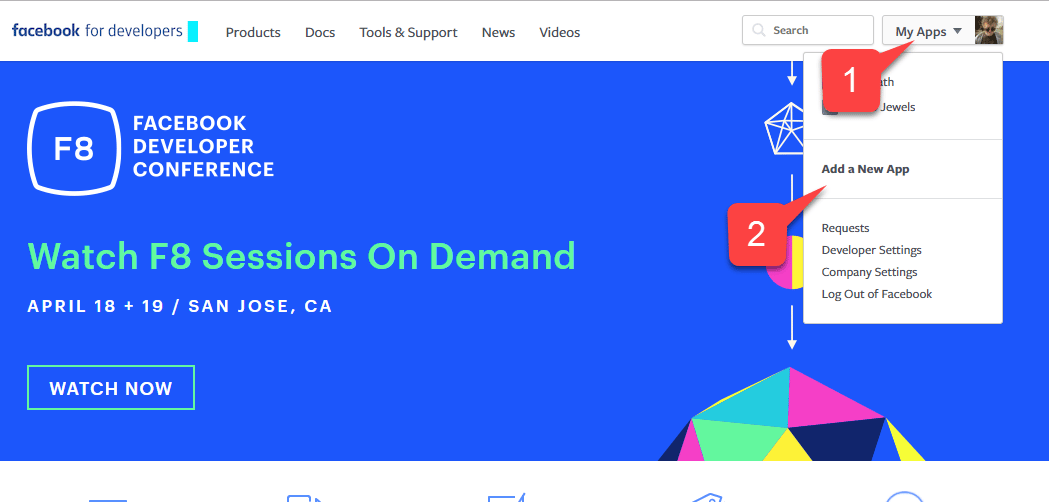
Start by navigating to the Facebook Developer Portal:- Move your mouse over the My Apps button.
- Select Add a New App, as shown on the picture below.
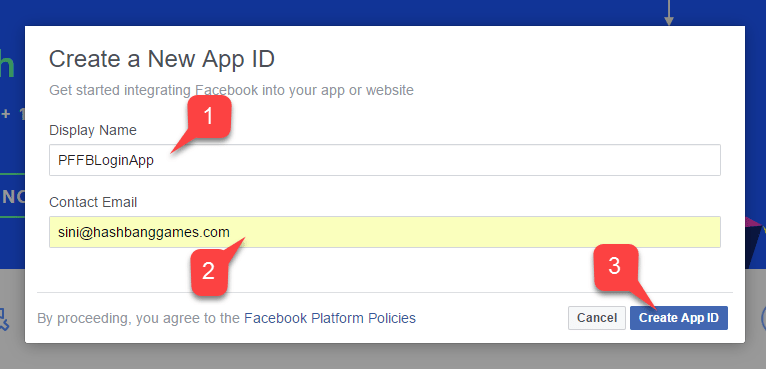
- Enter a name for your Application.
- Enter a Contact Email.
Make sure to come up with your own unique Application Name and Email, as shown on the picture below.
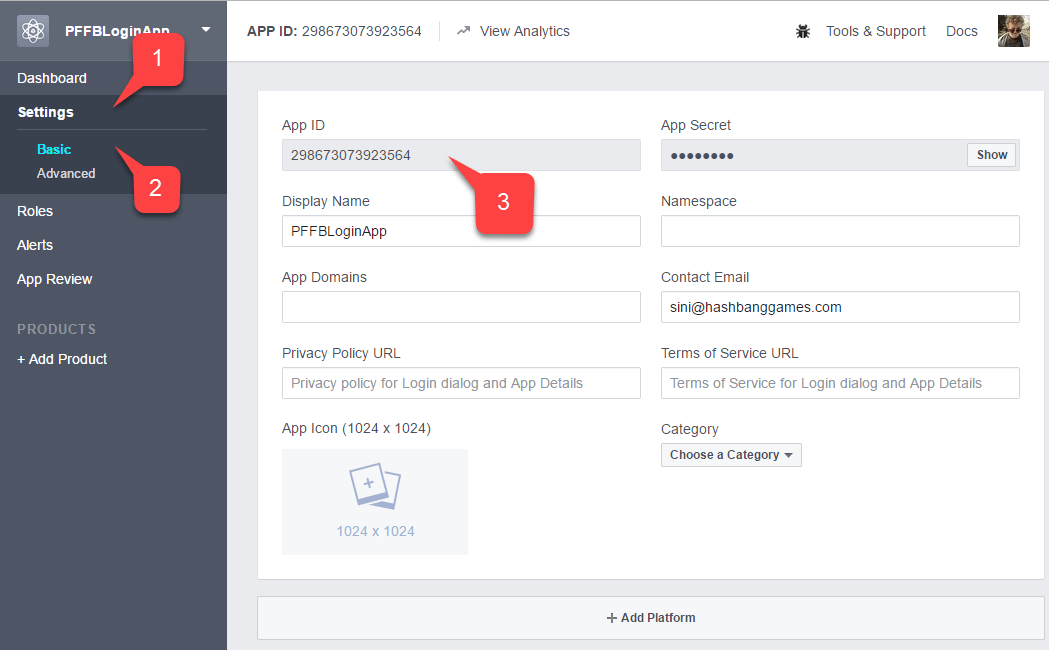
- Navigate to the Settings tab.
- Then move to the Basic subtab.
- Locate your Application ID.
- Copy it somewhere to a safe place that is easily accessed. We’ll use it later to set up the Facebook SDK.
- Locate your App in the list.
- Verify that it has an assigned User Token.
If you don’t have an assigned user token, request one using the button to the right of your screen. Refer to this page whenever you need a fresh user token. If authorization fails during testing on a PC, token expiration might be the most likely reason. Refresh the page to get a new user token and test again.
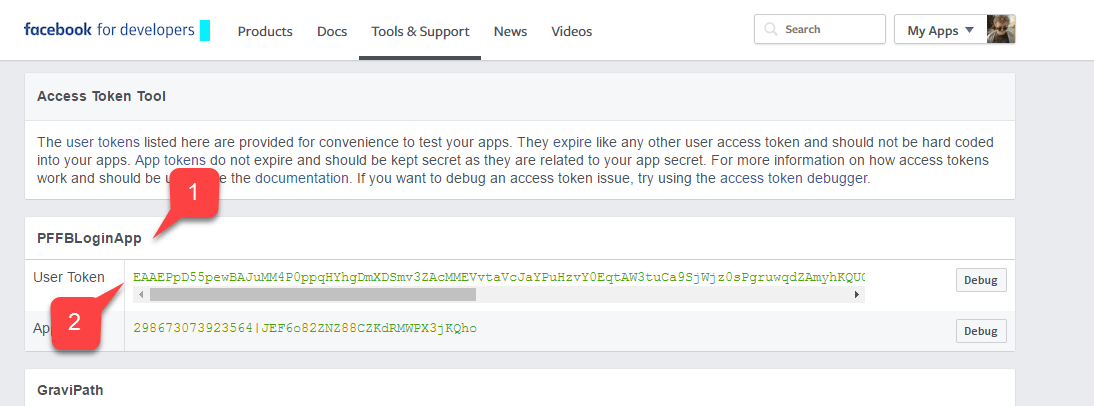
- On your Application Manager page, navigate to + Add Products.
- Locate the Facebook Login entry and select Get Started.
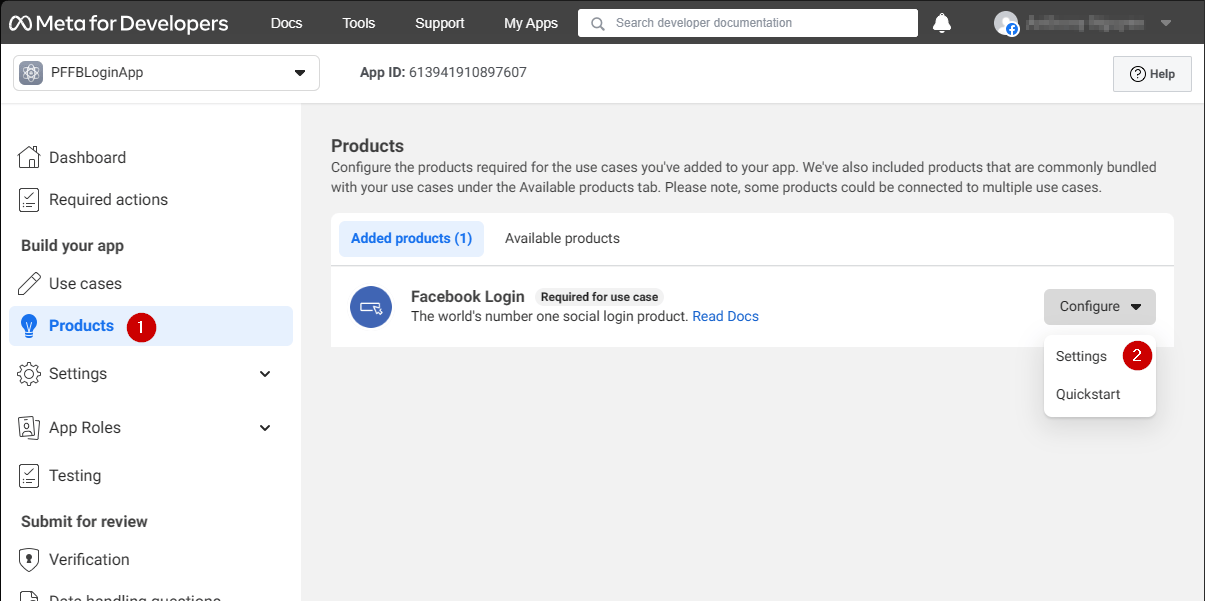
- Make sure that you have the Login product Settings page opened.
- Verify that both Client OAuth and Web OAuth are on.
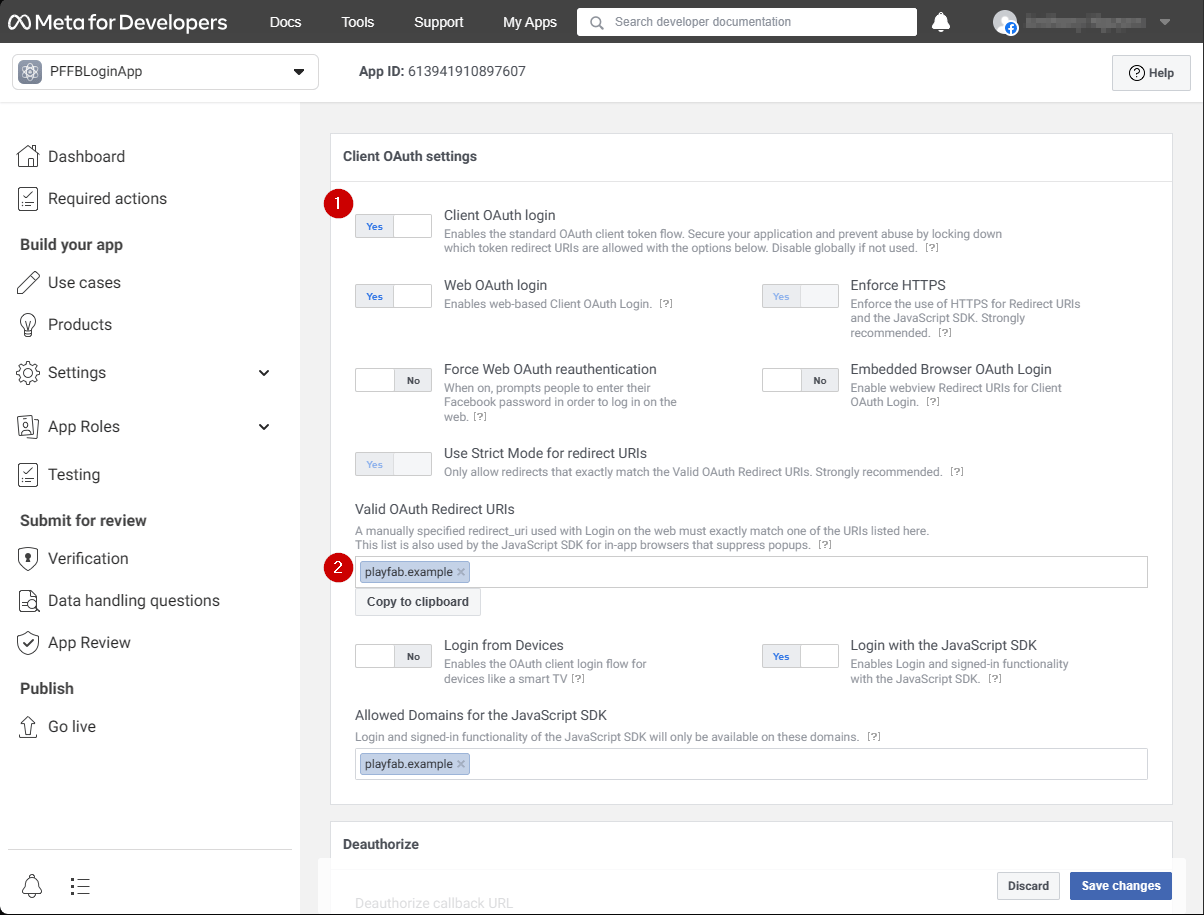
Setting up Facebook SDK
Open your Unity Project:- Select Facebook in the file menu.
- Then select Edit Settings.
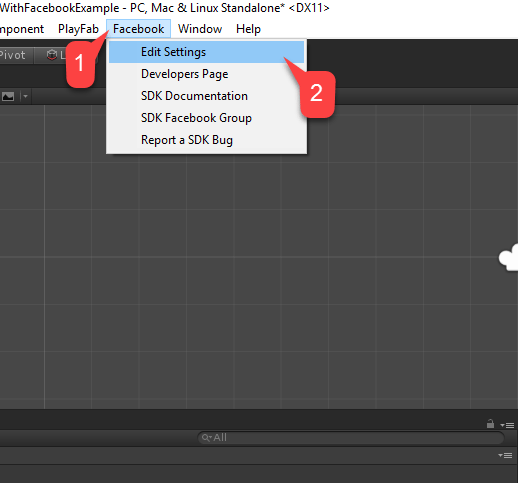
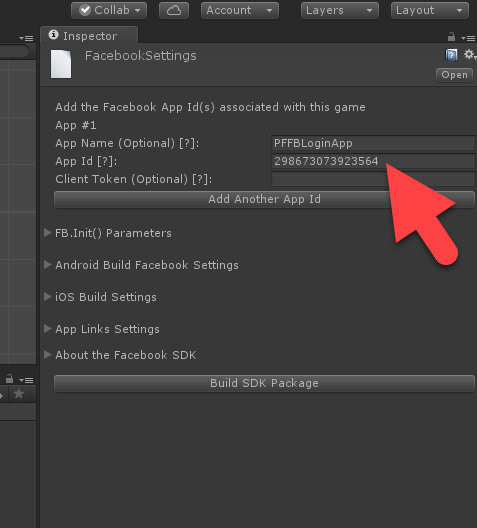
- Enter your Application ID in the corresponding field, as shown in the following picture.
Simple authentication script
Create a new Game Object, and rename it to PlayfabFacebookAuthExample, as shown in the following picture.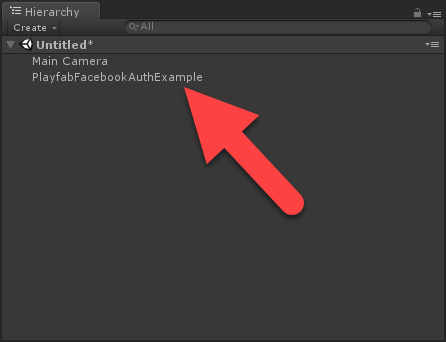
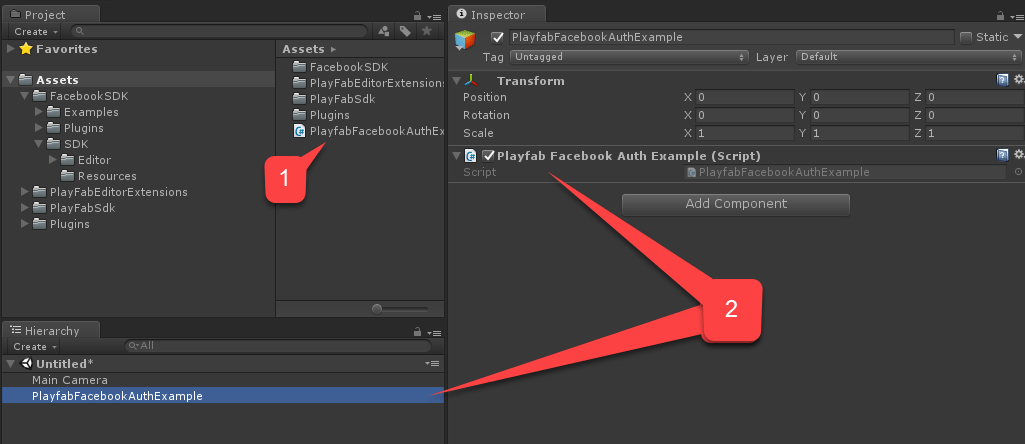
- Create a script called PlayfabFacebookAuthExample.cs.
- Add it to the Game Object as shown on the picture below.
PlayfabFacebookAuthExample.cs place the following code.
Testing
Running the application in the editor
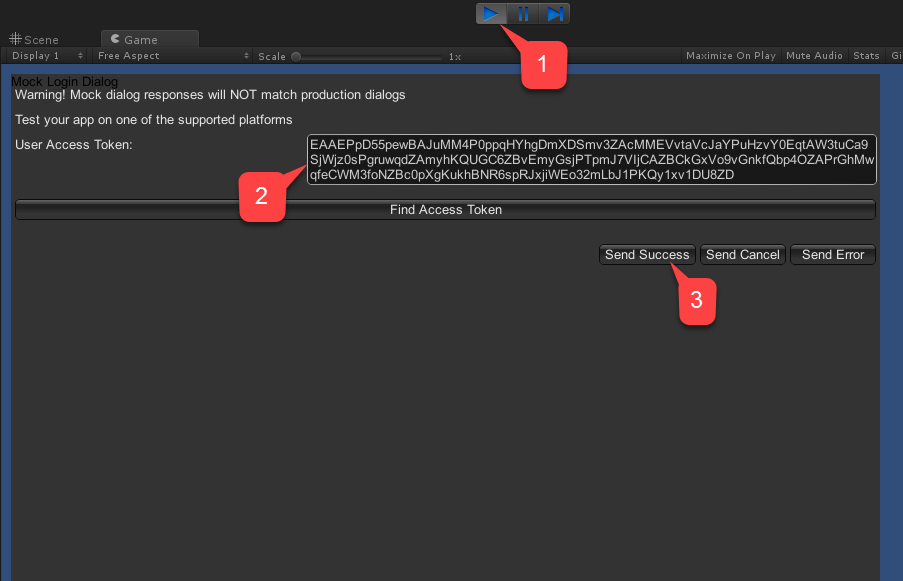
- Select the Play button. Once Facebook is initialized (and an authentication call is made), a Facebook authentication dialog will appear in your game view.
- Enter the User Token.
- Select the Send Success button, as shown in the following picture.
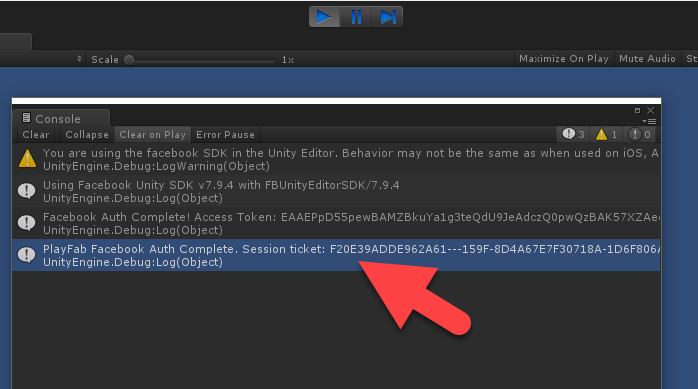
- Check the console output. It should render our debug statements, as shown on the picture below.
- If you see no errors, this means that authentication was successful.
Running the application on Android
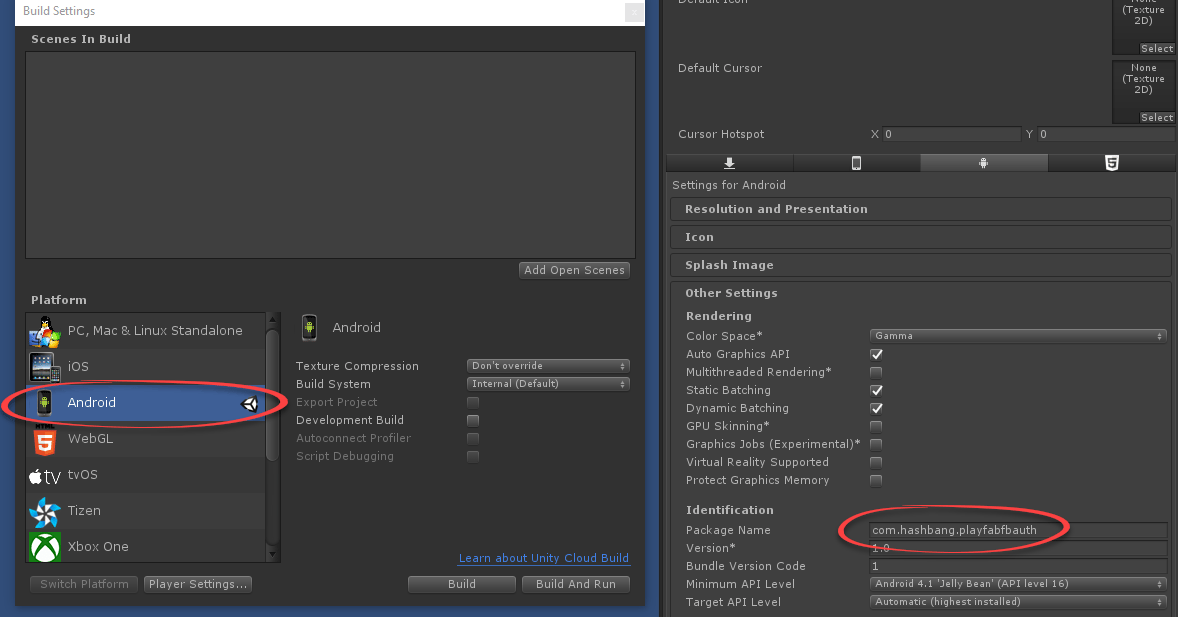
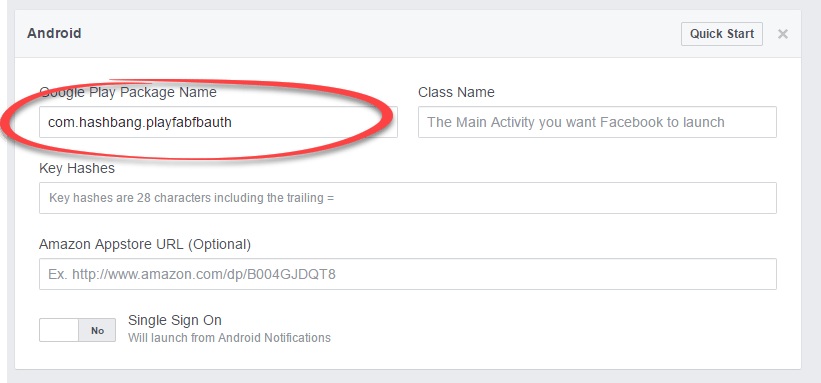
Before launching the application on Android, you’re required to perform additional configuration steps:- First, you need to ensure you have the Android platform selected, and the unique Package ID set (as indicated in the example below).
Make sure to create your own unique Package ID.
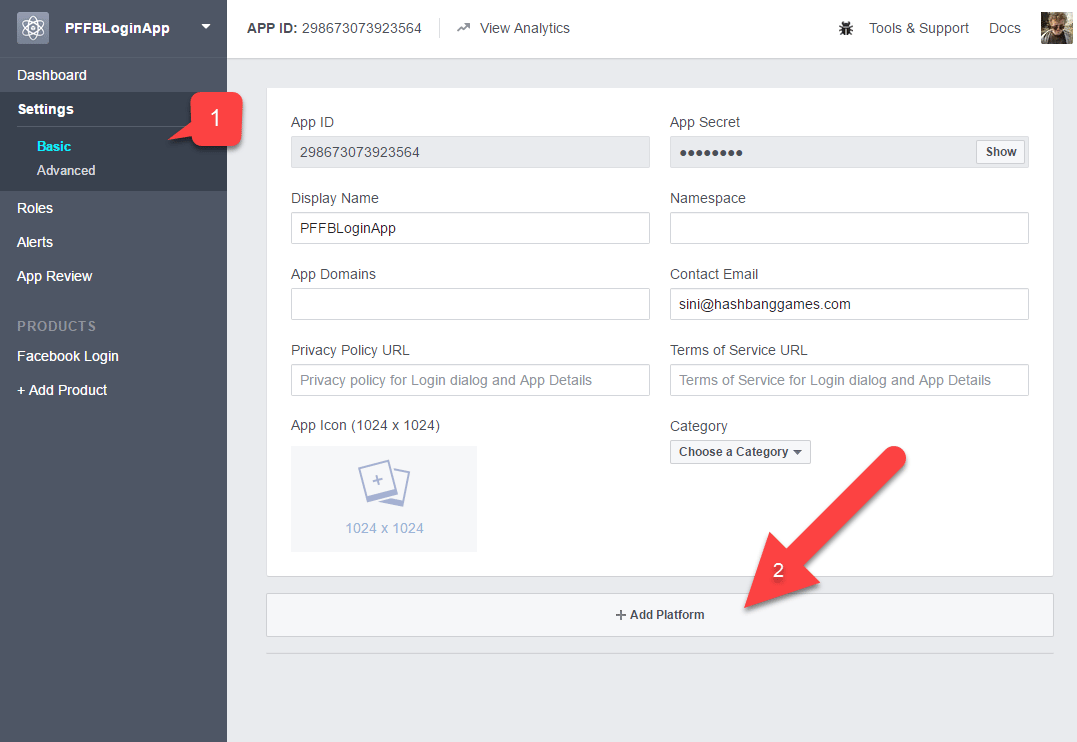
- Navigate to Basic settings.
- Select + Add Platform, as indicated in the example provided below.
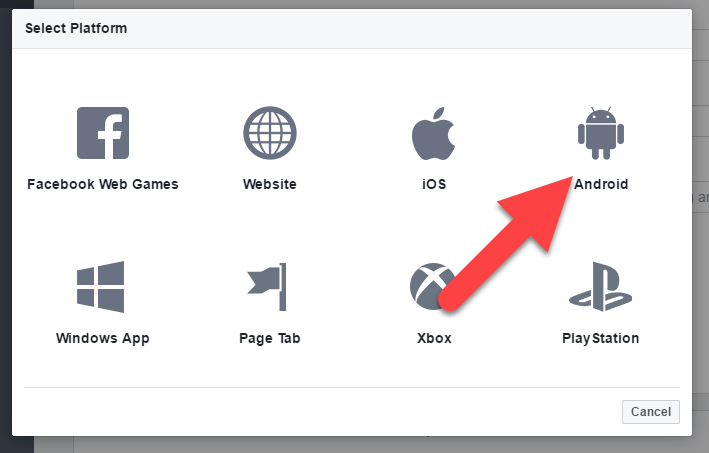
- Then select Android from the list of available platforms.
- Fill in your Package ID.
- Select Save (the Save button is hidden in the bottom right corner of the page).
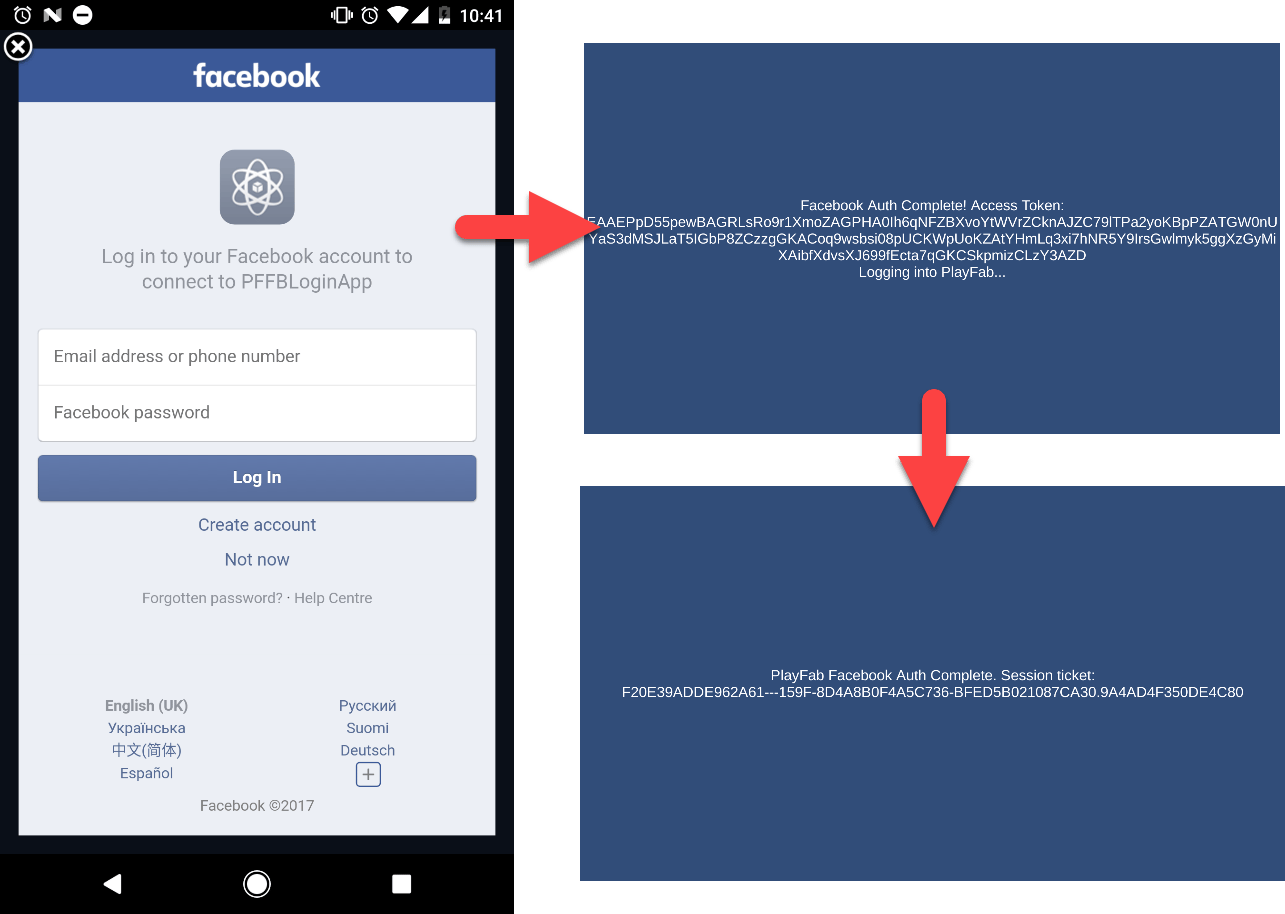
- The application should welcome you with a Facebook sign-in page.
- Once you sign in, watch the message on the screen as it changes.
- Finally, you should be presented with a message indicating successful authentication in PlayFab. The entire procedure is illustrated in the example provided below.
Running the application on iOS
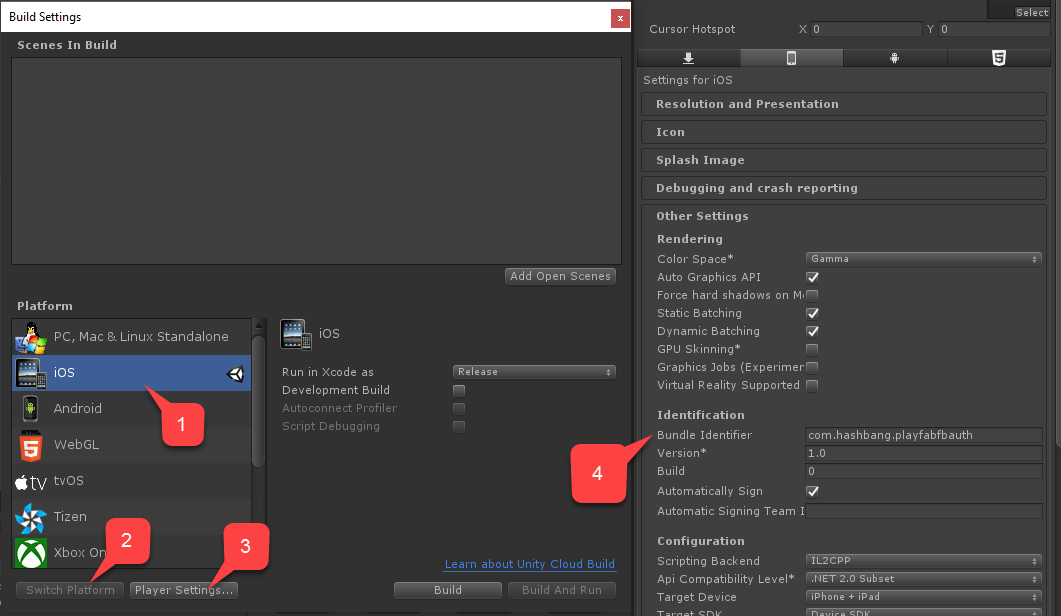
Before launching the Application on iOS, you have to perform additional configuration steps.- First, ensure that you have the iOS platform selected.
- Then, set a unique Bundle ID as indicated in the example provided below.
- Make sure to create your own unique Package ID.
- Navigate to Basic settings.
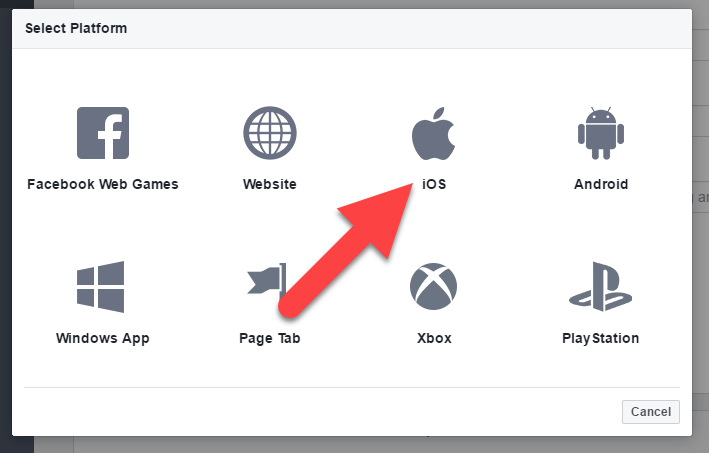
- Select + Add Platform, as indicated in the example provided below.
- Select iOS from the list of available platforms.
- Fill in your Package ID.
- Select the Save button (the Save button is hidden in the bottom right corner of the page).
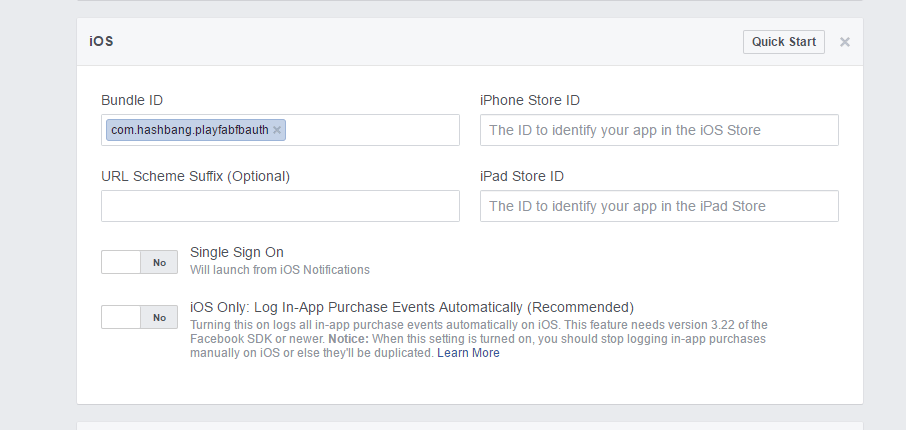
- Next, build the application as usual.
- Once this is done, open the Project using XCode.
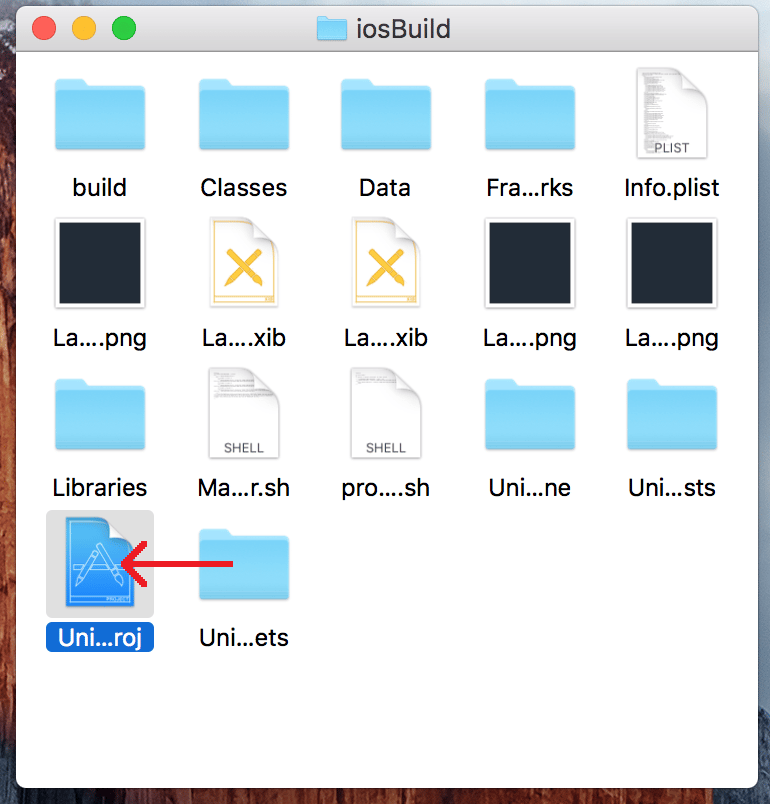
- Select the Project to open Project Settings.
- Verify that the Bundle ID matches your unique Package ID.
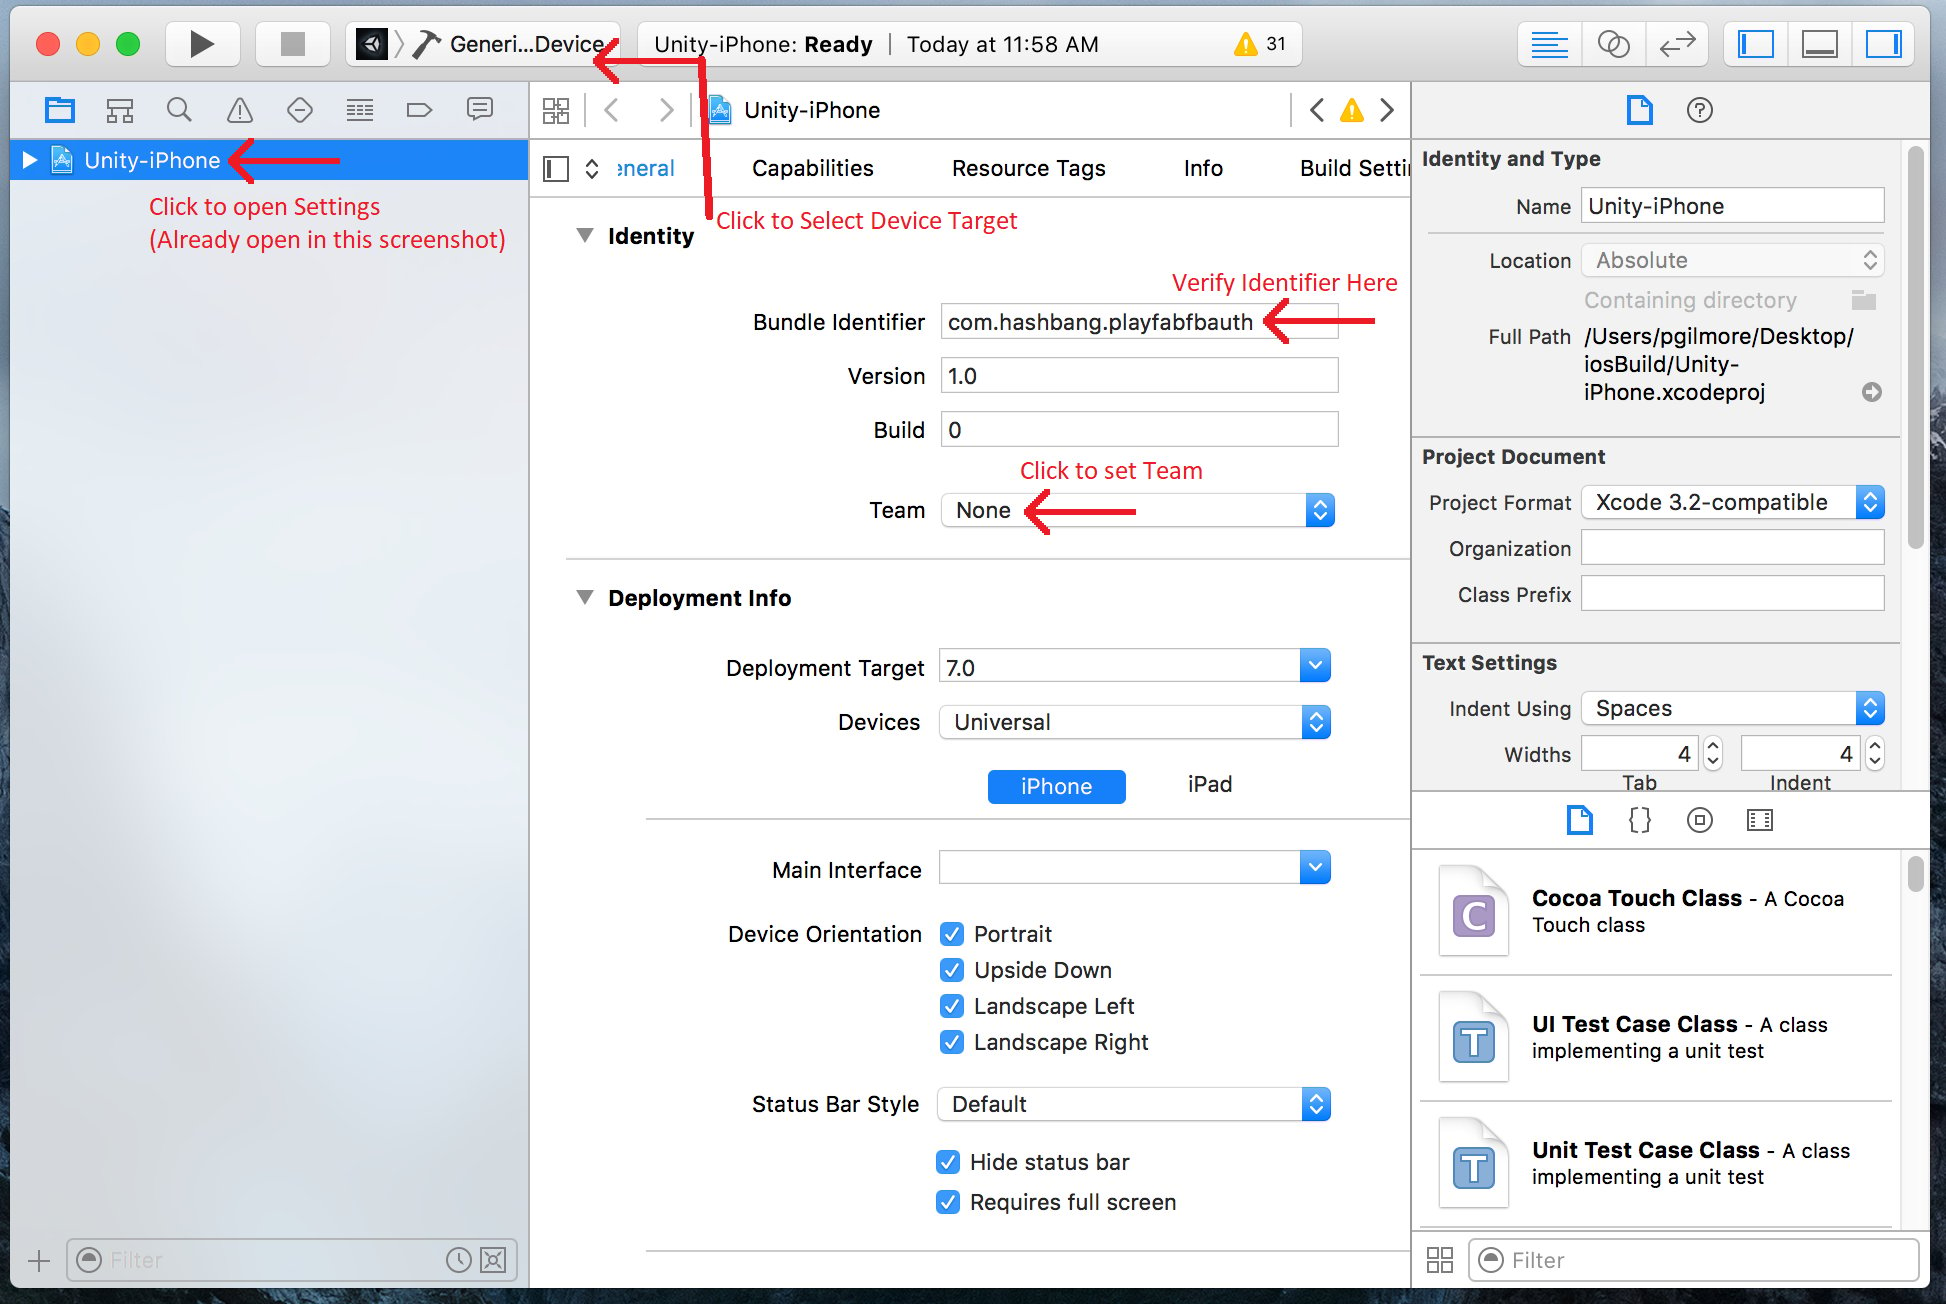
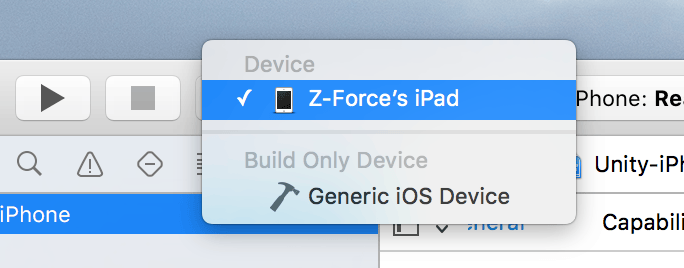
- Make sure to select the correct device.
- And select the correct Identity Team.
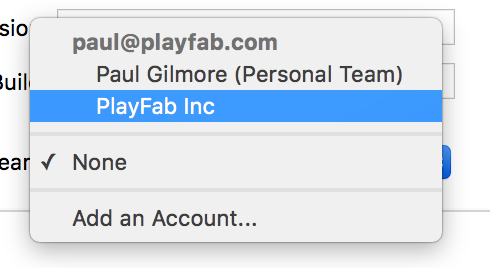
- Once started, the application will allow you to log in to Facebook using the web browser.
- Once done, PlayFab authentication will be invoked, and a message will indicate the result.
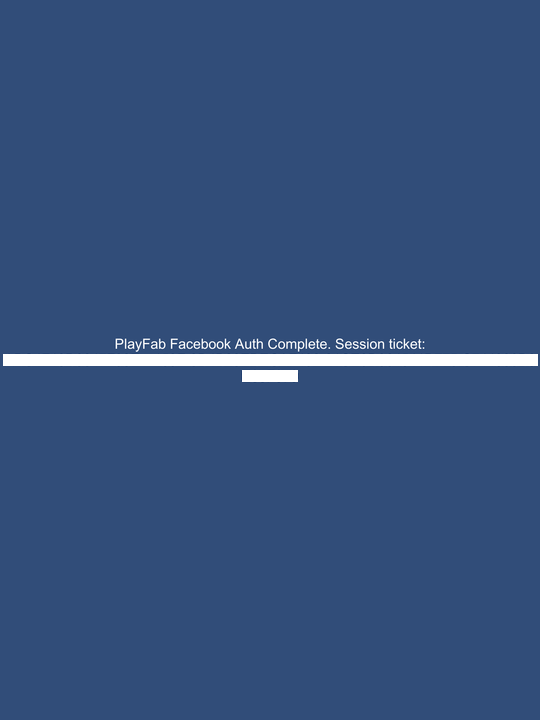
Checking through PlayFab Game Manager
Open your PlayFab title in Game Manager.- Navigate to the dashboard.
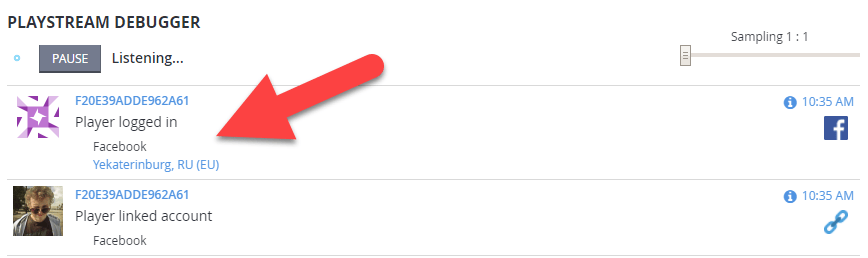
- Refer to the PlayStream Debugger panel to check for the latest events. You should see the Facebook authentication event as displayed in the following example.