Requirements
- A Facebook account for testing.
- A registered PlayFab title.
- A familiarity with sign-in basics and best practices.
- A minimal server, with a valid domain name to serve static HTML file.
If you are unsure if you have the proper requirements for this activity, please consult the Running an HTTP server for testing tutorial.
Server and domain
As part of the requirements to set up your PlayFab authentication, you must have a server with a valid domain to follow. If you don’t have a registered domain and remote web server yet, please follow our Running an HTTP server for testing tutorial to run a local web server with a valid domain name. Throughout this guide, we’ll assume your domain is['http://playfab.example'](http://playfab.example).
Registering a Facebook application
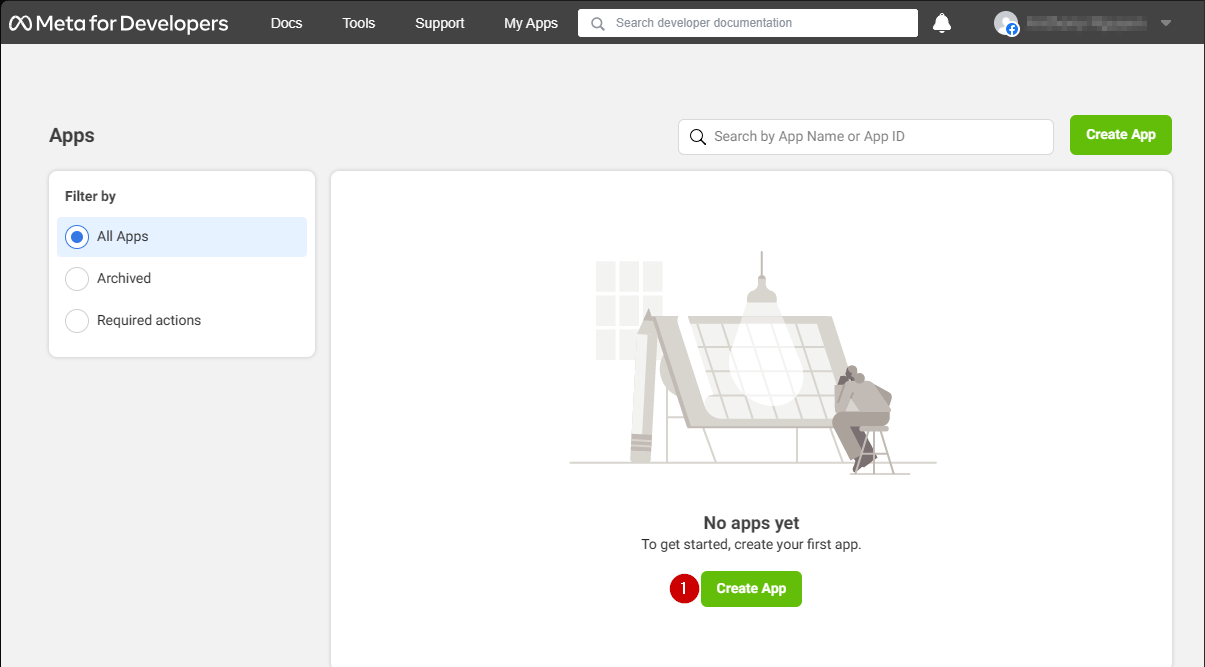
Start by navigating to the Facebook Developer Portal.- Select the My Apps button.

- Select Create App to create a new app.
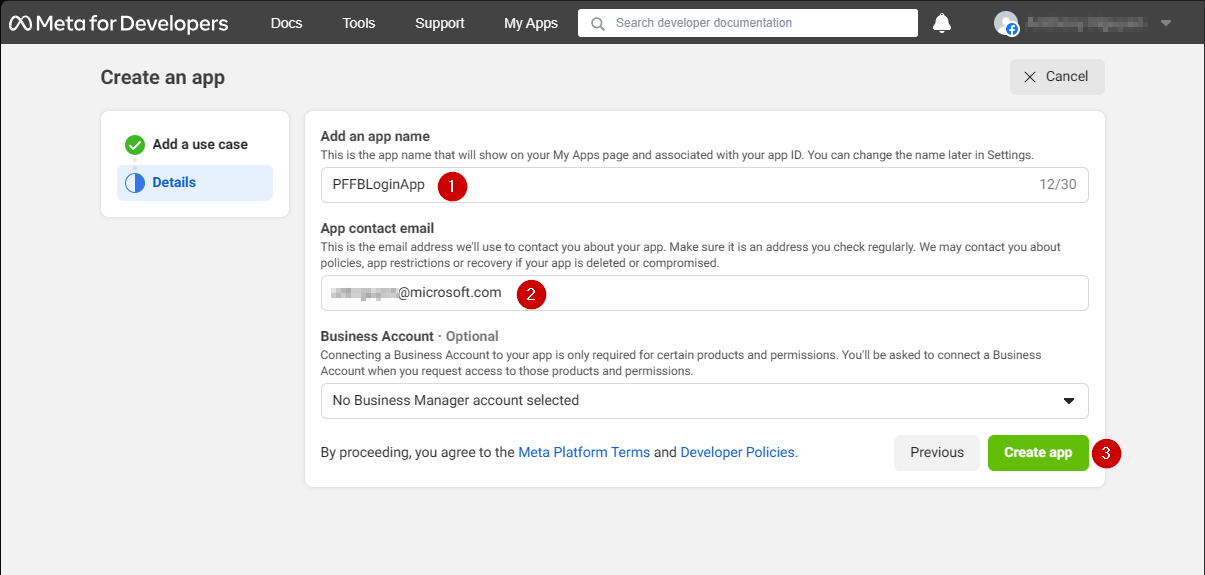
- Enter a name for your Application in the field under Add an app name.
- Enter a contact email address in the field under App contact email.
- Select the Create app button to save.
Make sure to come up with your own unique application name and email, as shown in the example provided below.
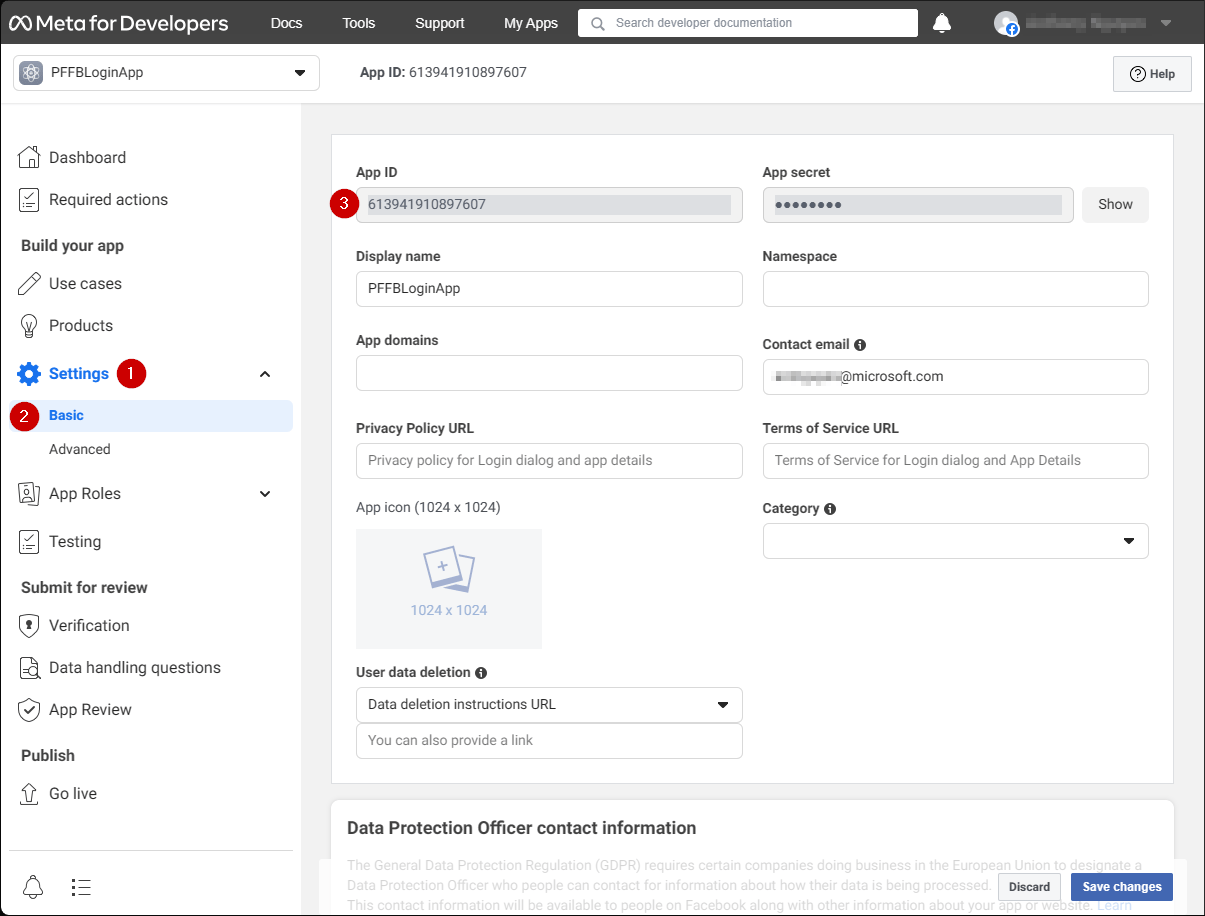
- Navigate to the Settings tab.
- Select the Basic sub-tab.
- Locate your App ID.
Copy your App ID to a safe place, we will use it later to set up the Facebook SDK.
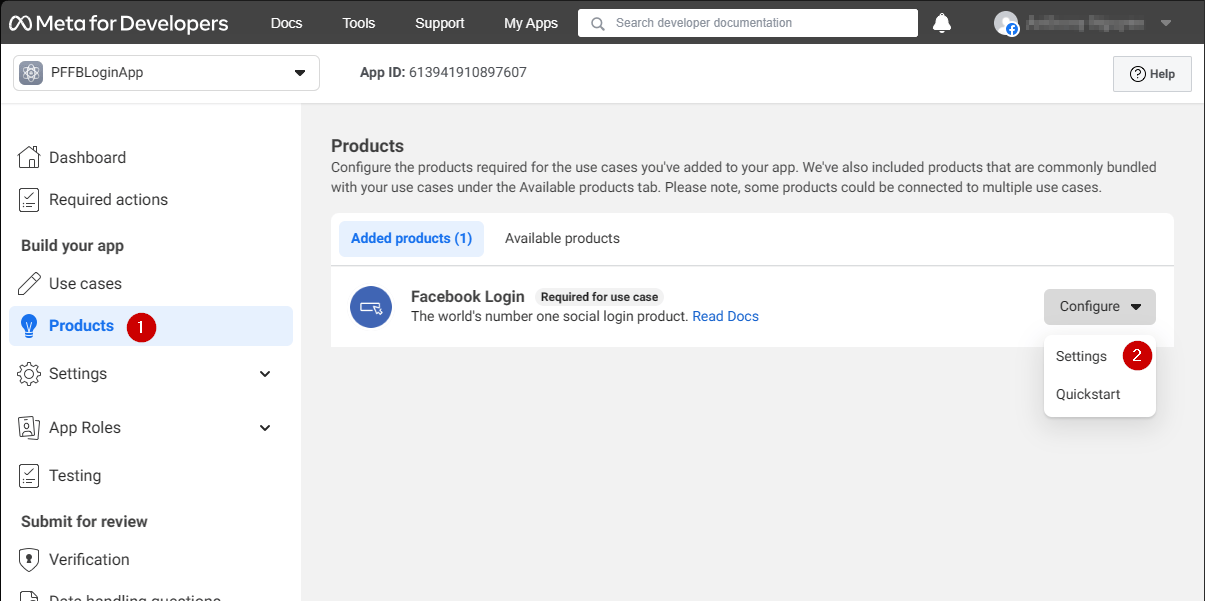
- Go to the menu on the left of your screen and select the Products item.
- Locate Configure in the Facebook Login area and select Settings from the dropdown menu.
- Verify that both the Client OAuth and Web OAuth are on (marked Yes).
- Set the Valid OAuth redirect URIs to your own auth page URI.
This will be
playfab.example in your case.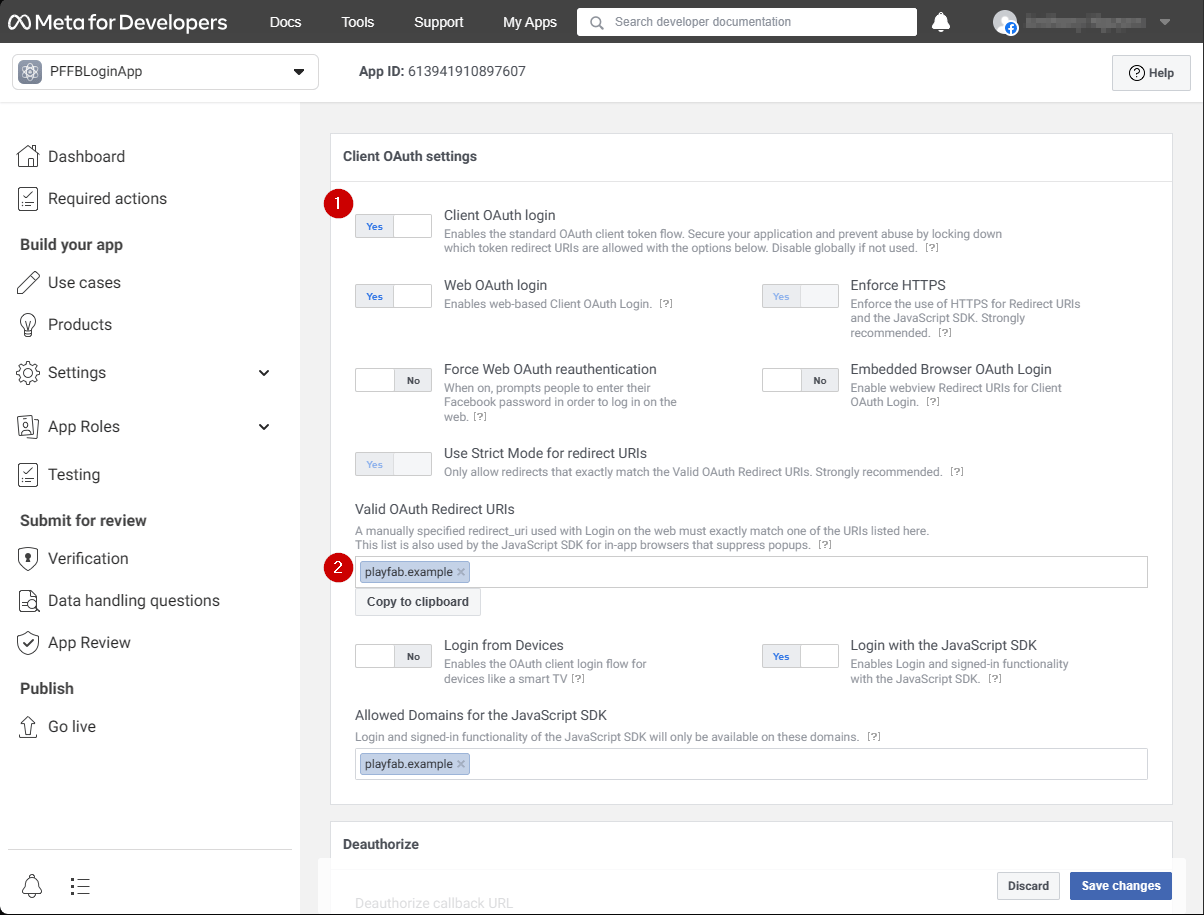
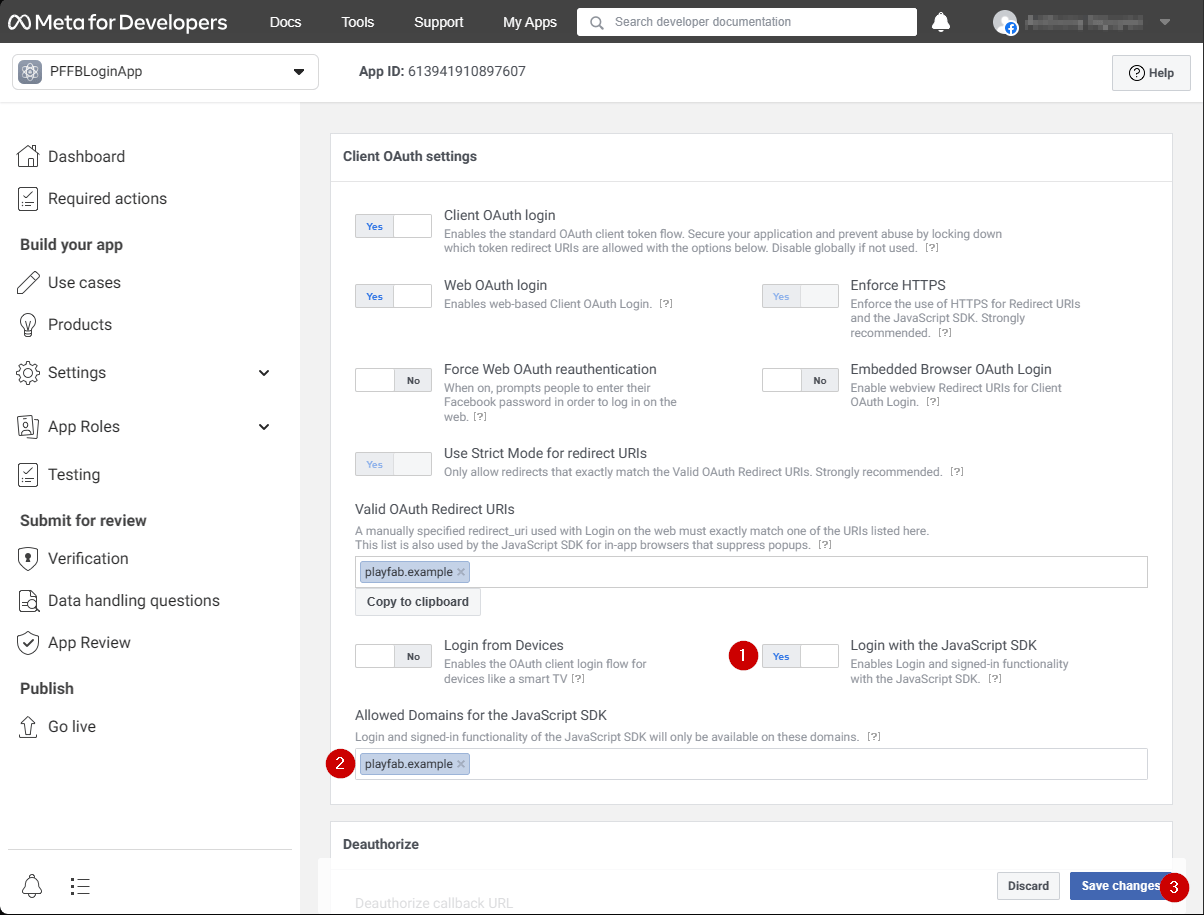
- Verify that Login with the JavaScript SDK is on (marked Yes)
- Set the Valid OAuth redirect URIs to your own auth page URI.
This will be
playfab.example in your case.- Select Save Changes to commit.
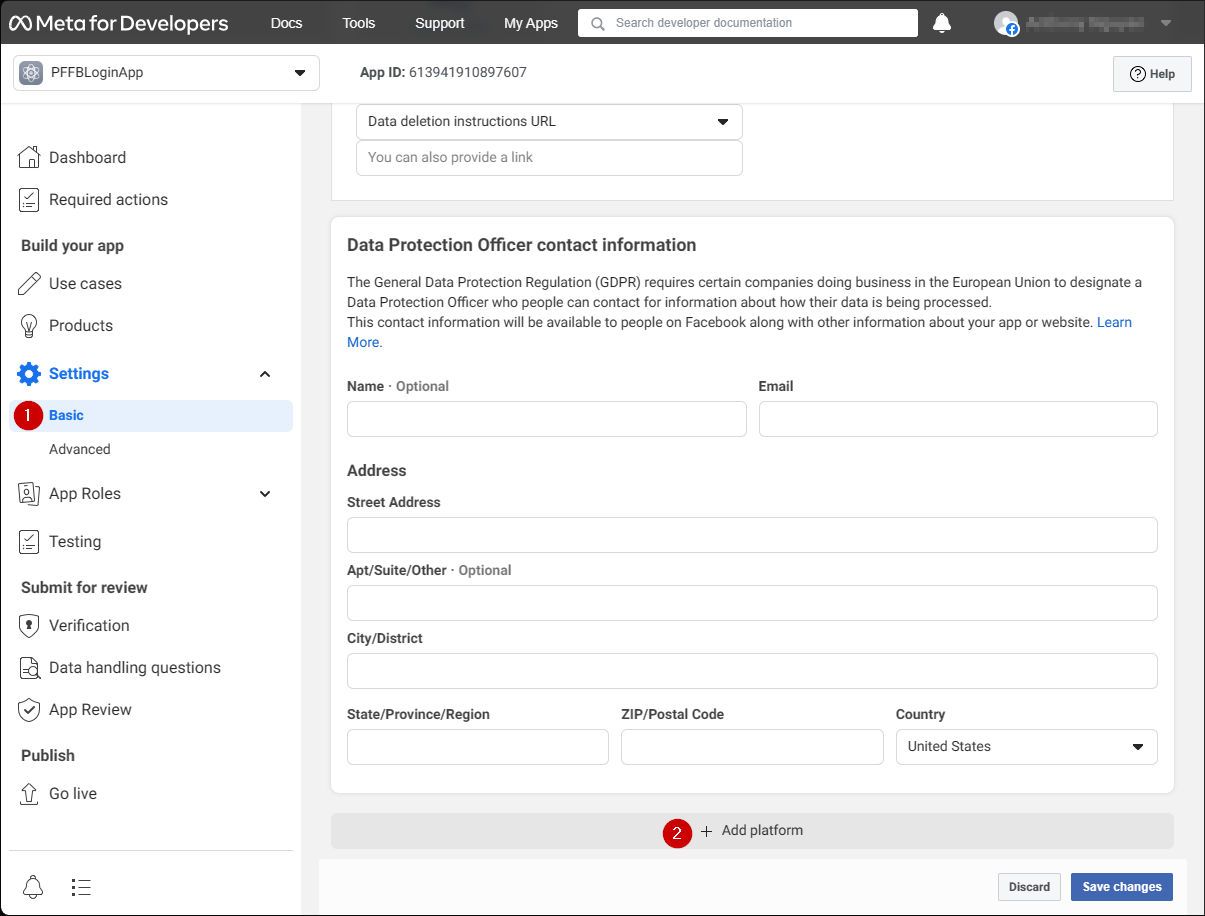
- Open Settings/Basic (1) in your menu.
- Select the Add Platform (2) button.
- Select the Website icon.
- Then select Next.
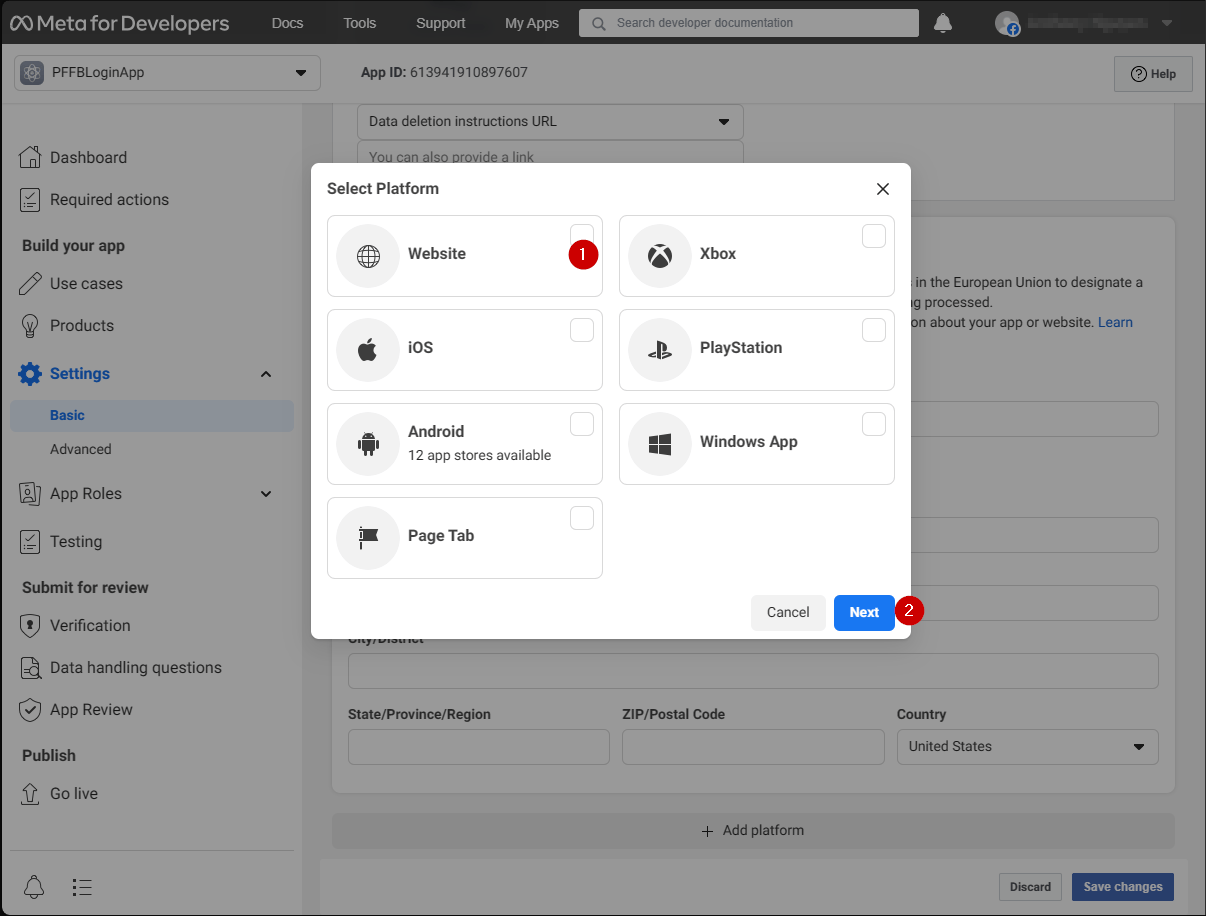
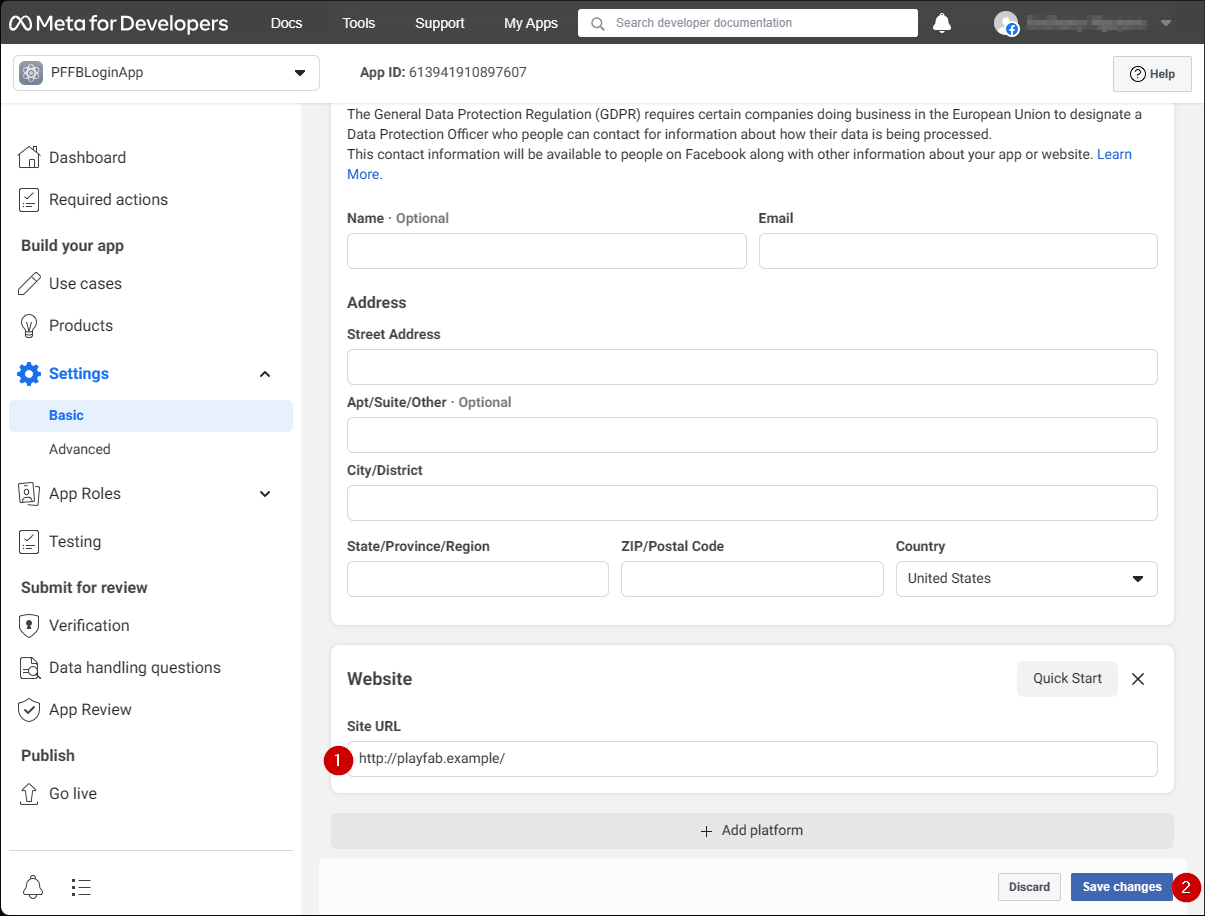
- In the Site URL field, enter your auth page URL (this is
playfab.examplein your case). - Select Save changes to commit.
Testing
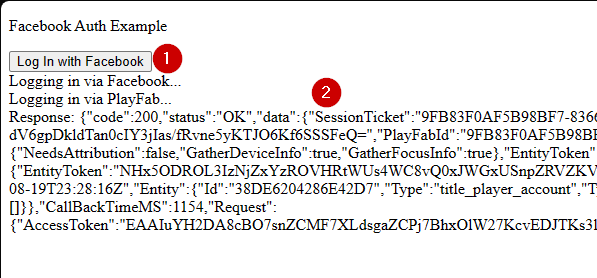
Use the following HTML file to test your PlayFab authentication using Facebook.Make sure to replace YOUR-APPLICATION-ID and YOUR-PLAYFAB-TITLE with your own.
playfab.example in our case).
- Once the Facebook Auth Example page opens, select Log In with Facebook button.
- Follow any Facebook instructions in the pop-up window.