
Push notifications for Android
Prerequisites
- Push Notifications quickstart
- Unity3D quickstart
- Optional Unity Editor Extensions
- Optional Postman Quickstart
Configuring the Android notification channel
Firebase setup
There are three Google websites that you must use and synchronize. In Google/Firebase, there are both Projects and Apps:-
Project:
- Import your project into the Firebase Console if it’s not already there.
-
App:
- Firebase Projects contain apps.
- Make sure your app exists in both locations, with the same name and identifier (for example, Unicorn Battle and com.playfab.unicornbattle2).
PlayFab requires a server private key file
- You can get this private key file from the Firebase Console
- Firebase Console:
- Select your Project or App, and find the Settings option (there are many ways to do this, all of which lead you to the same place).
- In the Service accounts tab, select the Generate new private key button to download the JSON file.
Using the private key file
-
Provide your private key file in one of two ways:
- Upload the private key file directly into the Game Manager UI: Settings (for your Title) > Push Notifications > Android.
- Or call SetupPushNotification using Postman or a Unity project with Server API methods enabled.
- Name: your_game_name
- Platform: GCM
-
Credential: (private key file contents as a string):
{ ... } -
Overwrite OldARN:
true -
You should receive an HTTP 200 OK response with data similar to the following.
-
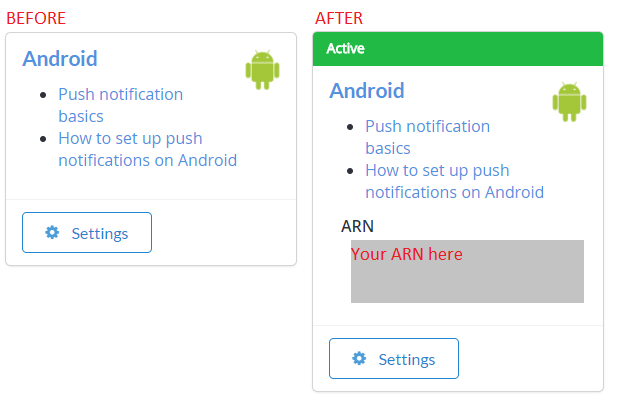
Once set up properly (using either method), you should see this in the Game Manager UI Settings (for your title) > Push Notifications > Android.
Getting started: push notifications for Android + Unity
To set up your Unity project:- Create a new Unity project.
- OPTIONAL Import the PlayFab Unity Editor Extensions package.
- Import the Unity PlayFab SDK package.
-
Follow the FCM Unity guide to install FCM messaging, and set up a project for push notifications.
- Once finished, you can continue with this guide to receive messages from PlayFab.
- We’ll give you a complete FCM-ready monoBehaviour script in the following example, which combines FCM and PlayFab.
-
In the FCM guide, you created a monobehavior script that set up the Firebase plugin.
- You can continue using that monobehavior script, or replace it with the one in the example that follows.
Setting up your first Push Notification
In Unity, open the script you created in the FCM tutorial, and replace the contents.PlayFabSettings.TitleId = TITLE_ID. You must set your own TitleId. This example will not work if you don’t update this TitleId, because our title is registered with our Firebase Keys and settings, not yours. You can do so by un-commenting this line and replacing TITLE_ID with your titleId, or you can choose your title from the optional Editor Extensions plugin mentioned in the previous section.Troubleshooting Android
-
Verify that you can send a test push notifications from the Firebase Console.
- If you can’t, then your Firebase plugin isn’t set up correctly, and you should review the Firebase Documentation to find out why, or contact Firebase Support.
-
Ensure your FCM client pushToken is set properly.
- The
OnTokenReceivedfunction in the example should be called, and should have a valid token. - If it is not called, your Firebase plugin is not set up correctly, and you should review the Firebase Documentation to find out why, or contact Firebase Support.
- The
-
Ensure your
titleIdis set to a title that you own, and that it has been registered with the server API key from your Firebase project.
Advanced Features
In server.SendPushNotification, you can use request.Package.CustomData to deliver arbitrary data to the device. In the example previously, this is delivered to the section with the following comment.3rd party plugin delivery is not supported or guaranteed, but is available for advanced users.