
Creating an instrumented build
Training with PGO relies on a build of your title that contains the PGO instrumentation. PGO uses this instrumentation to determine which code paths are executed most frequently. All you need to do to create an instrumented build is to set two build properties in Visual Studio.To create an instrumented build
- In Solution Explorer, right-click your project, and then select Properties.
- In the Property Pages dialog box, expand the Configuration Properties and C/C++ nodes.
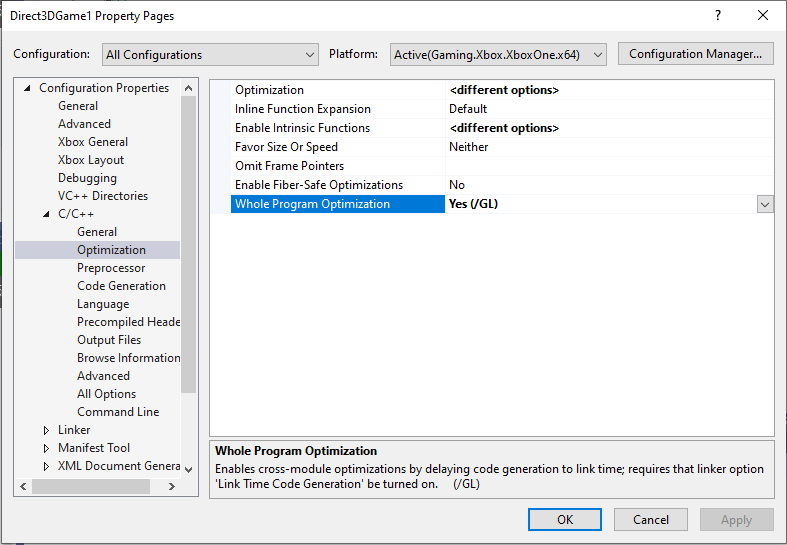
- Select the Optimization property page, and then set Whole Program Optimization to Yes (figure 1). Figure 1. Setting the Whole Program Optimization property.
- Expand the Linker node.
- Select the Optimization property page, and then set Link Time Code Generation to Profile Guided Optimization - Instrument (figure 2). Figure 2. Setting the Link Time Code Generation property for an instrumented build.
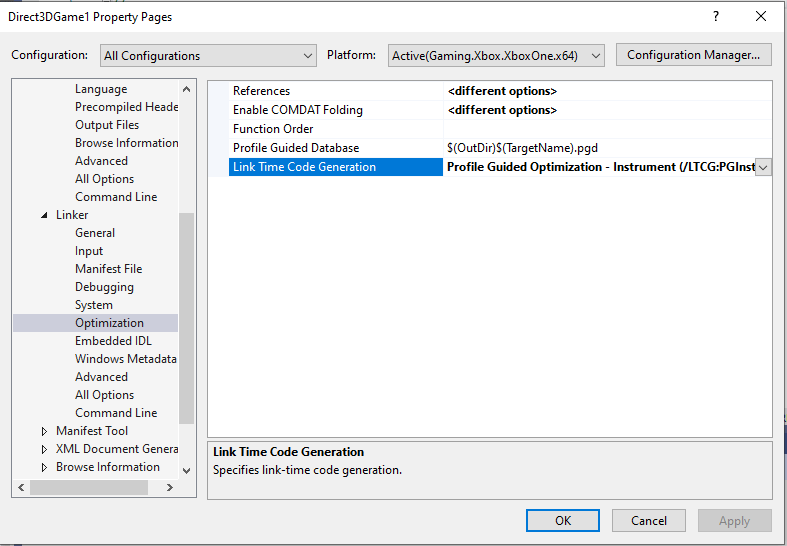
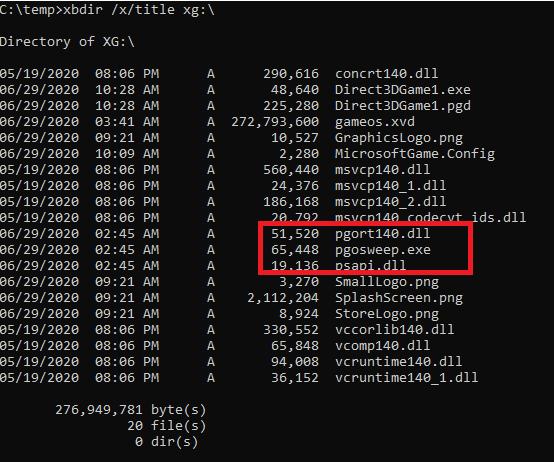
/GLcompiler switch and the/LTCG:PGInstrumentlinker switch in MSBuild. - Build and deploy the instrumented build to your XBOX console. With your title running, you can see that the PGO files are deployed as part of your title, similar to figure 3. Figure 3. The PGO files deployed by an instrumented build.
Deploying required files
The Microsoft Game Development Kit (GDK) includes three files that must be deployed with your title to use PGO. One file, named psapi.dll, is installed to C:\Program Files (x86)\Microsoft GDK\edition\GXDK\bin. The other two, named pgort140.dll and pgosweep.exe, come from your Visual Studio installation. If you’re using MSBuild to build your title, these files are automatically copied into your Layout directory when you create an instrumented build. If you’re usingmakefiles to build your title, you need to manually add these three files to your Layout directory so that they get deployed with your title. In Visual Studio, adding these files to your project and excluding them from the build is a convenient way to get the files copied to your Layout directory and deployed with the title.
To add the required files to your Visual Studio project
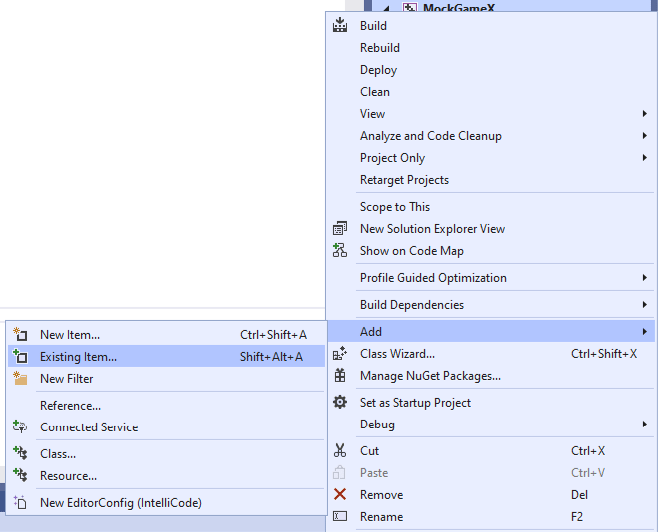
- In Solution Explorer, right-click your project, select Add, and then select Existing Item (figure 4). Figure 4. Adding the PGO files to a project.
- Go to C:\Program Files (x86)\Microsoft GDK\edition\GXDK\bin, select the PGO file (psapi.dll), and then select Add to add the file to your project.
- Go to the C:\Program Files (x86)\Microsoft Visual Studio\2019\edition\VC\Tools\MSVC\version\bin\Hostx64\x64\onecore -or- C:\Program Files\Microsoft Visual Studio\2022\edition\VC\Tools\MSVC\version\bin\Hostx64\x64\onecore for your toolset and select the PGO files (pgort140.dll and pgosweep.exe). Then select Add to add the files to your project.
- In Solution Explorer, right-click pgort140.dll, and then select Properties.
- In the Property Pages dialog box, expand the Configuration Properties node , and then select the General property page.
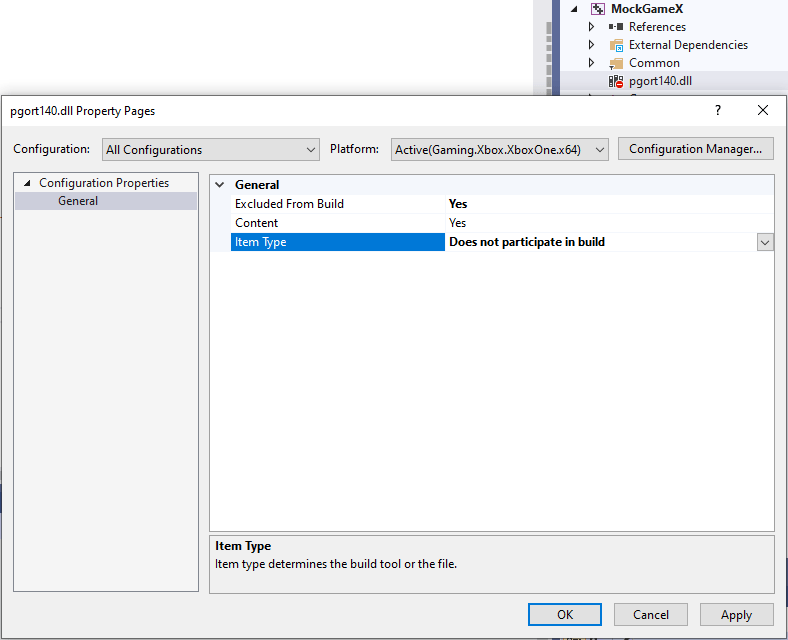
- Set Excluded From Build to Yes, and then set Item Type to Does not participate in build (figure 5). Figure 5. Excluding a PGO file from builds.
Training with the instrumented build
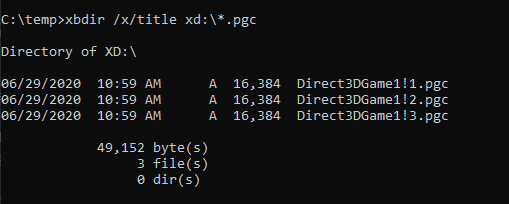
Training is the most important phase of PGO. The performance gains you attain with PGO are a direct function of how well the application is trained. For the training phase of PGO, exercise common performance-centric scenarios with your title running. After you exercise the common performance scenarios, initiate collection of a PGO artifact (.pgc) file, which captures your training data. Use pgosweep.exe to generate your .pgc file (figure 6). Figure 6. Running pgosweep.exe.

Creating the optimized build
To create your optimized build, set the Link Time Code Generation property to Profile Guided Optimization - Update (figure 9). Figure 9. Setting the Link Time Code Generation property for an optimized build.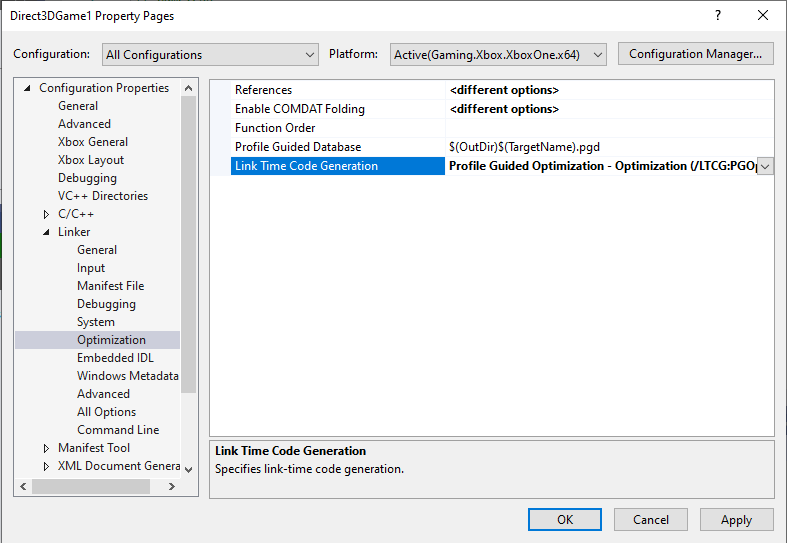
This property corresponds to the
/LTCG:PGOptimize linker switch in MSBuild.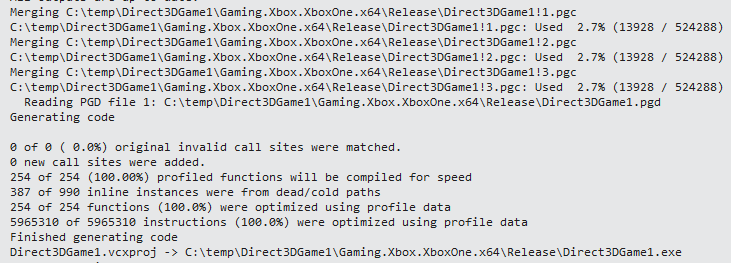
Recommendations for PGO for XBOX
The preceding instructions provide an overview for using PGO on the Microsoft Game Development Kit (GDK) on XBOX by using the built-in Visual Studio project properties. The Visual C++ compiler, however, has deprecated use of PGO via the/LTCG:PGInstrument, /LTCG:PGOptimize, and /LTCG:PGUpdate switches, which the Visual Studio project properties control in Visual Studio 2019 and Visual Studio 2022.
The preferred replacements are as follows.
- For the C/C++ compiler, use
/GL(Whole Program Optimization property set to Yes (/GL), as shown earlier in figure 1). - For the linker, use
/LTCG(Link Time Code Generation property set to Use Link Time Code Generation (/LTCG), as shown in figure 11). Figure 11. Setting the Link Time Code Generation property.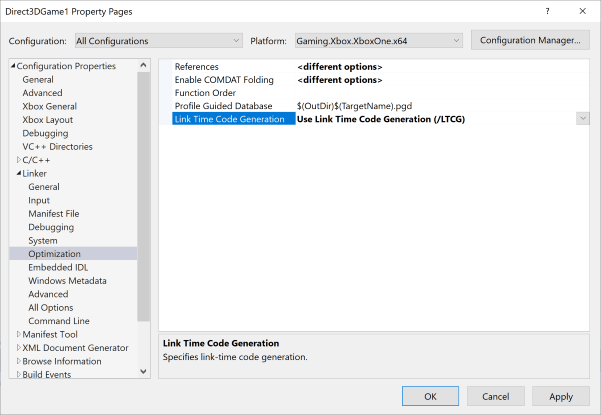
/FASTGENPROFILEor/GENPROFILEto generate a PGO profile (figure 12). For details about these switches, see /GENPROFILE, /FASTGENPROFILE (Generate Profiling Instrumented Build) on Microsoft Docs. Figure 12. Setting the linker switch to generate a PGO profile.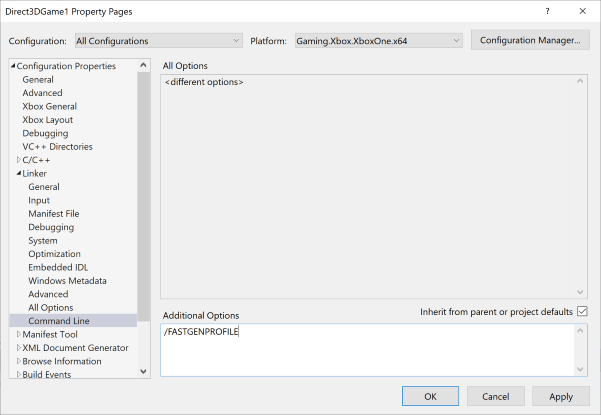
/USEPROFILEto optimize for a set of PGO profiles (figure 13). For details about this switch, see /USEPROFILE (Run PGO in thread safe mode) on Microsoft Docs. Figure 13. Setting the linker switch to optimize for a set of PGO profiles.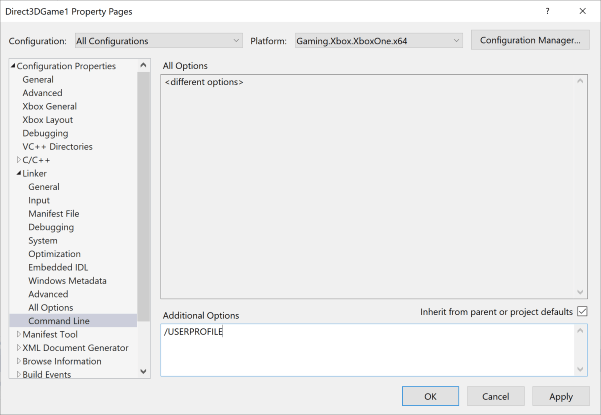
Troubleshooting PGO
Runtime performance
When profiling an instrumented build, the tooling can cause performance issues. Such issues might make your title difficult to control. The/FASTGENPROFILE switch is a good choice for making an instrumented build faster for profiling interactive game sessions.
Dependencies
If you enable PGO instrumentation and then discover that your title no longer loads, verify that pgort140.dll and vcruntime140.dll are in the same folder as your title .exe file. If attempting to run pgosweep.exe fails (usually with a STATUS_DLL_NOT_FOUND error), verify that pgort140.dll, psapi.dll, and vcruntime140.dll are present in the same folder as your title .exe file. Also be sure you are using the x64 onecore version of pgort140.dll and pgosweep.exe.Memory usage
PGO uses memory to capture the profile, which can be a challenge for a title that uses a significant portion of available memory. To perform PGO successfully, you might need to use the ExtraTitleMemory setting in xbconfig.exe, the XMemTransferMemory function, or both. Using/FASTGENPROFILE rather than /LTCG:PGInstrument or /GENPROFILE produces a smaller memory footprint with a similar result.
[!NOTE] The version of PGO that ships in the June 2020 GDK (and its QFEs) uses title memory. PGO will be updated to properly use tooling memory in a future release.