How to create and access a segment
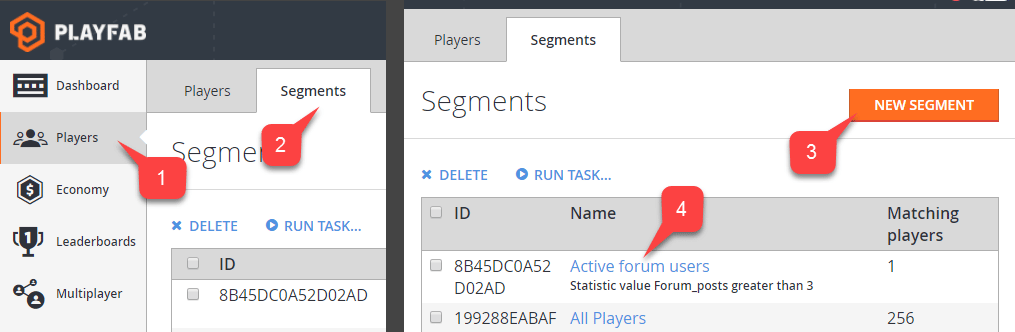
To access segment configuration:- Select Players from the menu on the left.
- Select the Segments tab.
- Use the New Segment button to create and configure a new Segment.
- Locate an existing Segment, and select the name label to configure the Segment.
How to configure a segment
Prerequisites: To configure a segment like the example in this tutorial, you will need:- Players with and without a distinctive characteristic defined in PlayFab.
- A defined CloudScript PlayStream Hook.
- Configure a segment using this defining characteristic: all players that come from Canada.
- Run a CloudScript function helloWorld for each player that enters the segment.
- Login time
- Linked device type
- Tags
- Real-world location
- Statistic values
- Virtual currency values
- Real money purchases, and more.
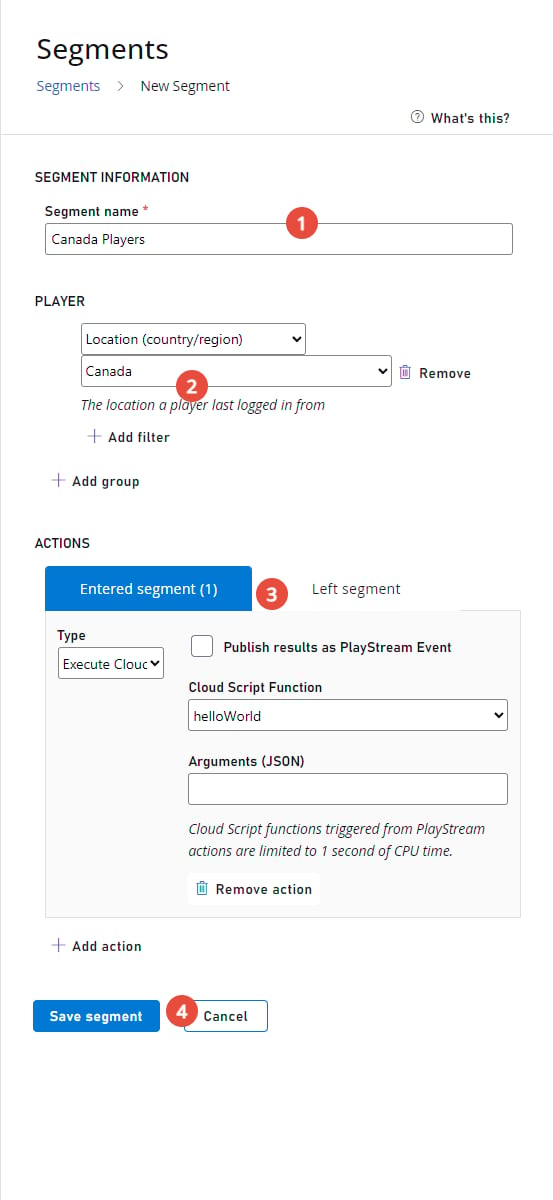
- Assign an appropriate name for the segment. It’s a good idea to use a name that incorporates your Defining Characteristic - Canada Players.
- Assign conditions that a player has to meet to enter the segment. In this case we want a Location (country/region) filter with the strict value: Canada.
- Add a CloudScript action for the entered segment trigger. Configure the action to run the function you want. In this example, we want helloWorld.
- Commit by selecting the Save Segment button.
- Assign an appropriate name for the segment (it’s a good idea to use a name that incorporates your defining characteristic - Canada Players).
- Assign conditions that a player has to meet to enter the segment. In this case we want a Location (country/region) filter with the strict value: Canada.
- Add a CloudScript action for the entered segment trigger. Configure the action to run the function you want. In this example, we want: helloWorld.
- Commit by selecting the Save Segment button.
- A player must be from Canada.
- A player must have Apple Push notifications enabled.
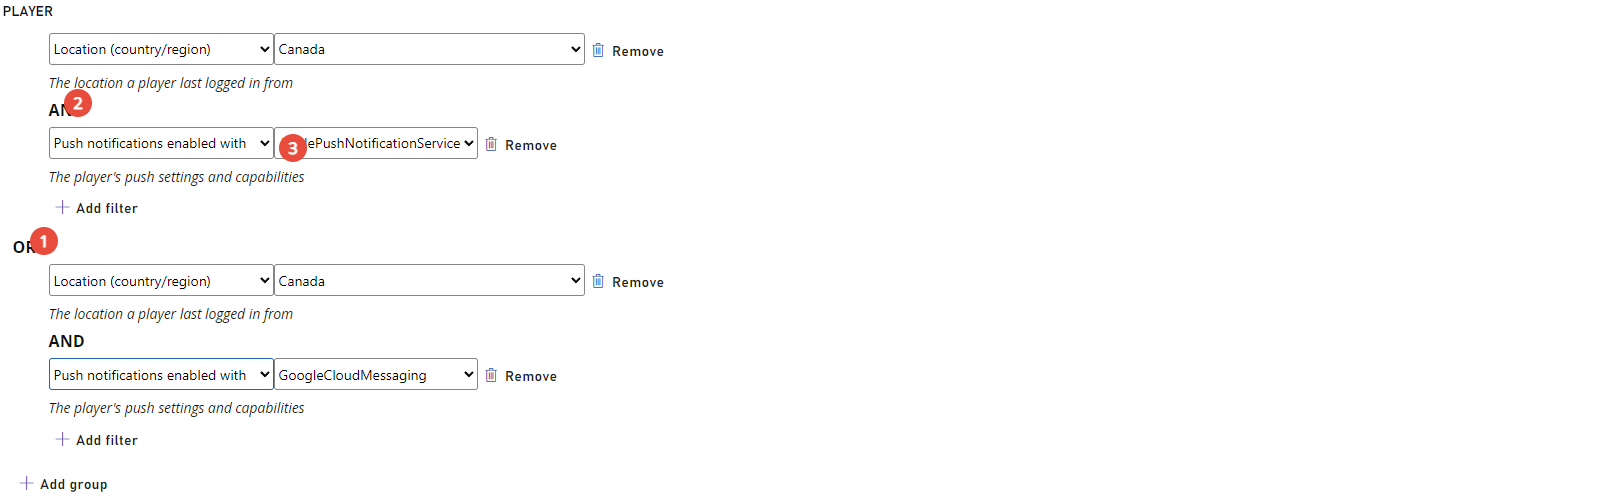
In the end, we have a segment of players from Canada with either Google or Apple push notifications. Each filter has a unique configuration and purpose. As of 4/30/2017, the following filters are available:
- The All players filter - This filter has no configuration and is unique, because it allows you to create a segment of all players. This comes in handy when you want to run automatic operations for every new player (segment actions are described in the How to manage actions section, later in this tutorial).
- The First login (date) filter - Allows you to filter based on first login datetime. For example, players that have first logged in after 1/1/2017.
- The First login (timespan) filter - Allows you to filter based on first login timespan relative to the current datetime. For example, player that have first signed in 20 minutes ago (from now).
- The Last login (date) filter - Allows you to filter based on last login datetime. For example, players that have not signed since 1/1/2017.
- The Last login (timespan) filter - Allows you to filter based on last login timespan relative to the current datetime. For example, players that have not signed in for a week (from now).
- The Linked user account to filter - Allows you to filter based on users linked accounts. For example, players that have a Steam account linked with an email account.
- The Location (country/region) filter - Allows you to filter based on player’s country/region. For example, players from Canada.
- The Push notifications enabled with filter - Allows you to filter based on player push settings and capabilities. For example, players that have Google push notifications enabled.
- The Statistics value filter - Allows you to filter based on your own custom statistic attribute. For example, players that inflicted 20000 damage in total.
- The Tag filter - Allows you to filter based on whether a player has or doesn’t have a certain tag. For example, players that have a cheater tag.
- The Total value to date in US filter - Allows you to filter based on how much USD currency a player has spent in your game. For example, players that have spent over $30.
- The Value to date filter - Allows you to filter based on how much of a certain currency a player has spent in your game. For example, players that have spent 50 RUB.
- The User origination filter - Allows you to filter based on the first authentication method that a player used to start playing the game.
The trick here is that a player may start with authentication based on, say, an iOS device ID, but later, the same player may have a GameCenter account linked. In this case, user origination will be the iOS device ID. For example, players that first signed in using an iOS device ID.
- The Virtual currency balance filter - Allows you to filter based on the custom virtual currency deposit of a player. For example, players that have less than 50 Crystal.
How to manage actions
Each action needs a trigger in order to run. Some actions are run manually, triggered right from the page. Sometimes, though, you have to select a trigger - an event that causes an action to run. A trigger defines the context of the action. For example, a player entered segment trigger passes you the context containing a reference to the player. The general workflow for the Actions panel is:- Select an Event condition, also known as a Trigger.
- Select an action Type. PlayFab offers a variety of actions. If, at any point, you need more a flexible action, consider a CloudScript action. This action type allows you to run your own CloudScript function.
- Configure the action (specific for each action Type).
- Select REMOVE to remove the action from the trigger.
- Select Add Action to add action to the trigger.
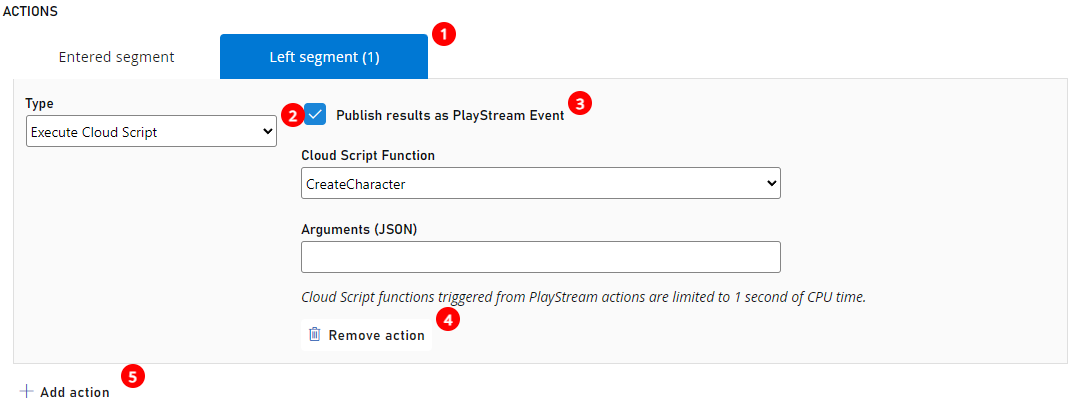
How to inspect player segments
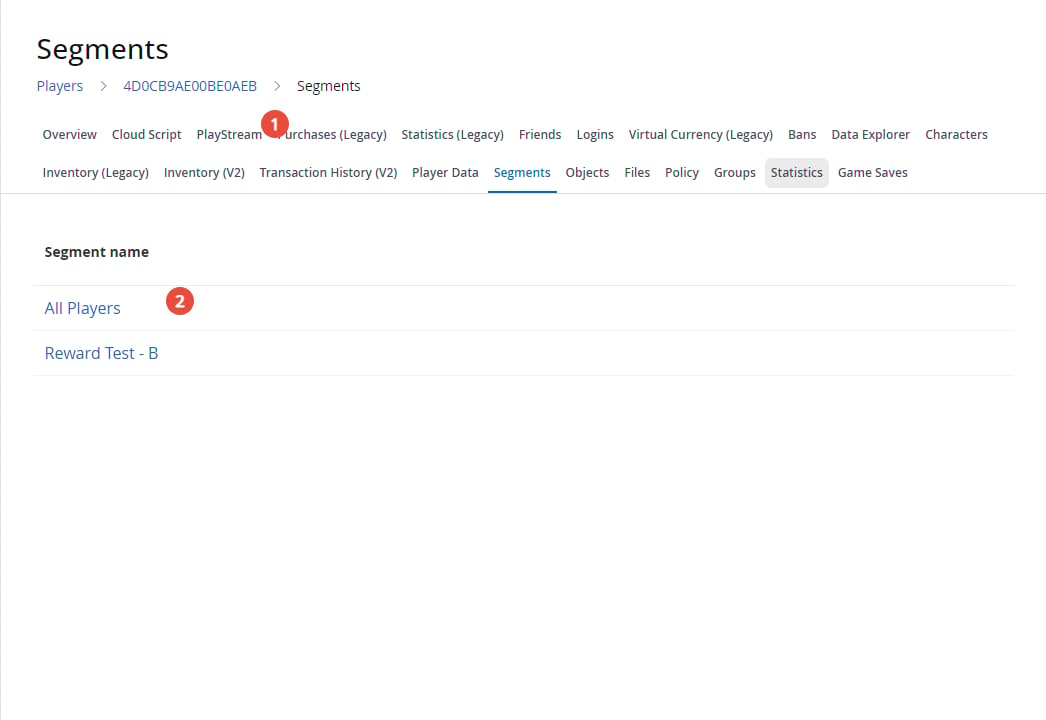
It is possible to look up what segments a player belongs to by means of the Player Segments page. To access the Player Segments page:- Select Players in the sidebar menu.
- Then select the Players tab.
- Locate the player you want to inspect, and select the ID label.
- Finally, select Segments in the Players Toolbar.
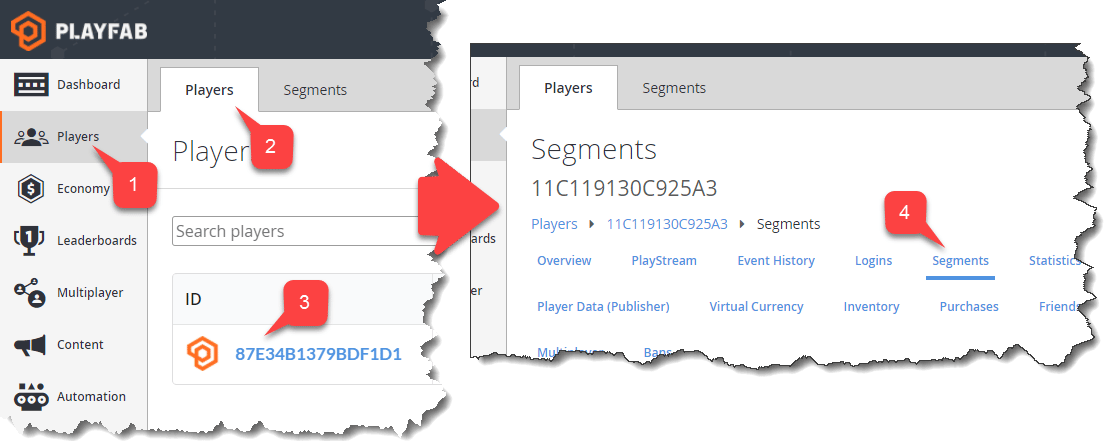
- The Player ID label identifies the player you currently inspecting.
- The Segments table contains a list of all segments a player belongs to. Select the Segment name label to configure a segment.