Part 1 - Environment Setup
This page guides you in the first step towards creating your first game using PlayFab’s Economy API. The focus is on setting up your coding environment.Prerequisites
- Have Visual Studio 2022 or later installed.
For the purpose of this guide, we will be working on a VS Solution named “PlayFab Test,” so some screenshots will make reference to that. In your local example, unless you named it the same, it will reflect the name you choose for your project.
Step 1 – Set up a C# Console Application in Visual Studio 2022
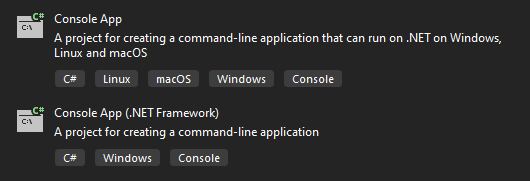
The first step is to set up a C# Console Application in Visual Studio (VS). What we do in this step serves as the foundation upon which you build your game. To do this, open VS and create a new project. An “Add a new project” window greets you. Here you get various project type options depending on your VS installation, alongside some dropdown menus acting as filters, one of which is labeled “All languages.” One of the first options should be “C#,” select it.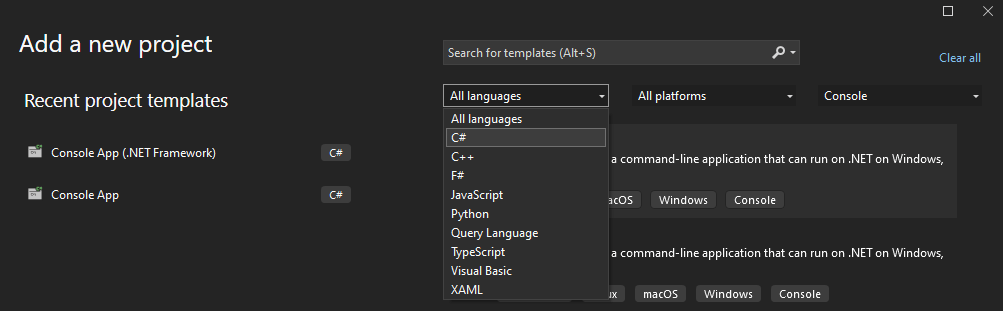
Step 2 - Add the PlayFab NuGet package to the project
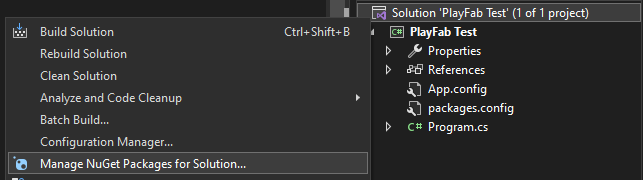
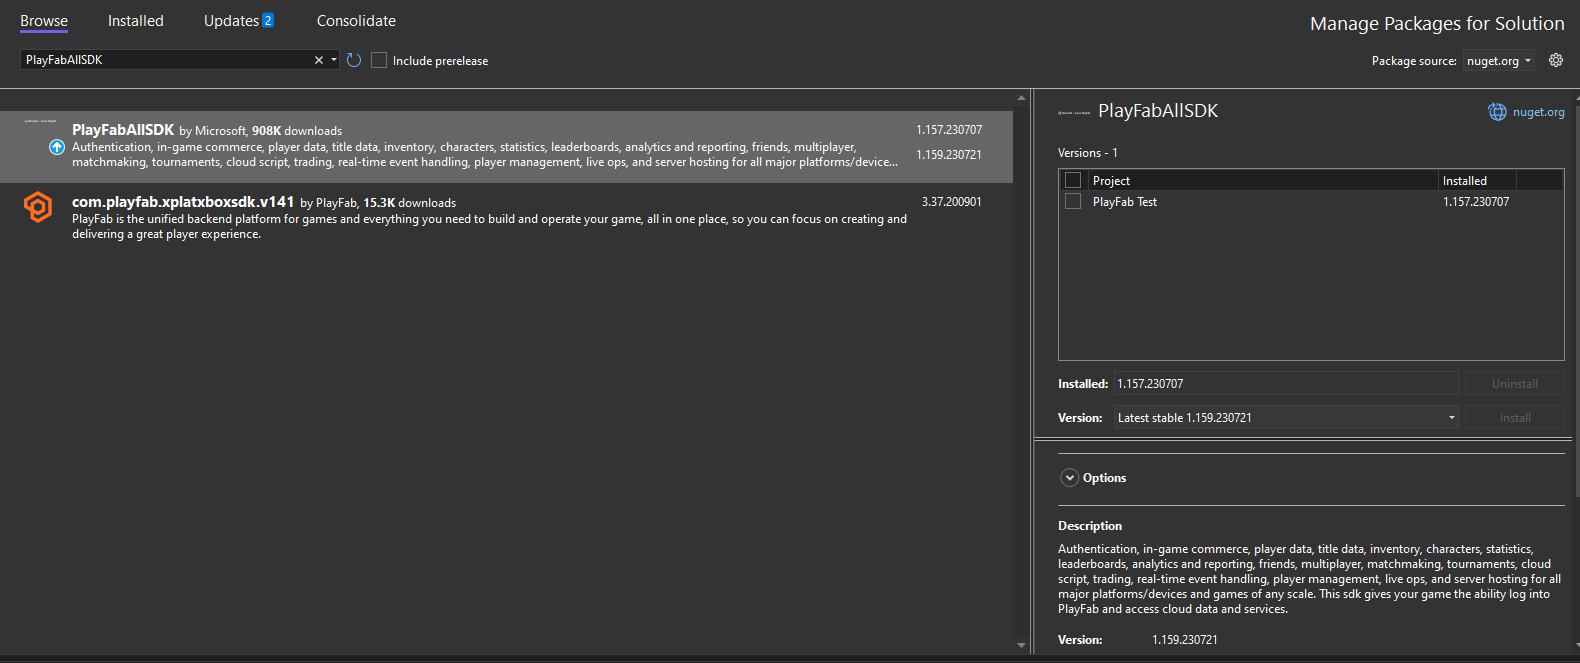
To get all of the PlayFab APIs and available functions, you must first import them using the NuGet package manager that comes built-in with VS. To interact with the package manager, select your Solution (.sln) file from the Solution Explorer tab, right-click it, and select “Manage NuGet packages for Solution…”, as shown in next screenshot.