
Configuring your Azure Storage Data Connection
First, you need an Azure subscription and a storage account. For existing PlayFab and Azure customers, you can create a storage container on the Azure portal and get started with Data Connections on PlayFab. For existing PlayFab who are new to Azure, you can sign up for an Azure subscription.Make sure to create your Storage Account in the West US 2, otherwise, egress cost will be applied to your storage account. You can configure up to three Azure Blob Storage accounts in the WestUS2 region.
Setting up your Storage in Azure
For PlayFab to ingest data in your storage account, container details along with authorization using a SAS token are required. To create a SAS token using the Microsoft Azure portal, use the following steps.A storage account with a restricted network isn’t supported. You must allow all networks in the firewall.
Option 1: Create the SAS token on the container level.
Generate and retrieve the shared access signature for your container, not for the storage account itself.
- In the Azure portal, select Your storage account > Containers.
- Select a container from the list.
- Go to the right of the main window and select the three ellipses associated with your chosen container.
- Select Generate SAS from the dropdown menu to open the Generate SAS window.
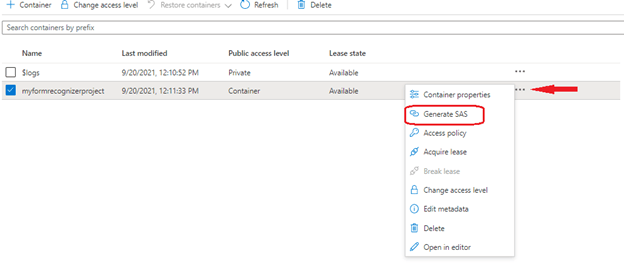
- Define Permissions by selecting or clearing the appropriate checkbox. Make sure the Create and Write permissions are selected.
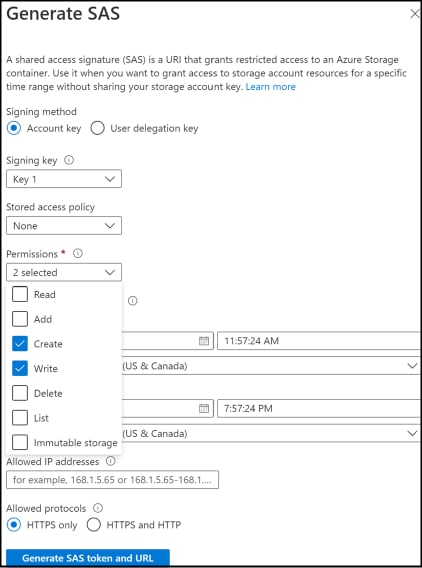
- Specify the signed key Start and Expiry times.
- Select Generate SAS token and URL.
- The Blob SAS token query string appears in the lower area of the window.
- Copy and paste the Blob SAS token values into a secure location for use in the PlayFab Data Connections. It’s displayed only once and can’t be retrieved after the window is closed.
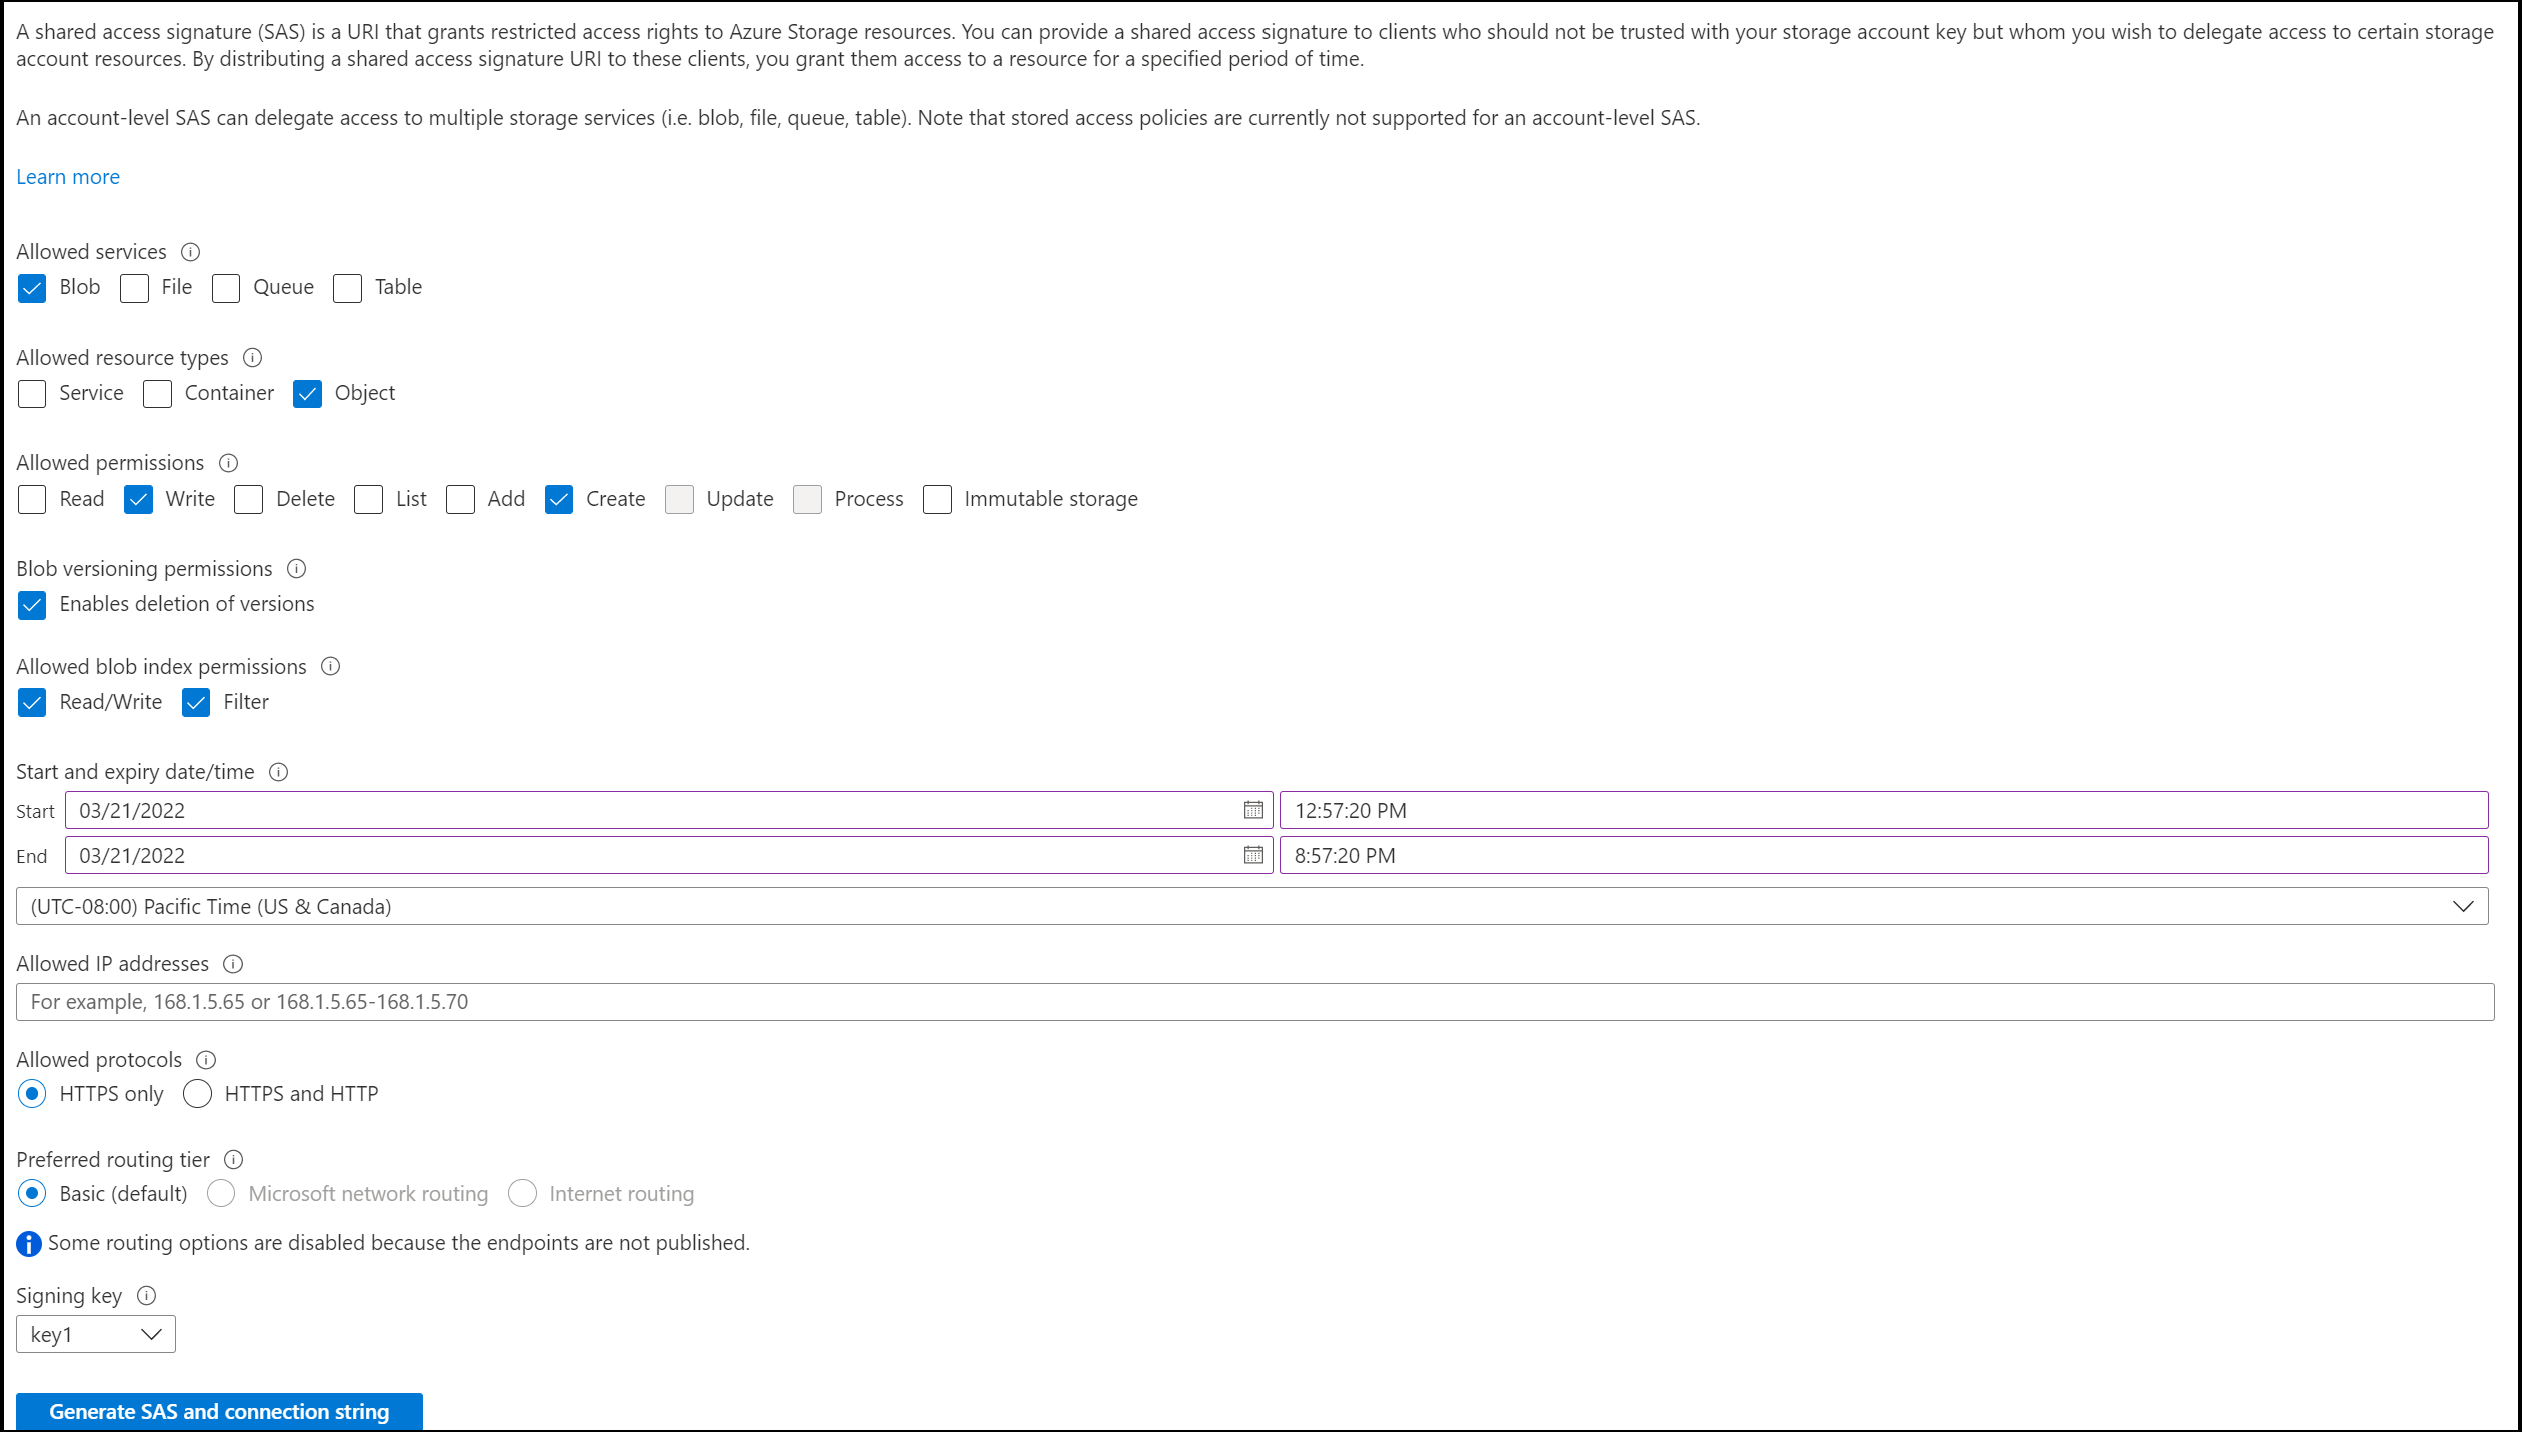
Option 2: Create the SAS token at the account level
Generate and retrieve the shared access signature for your storage account.
- In the Azure portal, select Your storage account
- Select Shared access signature from the list under Security + Networking.
- Define Services by selecting blob and clearing other checkboxes.
- Define Resource Type by selecting Container and Object (clear other checkboxes).
- Make sure the Create, Write, and List permissions are selected.
- Specify the signed key Start and Expiry times.
- Select Generate SAS token and URL.
- The Blob SAS token query string appears in the lower area of the window.
- Copy and paste the Blob SAS token values into a secure location for use in the PlayFab Data Connections. It’s displayed only once and can’t be retrieved after the window is closed.
Create an Azure Blob Data Connection in PlayFab
Step 1: Navigate to the Data Connections tab
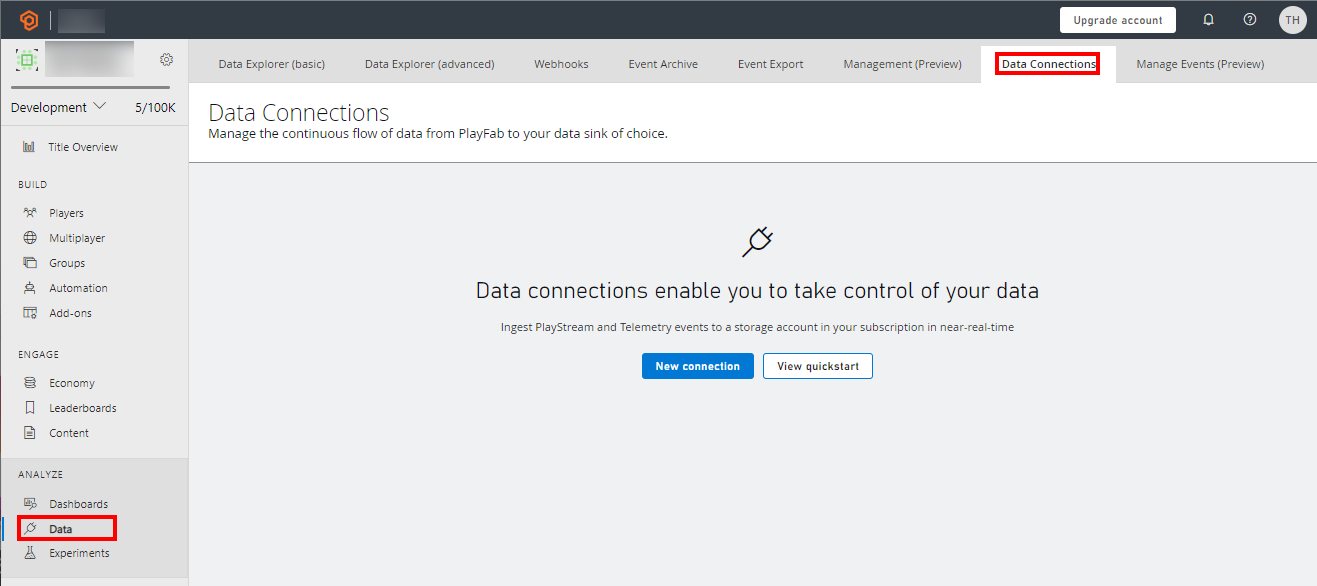
- Login to PlayFab and navigate to your title.
- Select the Data section in the left-hand menu.
- Select the Data Connections tab.
Step 2: Configure a new Data Connection
- Select New Connection.
- Choose Azure Blob Storage as the Destination Type.
- Enter the following values for each field:

We recommend using a table name that doesn’t exist. If you use an existing table and the schema isn’t what PlayFab is expecting, then the schema will be modified.