- Authenticate Photon players with PlayFab.
- Listen for room events using PlayFab CloudScript callbacks.
Photon quickstart
This quickstart shows how to set up Photon Multiplayer to work with PlayFab. Currently, PlayFab offers the following Photon integrations:- Authenticate Photon players with PlayFab.
- Listen for room events using PlayFab CloudScript callbacks.
For a fully supported PlayFab Multiplayer and Chat Experience on Unity, see the PlayFab Party Unity Plugin for more information.
Prerequisites
- A Unity project with the PlayFab SDK imported, and a configured title.
- The PlayFab title registered.
This guide omits the Chat Application settings. For your Chat Application to be integrated, create a new Photon Chat Application, and enter the App ID in the corresponding boxes in Unity and in the PlayFab Game Manager - Photon Add-on page.
Setting up a Photon application
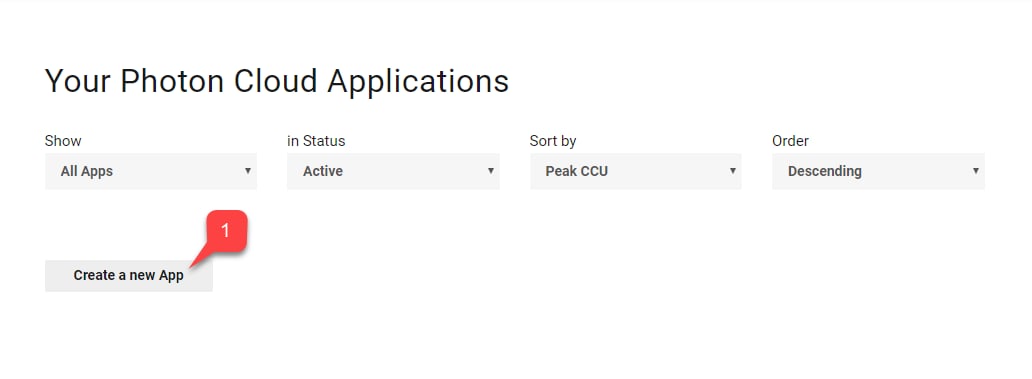
- Once you have registered and logged into the Photon dashboard, select Create a new App.
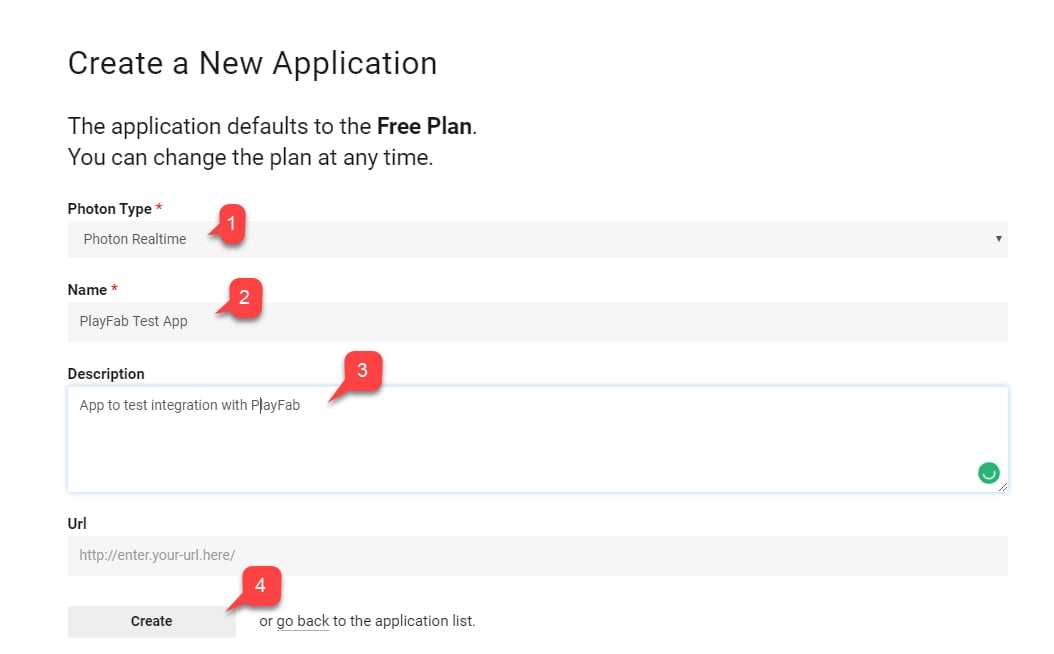
- Select Photon Type.
- Choose a Name.
- Create a Description.
- Submit by selecting Create.
Setting up authentication
- Find the newly created Application in the list, and select Manage.
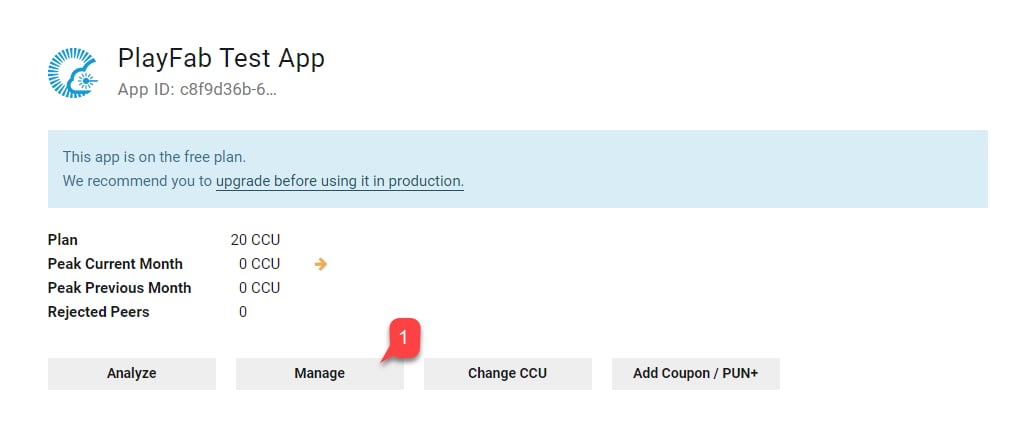
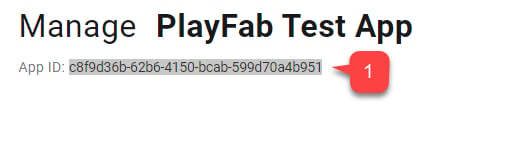
- In the Application dashboard, find and save the App ID located under the page Title.
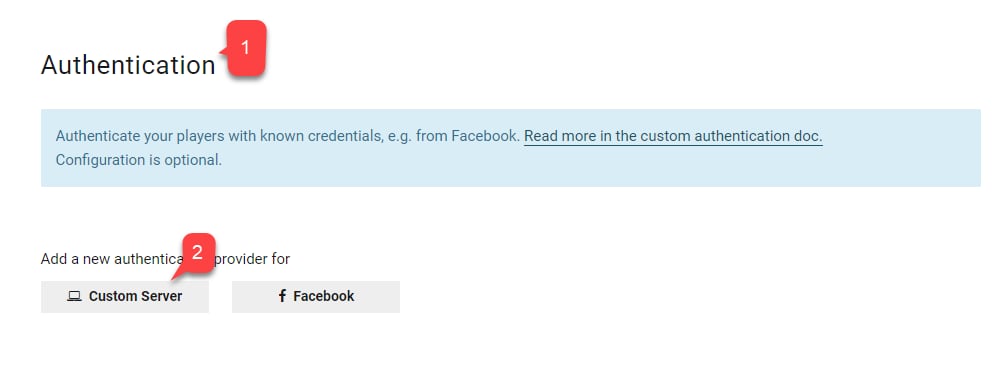
- Locate the Authentication section.
- Select the Custom Server.
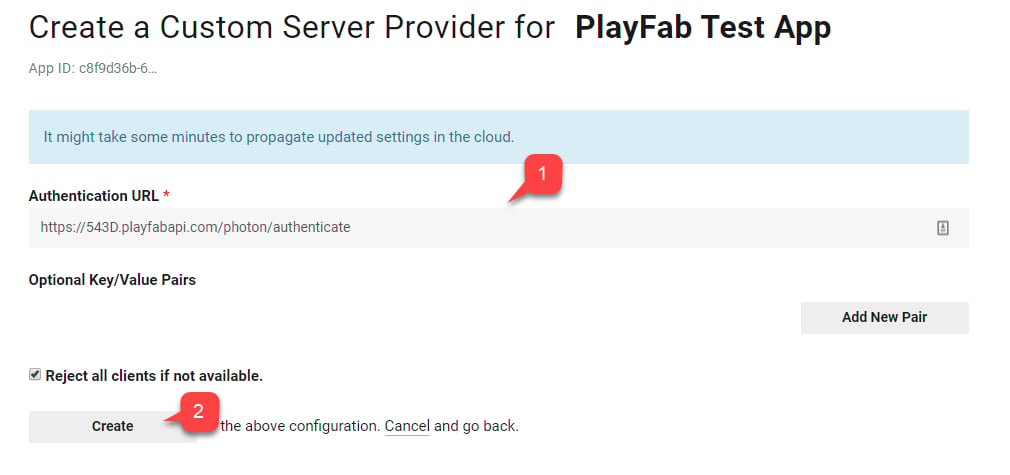
PlayFabTitleId place holder with your own Title Id.
- Enter the URL.
- Submit by selecting the Create button.
Setting up a PlayFab title for Photon
Navigate to your title’s Game Manager page, then:- Navigate to Add-ons tab.
- In the list of Add-ons, find and select Photon.
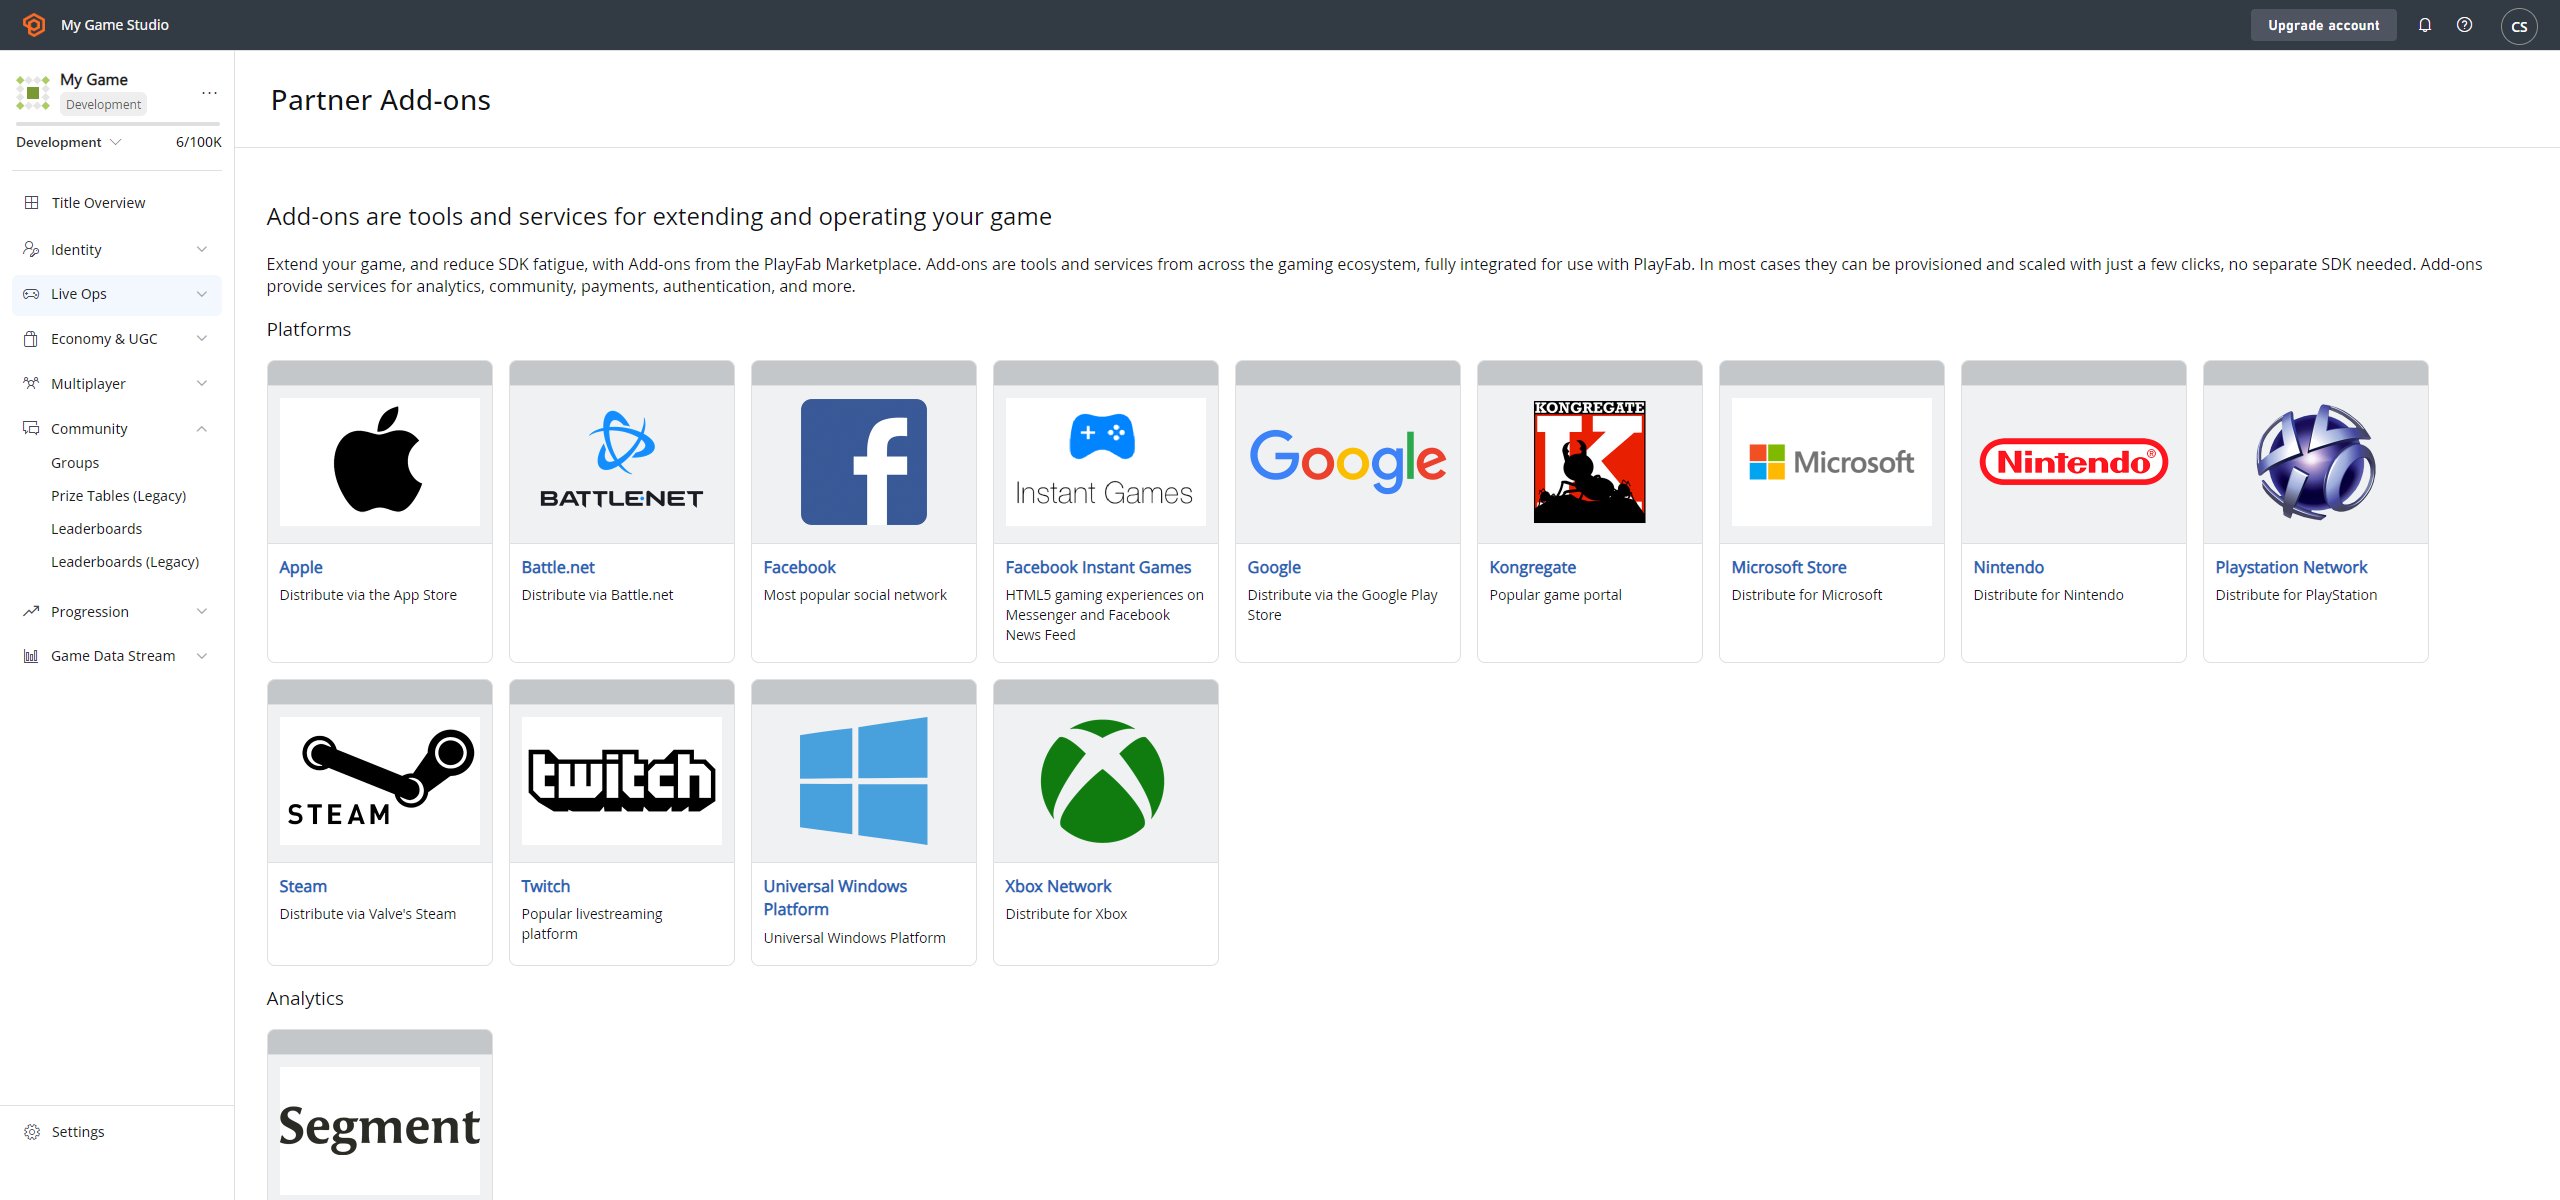
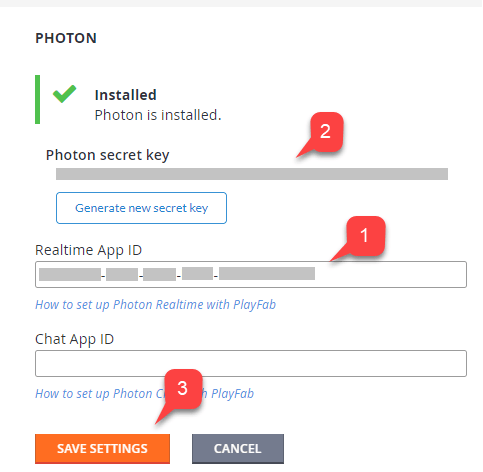
- The Photon Add-on page allows you to install Photon by specifying your Photon Realtime Application ID.
- Optionally, you may specify Chat App ID.
- Once you install the Add-on (3), a Photon secret Key is generated (2).
- Save it for future use when configuring web-hooks.
Remember to save your Photon secret key in a safe and easily accessible place. It comes in handy when configuring Webhooks.
Setting Photon webhooks
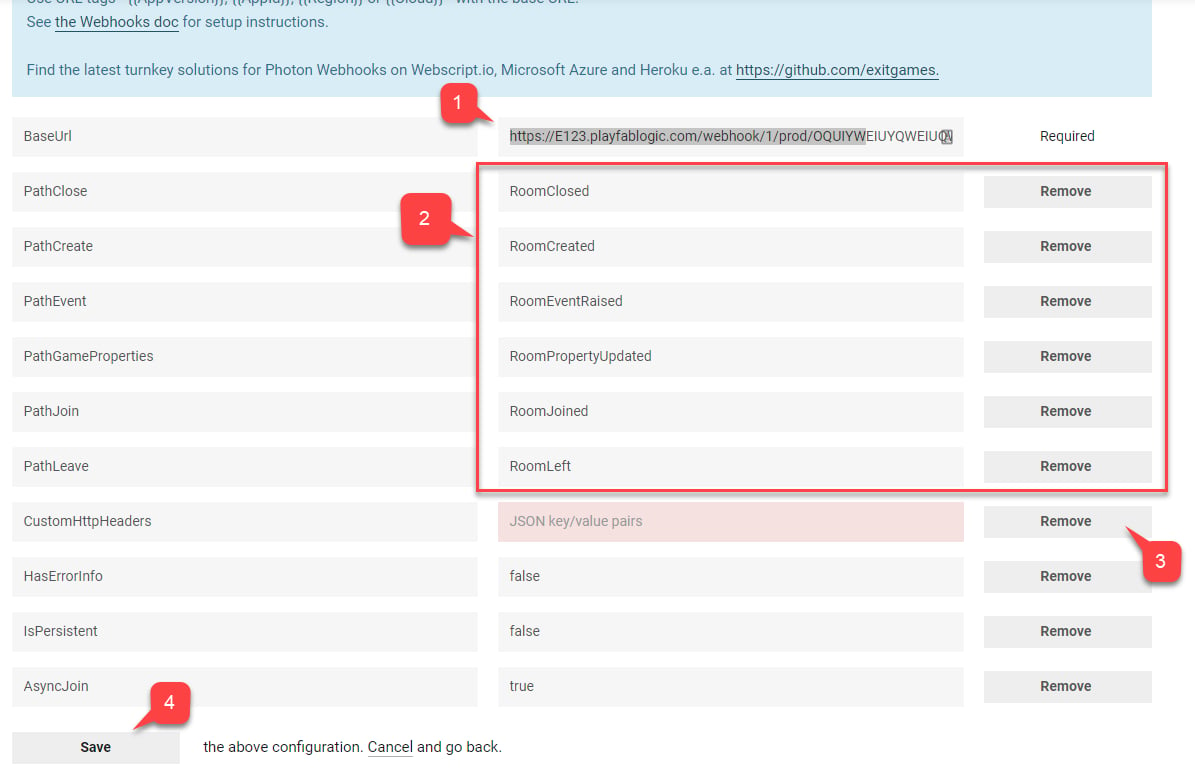
As an optional integration, Photon may transmit certain events to your PlayFab CloudScript. This is done with webhooks:- You specify a Base URL.
- Then you specify path for each of the available Events.
- A path is, effectively, a handler name implemented in your CloudScript.
Title Id placeholder with your own Title Id.
PhotonSecretKey token with the Secret Key you generated on the Photon Add-on page.
- Fill in the Base URL.
- Assign a CloudScript handler Name for each of the available Events.
- Remove any CustomHttpHeaders.
- Submit this by selecting the Save button.
Setting up a Unity project
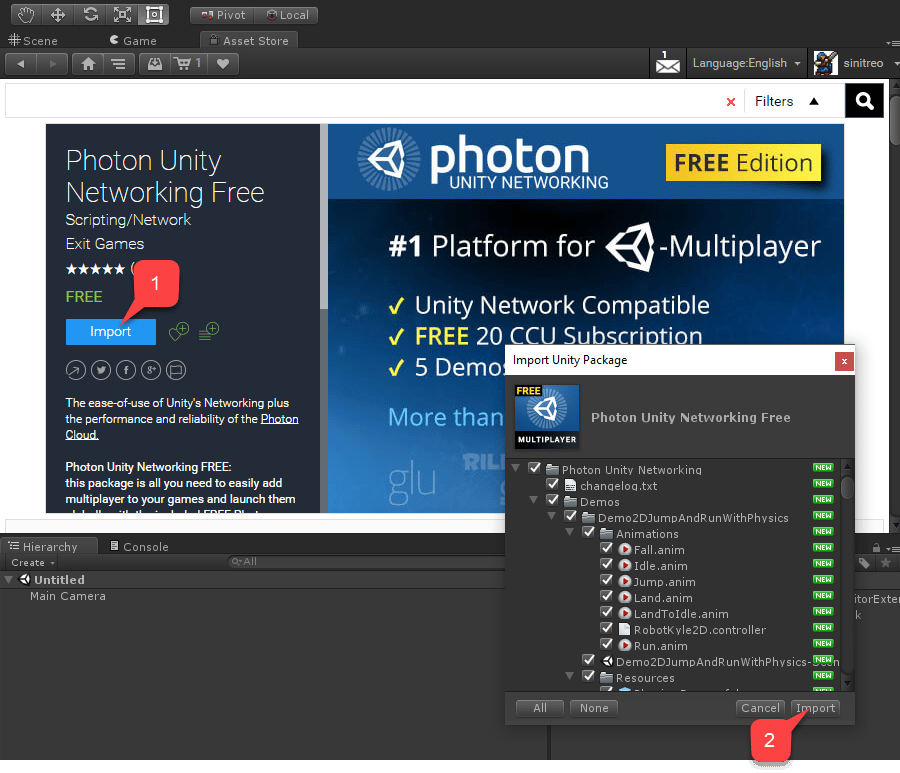
The guide assumes you already have PlayFab SDK imported, set up, and the title setting configured.- Start by navigating to the Asset Store.
- Locate Photon Unity Networking Free package.
- Select Import (1).
- You may inspect the imported files.
- Then select Import (2).
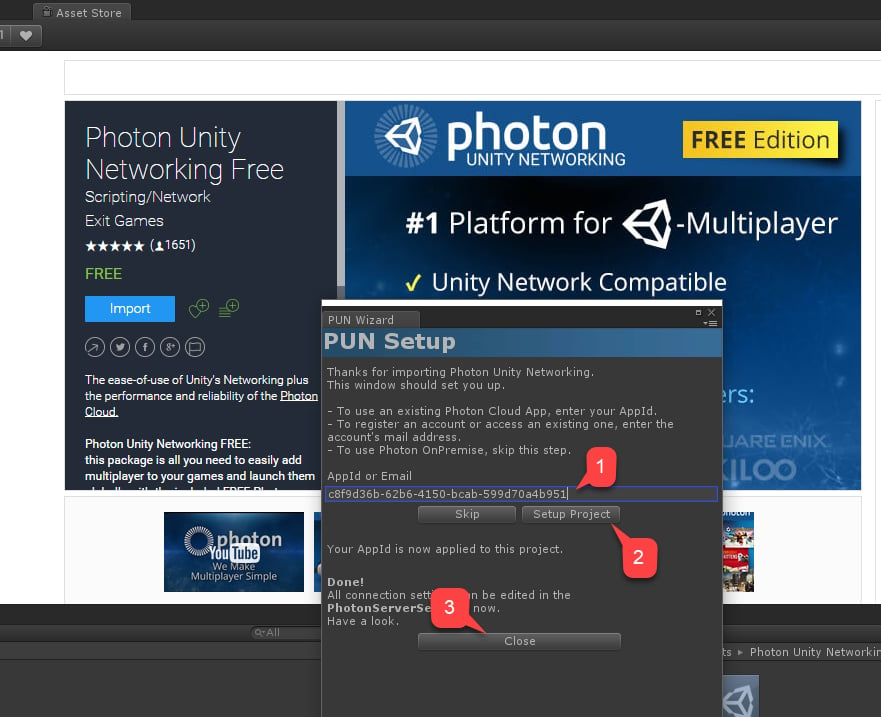
- Enter your Realtime Application ID (1) found in the Photon Application Dashboard for the Photon App you created.
- Select Setup Project (2).
- Once the setup finishes, select Close (3).
- Navigate to the top window panel.
- Select Window.
- Then select Photon Unity Networking (1).
- Finally select Highlight Server Settings (2).
- The Standard Unity project window reveals the PhotonServerSettings (3) object.
- Select the object to reveal its settings in the Unity Inspector window.
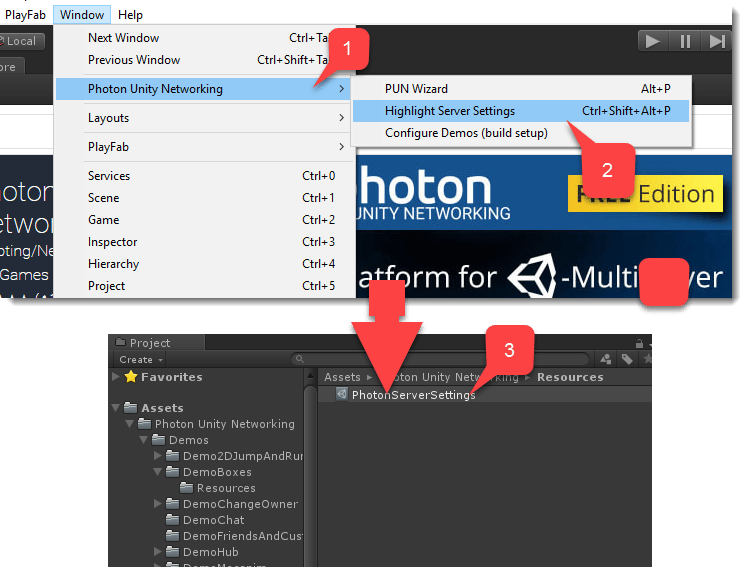
As part of PhotonServerSettings, you have the option to assign the Chat Application ID.
Implementing PlayFab to Photon authentication
When you enable the Photon Add-on for your title in the PlayFab Game Manager, and configure the authentication on the Photon Application dashboard, PlayFab allows you to authenticate existing PlayFab players inside the Photon environment. This means you may completely avoid implementing any user management for Photon.- Navigate to DemoHub-Scene-V2 scene from the Photon Unity Networking Free package, the Classic version.
- This scene is a hub for all the examples from the package.
- As it is the first scene to load, let’s add a small script to enable authenticating PlayFab with Photon.
- Create an empty GameObject called PlayFabAuthenticator.
- Then in the Unity Inspector window, add a component with the same name to this GameObject.
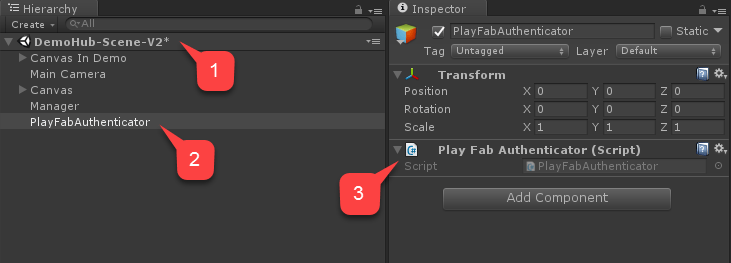
PlayFabAuthenticator component, and save and close the file.
Testing PlayFab to Photon authentication
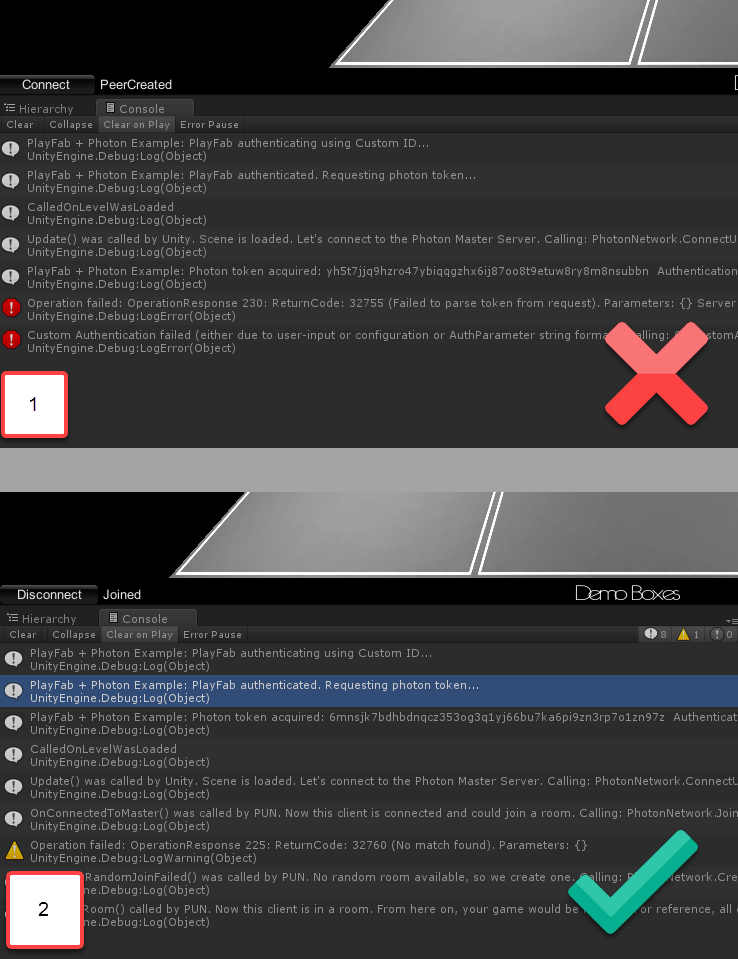
- Start the scene.
- Inspect the flow of console messages. Control that:
- Authentication to PlayFab itself was successful.
- The Photon token was acquired.
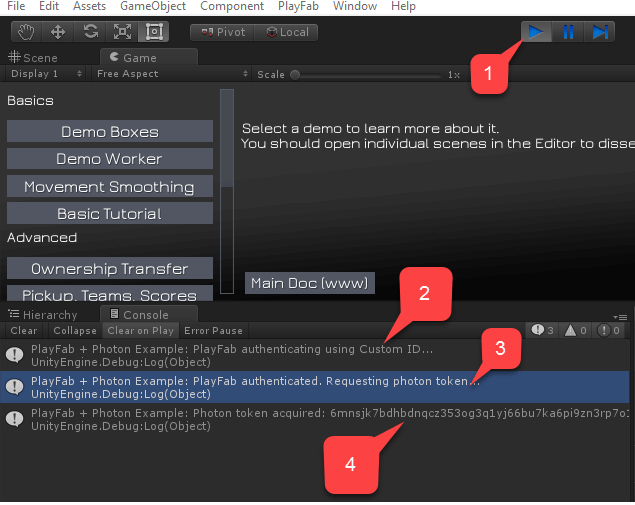
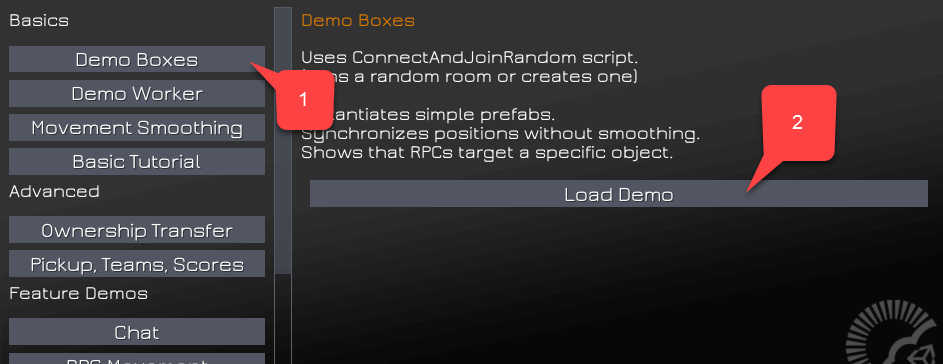
- To ensure that the PlayFab authentication is complete, select Demo Boxes.
- Then select Load Demo, as shown on the following picture.
Photon room event + CloudScript
The Photon matchmaking system has the concept of a Room. If you aren’t familiar with this concept, consult with the Photon Matchmaking Guide. PlayFab allows you to intercept various room events. The following room events require only CloudScript to be intercepted:RoomCreatedRoomJoinedRoomLeftRoomClosed
RoomPropertyUpdatedRoomEventRaised
Once you introduce a handler for a room event, it becomes an essential part of the event handling flow. So errors produced while running your CloudScript may cause problems for the entire system. For example, if the
RoomCreated handler throws an error, your clients will throw an error as well, and won’t be able to connect properly.Room Created handler
TheRoomCreated handler is invoked every time a Photon room is created. The following CloudScript handler intercepts such events.
You may acquire more data about the event using the “args” argument.
Room Joined handler
TheRoomJoined handler is invoked every time a player joins the room. The following CloudScript handler intercepts such an event.
RoomCreated to intercept the first player that joins. You may acquire more data about the event using the “args” argument.
Room left
TheRoomLeft handler is invoked every time a player leaves the room. The following CloudScript handler intercepts such event.
Room Closed handler
TheRoomClosed handler is invoked every time the last player leaves the room and room has no players left. The following CloudScript handler intercepts such event.
Room Property Updated
TheRoomPropertyUpdated handler is invoked every time the room property is changed. The following CloudScript handler intercepts such an event.
The
currentPlayerId is undefined in this handler. If the room property was changed from the client, you may use the “args” argument, and refer to the UserId to acquire the player in charge.Room Event Raised
The Room Event Raised is called every time a custom room event is raised. The following CloudScript handler intercepts such an event.Testing Room Event handlers
This example extends the previous example (PlayFab + Photon authentication). Upload the following CloudScript for your title.PlayFabAuthenticator script by including new example code that raises a custom event, and set custom room property. The extended version also utilizes an Awake method to not destroy object between scene loads.
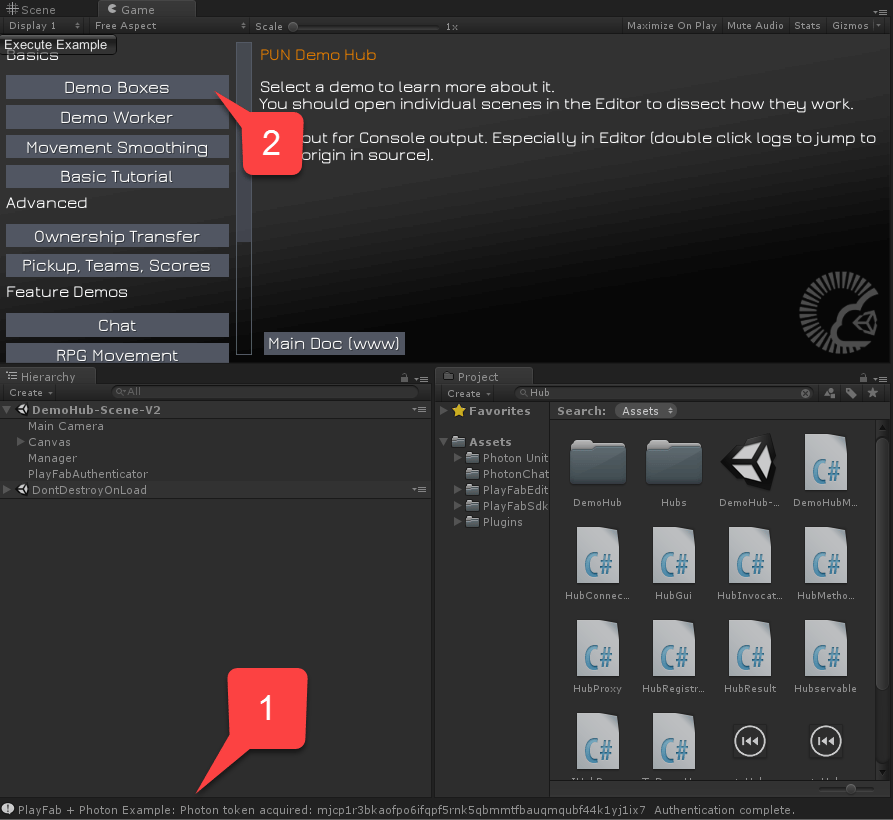
- Run the hub scene and wait for PlayFab authentication to complete (1).
- Then load the Boxes Demo scene (2).
- Once the scene loads, wait for the peer to connect newly created room (1).
- Then select Execute Example in the top left corner (2).
- Observe the console output (3).
- Make sure no errors have occurred.
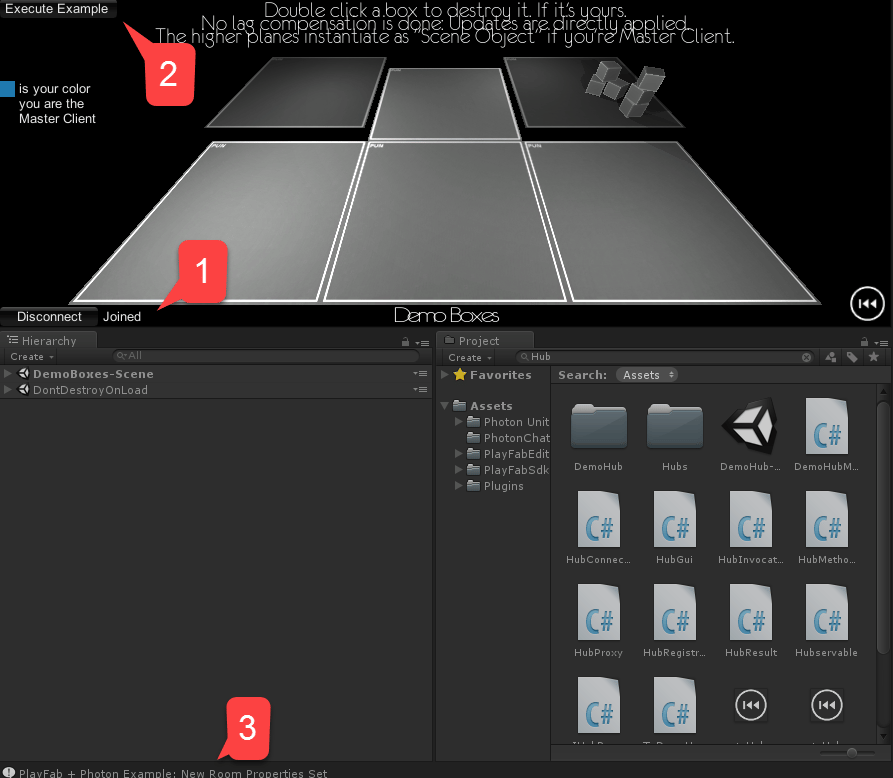
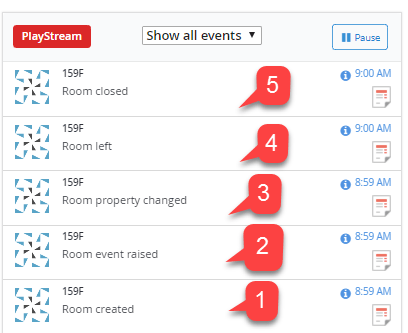
- Initially, our Photon instance had no opened room. When we launched the example, Photon has created the room for the Boxes Demo.
- The first player to join is the player who requested the room. So no RoomJoined Event was recorded. We then executed our example code:
- First, we raised a custom Room Event.
- Then, we set a custom Room Property.
- Then we stopped the Unity play mode. This resulted in our client leaving the room.
- Since our disconnected client was the last one, there are no more clients and Photon closes the room.