> ## Documentation Index
> Fetch the complete documentation index at: https://devdocs.xbox.com/llms.txt
> Use this file to discover all available pages before exploring further.

# 为 PlayFab 设置 Sign In with Battle.net

> 使用 HTML5 和 JavaScript 配置 PlayFab 与 Battle.net 的身份验证，包括暴雪应用设置、OAuth 流程和玩家登录集成。

# 使用 Battle.net 设置 PlayFab 身份验证

本教程指导你完成使用 Battle.net 和 HTML5/JavaScript 设置 PlayFab 身份验证的过程。

## 要求

你需要：

* 一个用于测试的 [Battle.net 账户](https://developer.battle.net)。
* 已注册的 [PlayFab](https://developer.playfab.com/) title。
* 熟悉[登录基础和最佳实践](/services/playfab/identity/player-identity/login/login-basics-best-practices)。
* 具有有效域名以充当静态 HTML 文件的服务器。请参阅[为测试运行 HTTP 服务器](/services/playfab/identity/player-identity/platform-specific-authentication/running-an-http-server-for-testing)教程，了解如何设置。

## 服务器和域名

本指南需要具有有效域名的服务器来跟进。如果你还没有注册域名和远程 Web 服务器，请按照我们的[为测试运行 HTTP 服务器](/services/playfab/identity/player-identity/platform-specific-authentication/running-an-http-server-for-testing)教程，了解如何设置一个具有有效域名的本地 Web 服务器。

在本指南中，我们假设你的域名是 [http://playfab.example。](http://playfab.example。)

## 检索 Battle.net title Client ID

首先导航到 [Battle.net](https://developer.battle.net) 并创建 Battle.net 开发者账户。创建账户后，你需要创建 title 并被分配 Client ID。

## 安装 Battle.net 附加组件

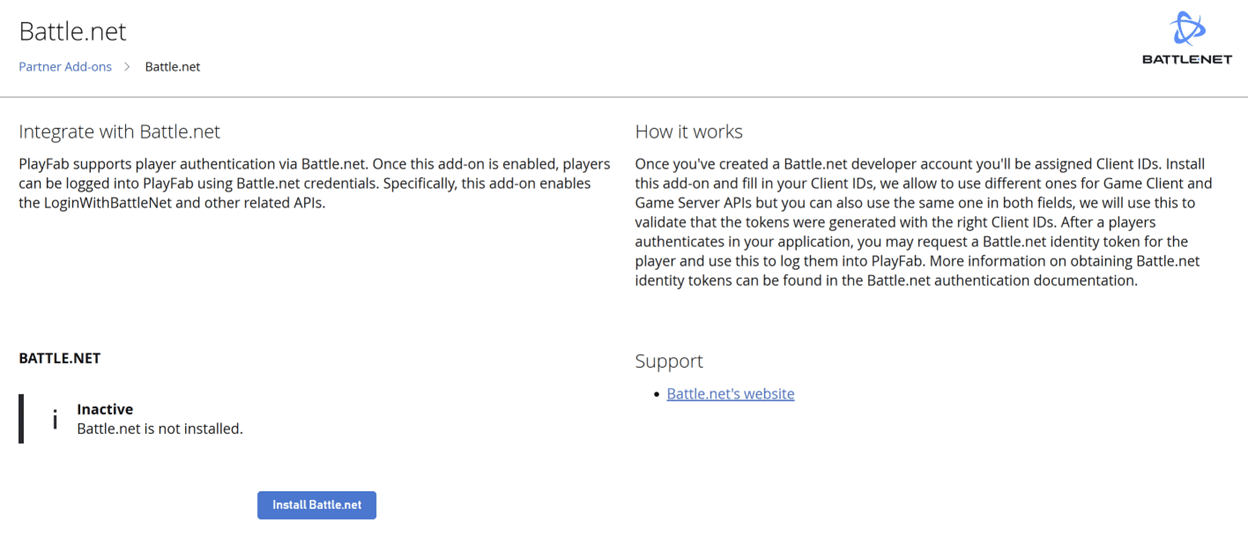
转到你 title 的 PlayFab **Game Manager** 页面。

1. 在菜单中导航到 **Add-ons**。
2. 找到并打开 **Battle.net Add-on** 图标/链接。

<img src="https://mintcdn.com/microsoft-4404708b/mLCHf0iQv3VidfBe/images/playfab/identity/player-identity/platform-specific-authentication/tutorials/battlenet/battlenet-partner-add-on-page.png?fit=max&auto=format&n=mLCHf0iQv3VidfBe&q=85&s=de4613079755faeb998407ac4158da89" alt="PlayFab Game Manager Add-on" width="1248" height="555" data-path="images/playfab/identity/player-identity/platform-specific-authentication/tutorials/battlenet/battlenet-partner-add-on-page.png" />

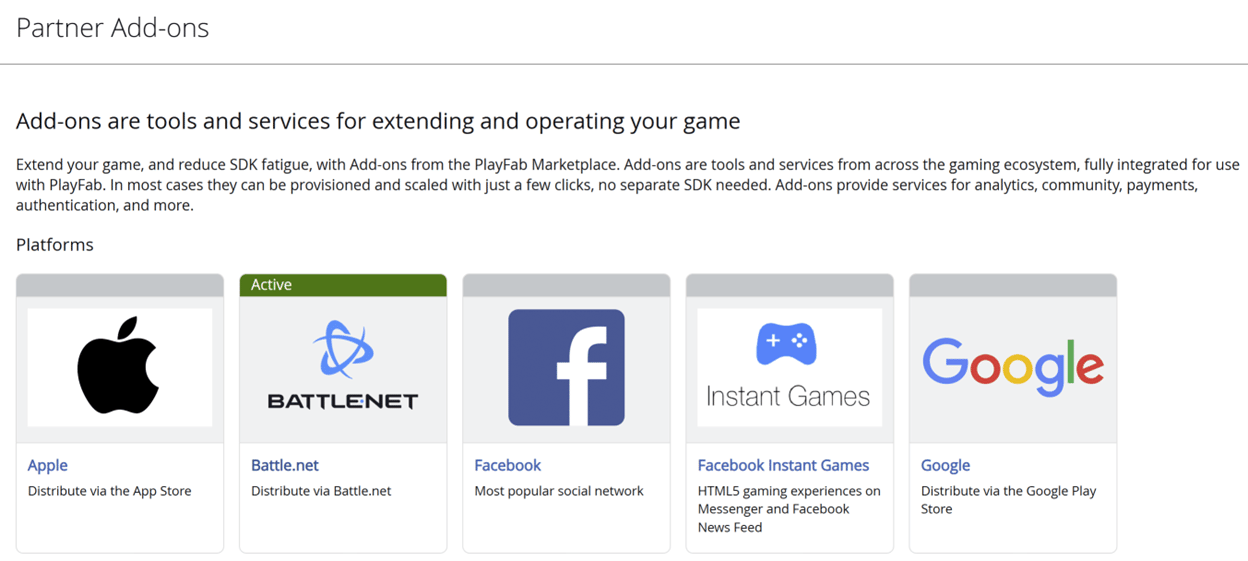
3. 选择 **Install Battle.net**。

<img src="https://mintcdn.com/microsoft-4404708b/mLCHf0iQv3VidfBe/images/playfab/identity/player-identity/platform-specific-authentication/tutorials/battlenet/battlenet-add-on.png?fit=max&auto=format&n=mLCHf0iQv3VidfBe&q=85&s=f9828e789c2285bbde0d456d7f307102" alt="PlayFab Game Manager Battle.net Add-on" width="1248" height="545" data-path="images/playfab/identity/player-identity/platform-specific-authentication/tutorials/battlenet/battlenet-add-on.png" />

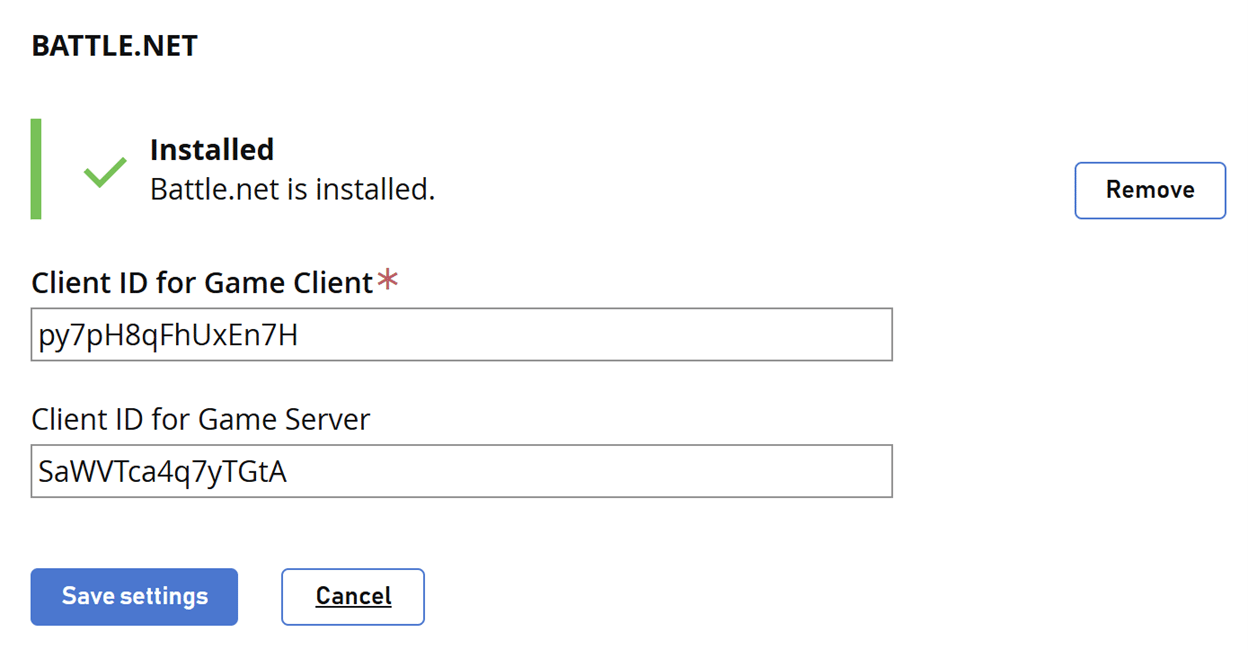
4. 填写 **Client ID for Game Client**。
5. （可选）填写 **Client ID for Game Server**。
6. 然后选择 **Save settings** 按钮。
<img src="https://mintcdn.com/microsoft-4404708b/mLCHf0iQv3VidfBe/images/playfab/identity/player-identity/platform-specific-authentication/tutorials/battlenet/battlenet-validated.png?fit=max&auto=format&n=mLCHf0iQv3VidfBe&q=85&s=1fe7a49156f04e31ae204c6f7ce6a9ef" alt="PlayFab Game Manager Battle.net Add-on Client IDs" width="1248" height="650" data-path="images/playfab/identity/player-identity/platform-specific-authentication/tutorials/battlenet/battlenet-validated.png" />

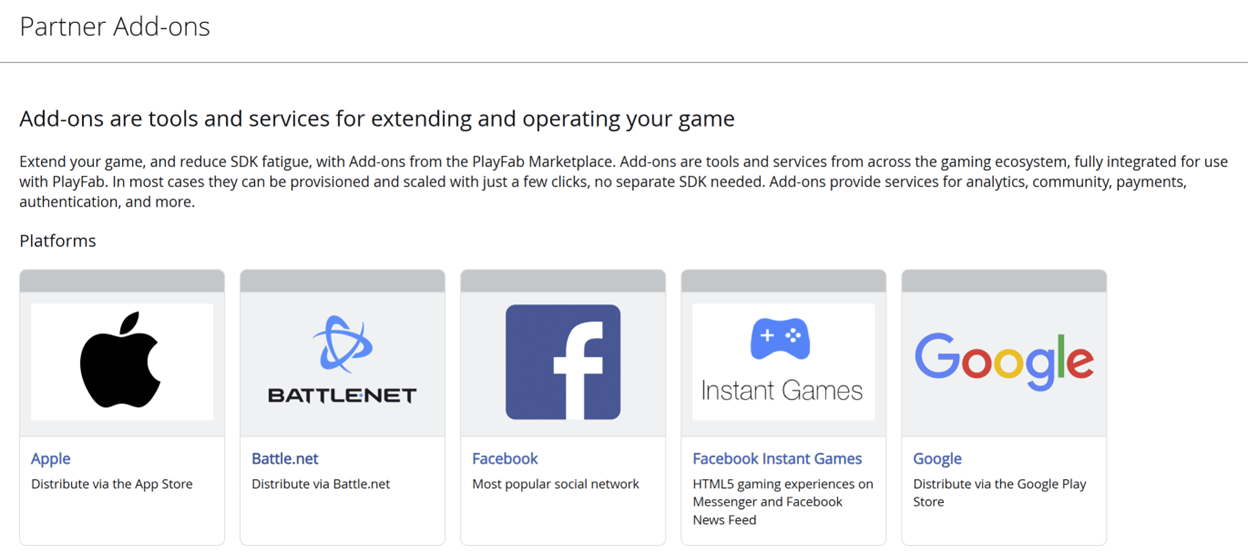
Battle.net 在 Add-on 页面上显示为活动。

<img src="https://mintcdn.com/microsoft-4404708b/mLCHf0iQv3VidfBe/images/playfab/identity/player-identity/platform-specific-authentication/tutorials/battlenet/battlenet-partner-add-on-page-active.png?fit=max&auto=format&n=mLCHf0iQv3VidfBe&q=85&s=42e07d365b7f93b5e3014039e91ac91b" alt="PlayFab Game Manager Battle.net Add-on active" width="1248" height="561" data-path="images/playfab/identity/player-identity/platform-specific-authentication/tutorials/battlenet/battlenet-partner-add-on-page-active.png" />

## 使用访问令牌进行测试

在此示例中，我们展示如何使用经典访问令牌方法测试 LoginWithBattleNet API。使用提供的 HTML 代码进行测试。

<Note>
  *请务必*用你自己的值替换 `YOUR_CLIENT_ID`、`YOUR_PLAYFAB_TITLE_ID`、`YOUR_BNET_TITLE_NAME` 和 `YOUR_CLIENT_SECRET`。
</Note>

```html theme={null}
<!DOCTYPE html>
<html>
<head>
    <script src="https://cdn.jsdelivr.net/npm/axios/dist/axios.min.js"></script>
</head>
<body>
    <h2>Battle.net SSO Token Demo (Manual Flow)</h2>
    <ol>
        <li>
            <button onclick="openBattleNetLogin()">Log in to Battle.net</button>
        </li>
        <li>
            After login, copy the <b>ST</b> value from the URL (e.g. <code>ST=US-xxxx-xxxx) and paste it here:
            

            <input type="text" id="ssoToken" size="80" placeholder="Paste SSO token (ST=...)" />
        </li>
        <li>
            Click "Exchange SSO Token for id_token"

            <button onclick="exchangeSSOToken()">Exchange SSO Token for id_token</button>
            

            <label>id_token:</label>

            <input type="text" id="idToken" size="80" placeholder="id_token will appear here" />
        </li>
        <li>
            Click "Login to PlayFab" to complete the flow

            <button onclick="loginWithPlayFab()">Login to PlayFab</button>
        </li>
    </ol>
    

    <div id="log"></div>
    <script>
        // Demo configuration variables
        const BNET_TITLE_NAME = 'YOUR_BNET_TITLE_NAME';
        const PLAYFAB_TITLE_ID = 'YOUR_PLAYFAB_TITLE_ID';
        const CLIENT_ID = 'YOUR_CLIENT_ID';
        const CLIENT_SECRET = 'YOUR_CLIENT_SECRET';

        function openBattleNetLogin() {
            const url = `http://account.battle.net/login/en/?app=${encodeURIComponent(BNET_TITLE_NAME)}`;
            window.open(url, '_blank');
        }

        function exchangeSSOToken() {
            const ssoToken = document.getElementById('ssoToken').value.trim();
            if (!ssoToken) {
                logLine("Please enter the SSO token.");
                return;
            }
            logLine("Exchanging SSO token for id_token...");
            // Prepare the request for the token exchange
            const params = new URLSearchParams();
            params.append('scope', 'account.basic openid');
            params.append('grant_type', 'urn:ietf:params:oauth:grant-type:token-exchange');
            params.append('subject_token', ssoToken);
            params.append('subject_token_type', 'urn:blizzard:params:oauth:token-type:sso');
            params.append('requested_token_type', 'urn:ietf:params:oauth:token-type:jwt');

            // Basic Auth header
            const authHeader = 'Basic ' + btoa(CLIENT_ID + ':' + CLIENT_SECRET);

            fetch('https://oauth.battle.net/token', {
                method: 'POST',
                headers: {
                    'Content-Type': 'application/x-www-form-urlencoded',
                    'Authorization': authHeader
                },
                body: params
            })
            .then(res => res.json())
            .then(data => {
                if (data.id_token) {
                    document.getElementById('idToken').value = data.id_token;
                    logLine("id_token received.");
                } else {
                    logLine("Error: " + JSON.stringify(data));
                }
            })
            .catch(err => logLine("Error: " + err));
        }

        function loginWithPlayFab() {
            const idToken = document.getElementById('idToken').value.trim();
            if (!idToken) {
                logLine("Please exchange for an id_token first.");
                return;
            }
            logLine("Logging in to PlayFab...");
            axios.post(
                `https://${PLAYFAB_TITLE_ID}.playfabapi.com/Client/LoginWithBattleNet`,
                {
                    TitleId: PLAYFAB_TITLE_ID,
                    IdentityToken: idToken,
                    CreateAccount: true
                },
                {
                    headers: {
                        'Content-Type': 'application/json'
                    }
                }
            )
            .then(response => logLine("Response: " + JSON.stringify(response.data)))
            .catch(error => logLine("Error: " + JSON.stringify(error.response ? error.response.data : error)));
        }

        function logLine(message) {
            const logDiv = document.getElementById('log');
            logDiv.innerHTML += message + "
";
        }
    </script>
</body>
</html></code>
```

记住使用你的 Web 服务器打开 HTML 页面，并确保使用你指定的 URL 访问此页面。

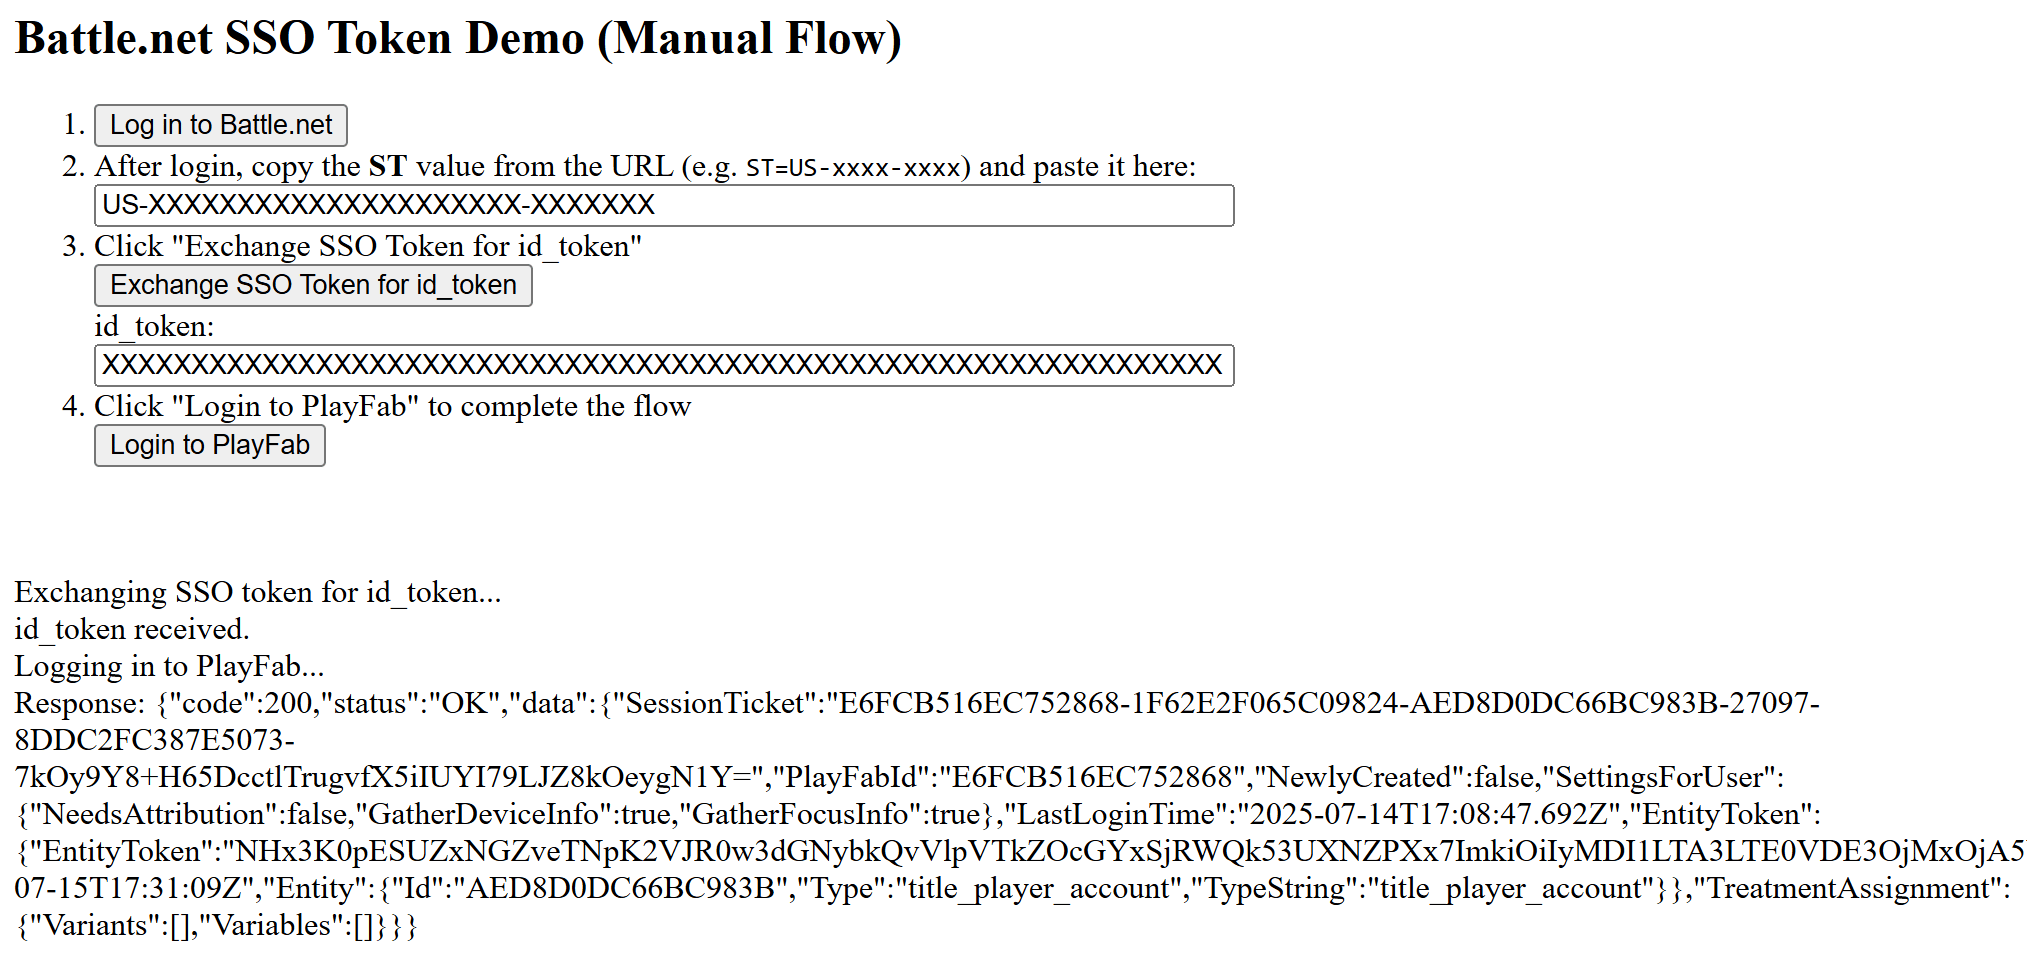
1. 页面打开后，选择 **Log in to Battle.net**。
2. 登录后，从 URL 复制 **ST** 值（例如：ST=US-xxxx-xxxx）并将其输入到对话框中。
3. 选择 **Exchange SSO Token for id\_token** 并将该值复制到对话框中。
4. 选择 **Login to PlayFab** 以完成登录流程。
5. 完成后，脚本尝试在 PlayFab 端进行身份验证并显示结果。

<img src="https://mintcdn.com/microsoft-4404708b/mLCHf0iQv3VidfBe/images/playfab/identity/player-identity/platform-specific-authentication/tutorials/battlenet/battlenet-token-demo.png?fit=max&auto=format&n=mLCHf0iQv3VidfBe&q=85&s=6436d543b2543a12c1842bb36ad4021d" alt="Battle.net Auth Example" width="2027" height="961" data-path="images/playfab/identity/player-identity/platform-specific-authentication/tutorials/battlenet/battlenet-token-demo.png" />


## Related topics

- [为 PlayFab 设置 Sign In with Apple](/zh-CN/services/playfab/identity/player-identity/platform-specific-authentication/apple-open-id/overview.md)
- [Photon 快速入门](/zh-CN/services/playfab/live-service-management/service-gateway/add-ons/photon/quickstart.md)
- [特定平台的身份验证](/zh-CN/services/playfab/identity/player-identity/platform-specific-authentication/index.md)
- [PlayFab Services SDK 2025 年发行说明](/zh-CN/services/playfab/release-notes/2025.md)
- [LoginIdentityProvider](/zh-CN/services/playfab/api-references/events/data-types/loginidentityprovider.md)