> ## Documentation Index
> Fetch the complete documentation index at: https://devdocs.xbox.com/llms.txt
> Use this file to discover all available pages before exploring further.
# Install the PlayFab SDK without Editor Extensions in Unity
> Install the PlayFab Unity 3D SDK in your Unity project without the Editor Extensions asset package, and configure Title ID from your code.
You have two options when installing the PlayFab Unity 3D SDK:
* Install the PlayFab Unity Editor Extensions Asset Package. Then use Editor Extensions to install the PlayFab Unity 3D SDK and configure your Unity Project.
PlayFab Editor Extensions is a stand-alone Unity plug-in that streamlines getting started with PlayFab.
When a supported SDK is installed, other service menus are available. These menus provide access to SDK configurations. These configuration settings are saved in a combination of places to ensure that the data persists throughout Unity compilations and deployments.
* Install the PlayFab Unity 3D SDK directly without using PlayFab Unity Editor Extensions. When you use this installation method, you configure your Unity Project directly by setting the property values in your code.
This content assumes you that you have a [PlayFab developer account](https://developer.playfab.com) and an existing Unity Project.
## Download and install the SDK only
To install the SDK without using the PlayFab Unity Editor Extensions:
1. Open your Unity project.
2. Download the [PlayFab Unity3D SDK Asset Package](https://aka.ms/playfabunitysdkdownload) from the PlayFab GitHub repo.
3. Navigate to where you downloaded the file, and double-click on the UnityPackage file to open the **Import Unity Package** dialog in the Unity Editor.
4. To import the PlayFab Unity3D SDK into your project, select **Import**.
## Setting the Title ID without using the Editor Extensions
To set the title:
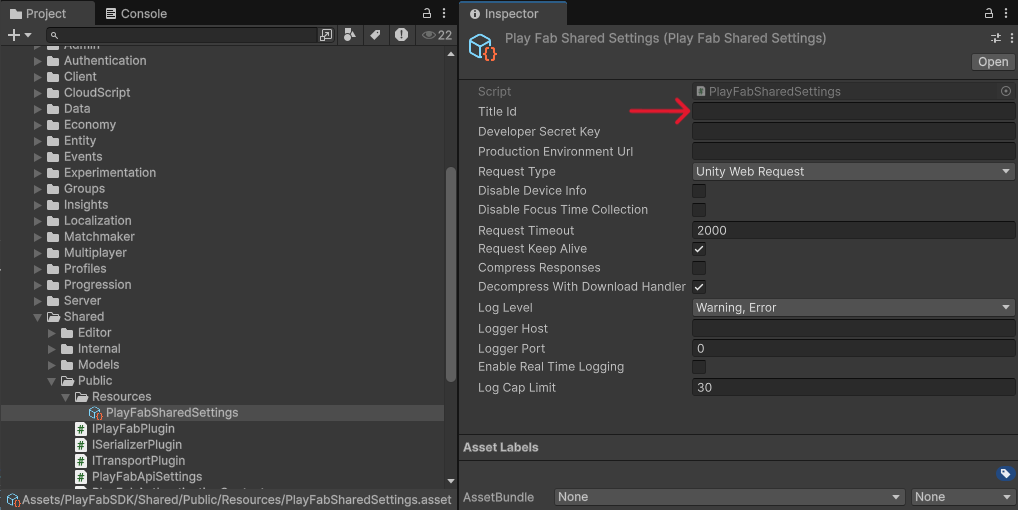
1. In the Unity Editor Project panel, select the **Assets** folder.
2. Open the **Assets** > **PlayFabSdk** > **Shared** > **Public** > **Resources** folder.
3. Select the PlayFabSettings Asset.
4. In the **Inspector** window, set the **Title ID**.
 If you're making a server build, be sure to provide the **Developer Secret Key** as well.
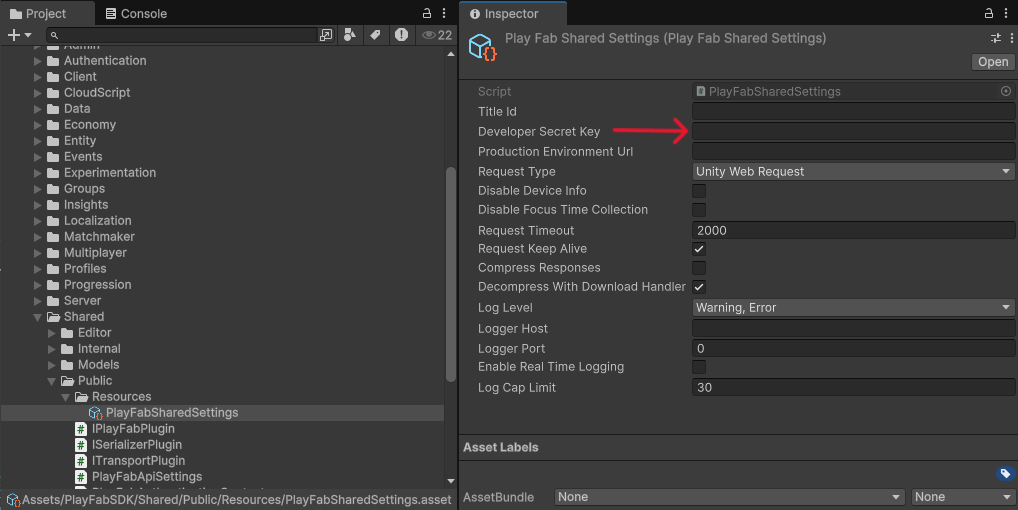 Otherwise, be sure the secret key **is not set** when building your game client. For more information about secret keys, see [Secret key management](/services/playfab/live-service-management/gamemanager/secret-key-management).
Refer to [Secret key Management](/services/playfab/live-service-management/gamemanager/secret-key-management) to find your secret key, also called a developer key to your PlayFab Title.
## Related topics
- [Unity quickstart](/services/playfab/sdks/unity3d/quickstart.md)
- [Azure PlayFab Party SDK for Unity](/build/console-features/networking/game-mesh/party-unity-plugin.md)
- [Party Unity plugin quickstart](/services/playfab/multiplayer/networking/party-unity-plugin-quickstart.md)
- [Multiplayer Unity plugin quickstart](/services/playfab/multiplayer/lobby/lobby-matchmaking-sdks/multiplayer-unity-plugin-quickstart.md)
- [PlayFab Release Notes 2020](/services/playfab/release-notes/2020.md)
Otherwise, be sure the secret key **is not set** when building your game client. For more information about secret keys, see [Secret key management](/services/playfab/live-service-management/gamemanager/secret-key-management).
Refer to [Secret key Management](/services/playfab/live-service-management/gamemanager/secret-key-management) to find your secret key, also called a developer key to your PlayFab Title.
## Related topics
- [Unity quickstart](/services/playfab/sdks/unity3d/quickstart.md)
- [Azure PlayFab Party SDK for Unity](/build/console-features/networking/game-mesh/party-unity-plugin.md)
- [Party Unity plugin quickstart](/services/playfab/multiplayer/networking/party-unity-plugin-quickstart.md)
- [Multiplayer Unity plugin quickstart](/services/playfab/multiplayer/lobby/lobby-matchmaking-sdks/multiplayer-unity-plugin-quickstart.md)
- [PlayFab Release Notes 2020](/services/playfab/release-notes/2020.md)