> ## Documentation Index
> Fetch the complete documentation index at: https://devdocs.xbox.com/llms.txt
> Use this file to discover all available pages before exploring further.
# Set up Sign In with Battle.net for PlayFab
> Configure PlayFab authentication with Battle.net using HTML5 and JavaScript, including Blizzard app setup, OAuth flow, and player sign-in integration.
# Set up PlayFab authentication with Battle.net
This tutorial guides you through the process of setting up PlayFab authentication using Battle.net and HTML5/JavaScript.
## Requirements
You need:
* A [Battle.net account](https://developer.battle.net) for testing.
* A Registered [PlayFab](https://developer.playfab.com/) title.
* A familiarity with [Login basics and Best Practices](/services/playfab/identity/player-identity/login/login-basics-best-practices).
* A server with a valid domain name to act as a static HTML file. Consult the [Running an HTTP server for testing](/services/playfab/identity/player-identity/platform-specific-authentication/running-an-http-server-for-testing) tutorial for information on how to set one up.
## Server and domain
This guide requires a server with a valid domain to follow. If you don't have a registered domain and remote web server yet, follow our [Running an HTTP server for testing](/services/playfab/identity/player-identity/platform-specific-authentication/running-an-http-server-for-testing) tutorial for information on how to set one to run a local web server with a valid domain name.
Throughout this guide, we assume your domain is [http://playfab.example](http://playfab.example).
## Retrieve Battle.net title Client ID
Start by navigating to the [Battle.net](https://developer.battle.net) and create a Battle.net developer account. Once your account is created, you need to create a title and be assigned Client IDs.
## Install Battle.net Add-on
Go to the PlayFab **Game Manager** page for your title.
1. Navigate to **Add-ons** in the menu.
2. Locate and open the **Battle.net Add-on** icon/link.
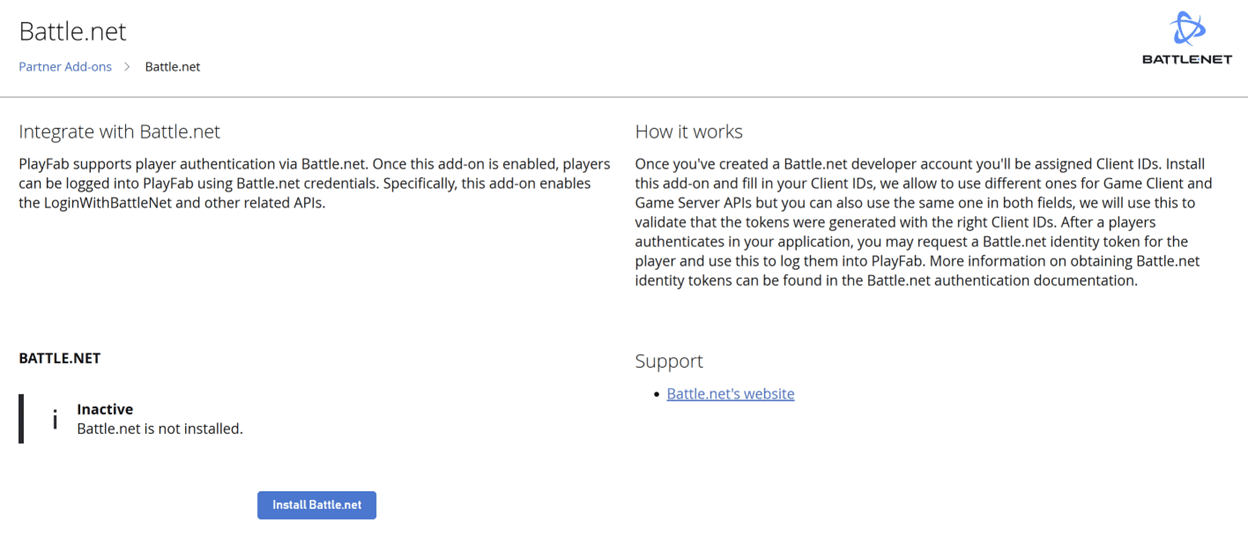
3. Select **Install Battle.net**.
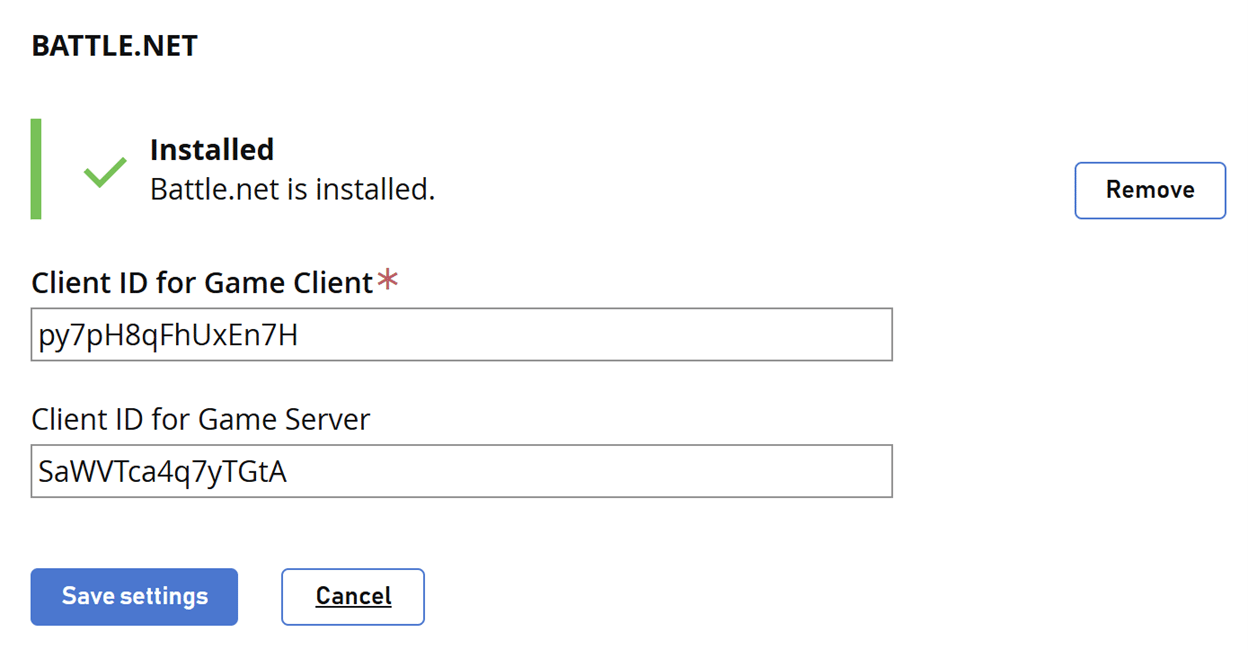
4. Fill in the **Client ID for Game Client**.
5. Optionally, fill in a **Client ID for Game Server**.
6. Then select the **Save settings** button.
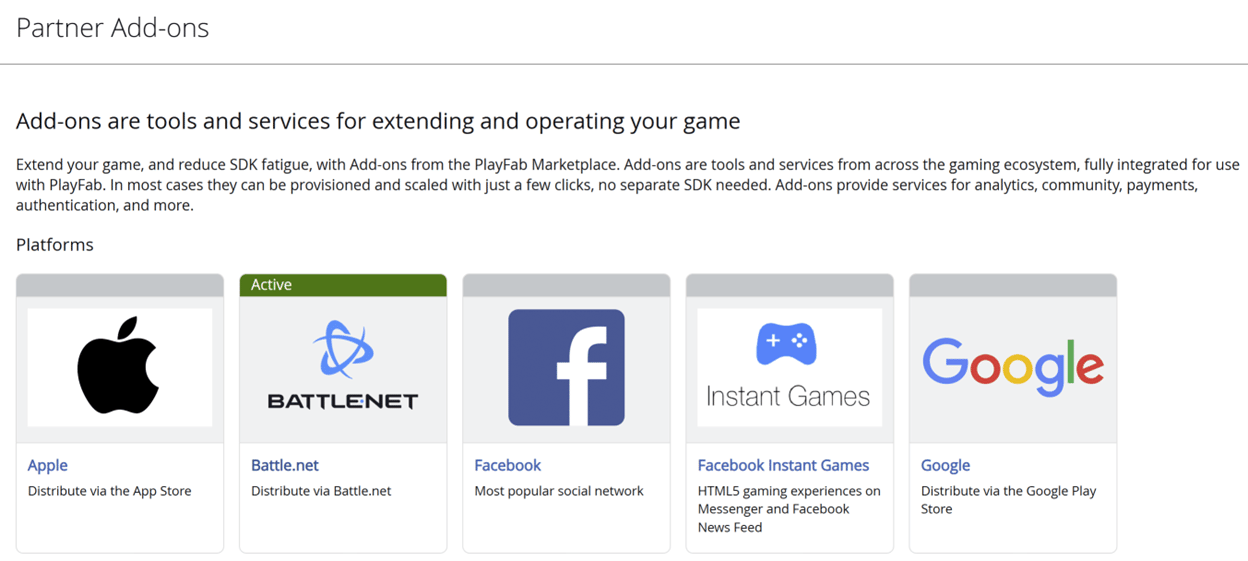
Battle.net shows as active in the Add-on page.
## Testing using an access token
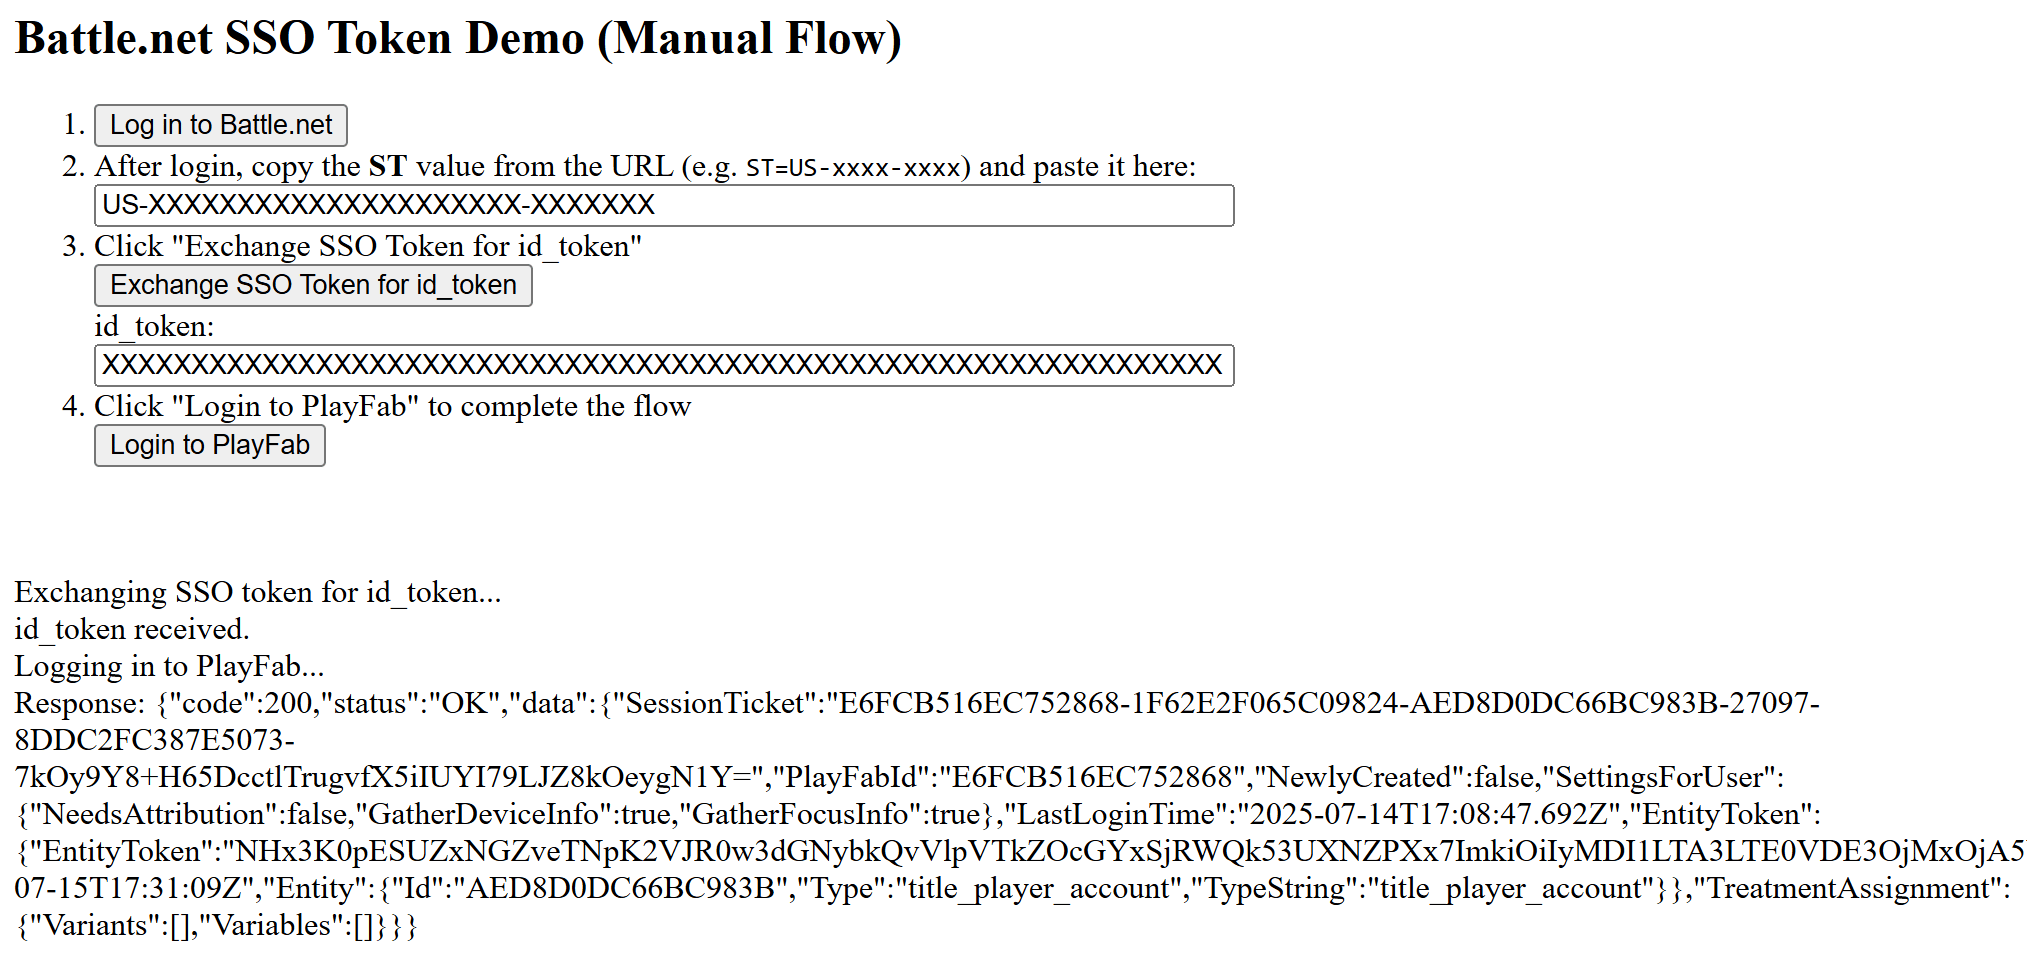
In this example, we show how to test the LoginWithBattleNet API using the classic access token approach. Use the HTML code provided for your testing.
*Make sure* to replace `YOUR_CLIENT_ID`, `YOUR_PLAYFAB_TITLE_ID`, `YOUR_BNET_TITLE_NAME`, and `YOUR_CLIENT_SECRET` with your own values.
```html theme={null}
Battle.net SSO Token Demo (Manual Flow)
After login, copy the ST value from the URL (e.g. ST=US-xxxx-xxxx) and paste it here:
Click "Exchange SSO Token for id_token"
Click "Login to PlayFab" to complete the flow
```
Remember to open the HTML page using your web server, and make sure to access this page using the URL you specified.
1. Once the page opens, select **Log in to Battle.net**.
2. After signing in, copy the **ST** value from the URL (for example: ST=US-xxxx-xxxx) and input it into the dialogue box.
3. Select **Exchange SSO Token for id\_token** and copy the value into the dialogue box.
4. Select **Login to PlayFab** to complete the sign-in flow.
5. When finished, the script tries to authenticate on the PlayFab side and shows the result.
## Related topics
- [Set up Sign In with Apple for PlayFab](/services/playfab/identity/player-identity/platform-specific-authentication/apple-open-id/overview.md)
- [Set up PlayFab authentication with UWP apps](/services/playfab/identity/player-identity/platform-specific-authentication/uwp.md)
- [Microsoft Entra ID authentication for PlayFab APIs](/services/playfab/identity/dev-identity/authentication/entra-id-api-authentication.md)
- [Platform-Specific Authentication](/services/playfab/identity/player-identity/platform-specific-authentication/index.md)
- [XBOX Godot Sample v0.2.0 Release](/build/gdk-and-engines/godot-release-notes/godot-release-notes-0-2-0.md)
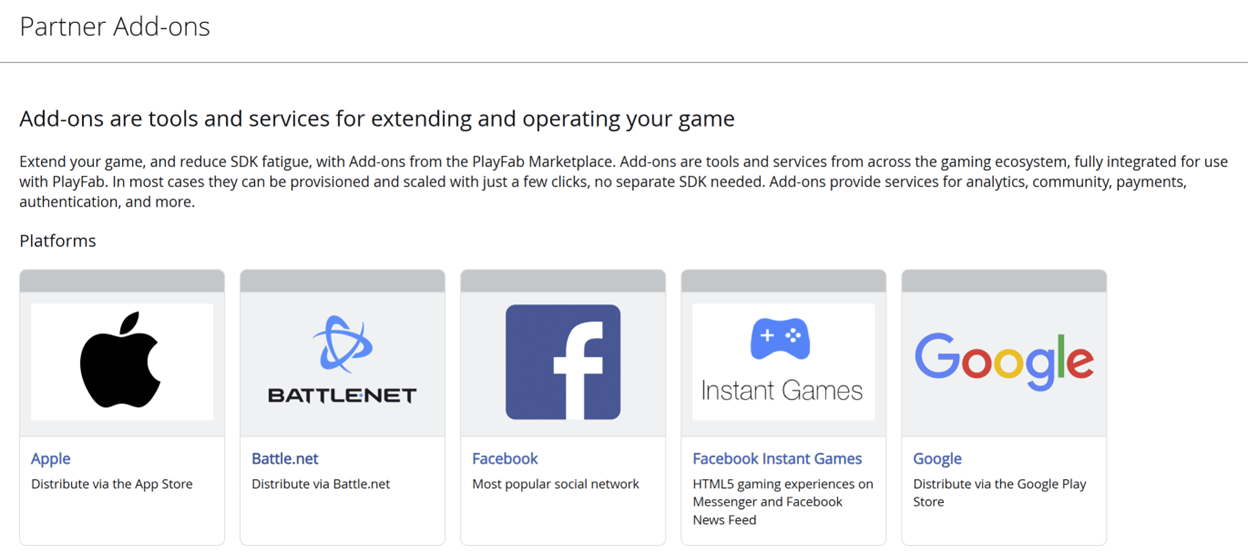 3. Select **Install Battle.net**.
 4. Fill in the **Client ID for Game Client**.
5. Optionally, fill in a **Client ID for Game Server**.
6. Then select the **Save settings** button.
4. Fill in the **Client ID for Game Client**.
5. Optionally, fill in a **Client ID for Game Server**.
6. Then select the **Save settings** button.
 Battle.net shows as active in the Add-on page.
 ## Testing using an access token
In this example, we show how to test the LoginWithBattleNet API using the classic access token approach. Use the HTML code provided for your testing.
## Testing using an access token
In this example, we show how to test the LoginWithBattleNet API using the classic access token approach. Use the HTML code provided for your testing.
 ## Related topics
- [Set up Sign In with Apple for PlayFab](/services/playfab/identity/player-identity/platform-specific-authentication/apple-open-id/overview.md)
- [Set up PlayFab authentication with UWP apps](/services/playfab/identity/player-identity/platform-specific-authentication/uwp.md)
- [Microsoft Entra ID authentication for PlayFab APIs](/services/playfab/identity/dev-identity/authentication/entra-id-api-authentication.md)
- [Platform-Specific Authentication](/services/playfab/identity/player-identity/platform-specific-authentication/index.md)
- [XBOX Godot Sample v0.2.0 Release](/build/gdk-and-engines/godot-release-notes/godot-release-notes-0-2-0.md)
## Related topics
- [Set up Sign In with Apple for PlayFab](/services/playfab/identity/player-identity/platform-specific-authentication/apple-open-id/overview.md)
- [Set up PlayFab authentication with UWP apps](/services/playfab/identity/player-identity/platform-specific-authentication/uwp.md)
- [Microsoft Entra ID authentication for PlayFab APIs](/services/playfab/identity/dev-identity/authentication/entra-id-api-authentication.md)
- [Platform-Specific Authentication](/services/playfab/identity/player-identity/platform-specific-authentication/index.md)
- [XBOX Godot Sample v0.2.0 Release](/build/gdk-and-engines/godot-release-notes/godot-release-notes-0-2-0.md)