> ## Documentation Index
> Fetch the complete documentation index at: https://devdocs.xbox.com/llms.txt
> Use this file to discover all available pages before exploring further.
# Configurar a entrada com Battle.net para o PlayFab
> Configure a autenticação do PlayFab com Battle.net usando HTML5 e JavaScript, incluindo a configuração do aplicativo da Blizzard, o fluxo OAuth e a integração da entrada do jogador.
# Configurar a autenticação do PlayFab com Battle.net
Este tutorial orienta você no processo de configuração da autenticação do PlayFab usando Battle.net e HTML5/JavaScript.
## Requisitos
Você precisa de:
* Uma [conta Battle.net](https://developer.battle.net) para testes.
* Um título registrado no [PlayFab](https://developer.playfab.com/).
* Familiaridade com [Noções básicas e práticas recomendadas de login](/pt-BR/services/playfab/identity/player-identity/login/login-basics-best-practices).
* Um servidor com um nome de domínio válido para servir um arquivo HTML estático. Consulte o tutorial [Executando um servidor HTTP para testes](/pt-BR/services/playfab/identity/player-identity/platform-specific-authentication/running-an-http-server-for-testing) para obter informações sobre como configurar um.
## Servidor e domínio
Para seguir este guia, é necessário um servidor com um domínio válido. Se você ainda não tiver um domínio registrado e um servidor Web remoto, siga nosso tutorial [Executando um servidor HTTP para testes](/pt-BR/services/playfab/identity/player-identity/platform-specific-authentication/running-an-http-server-for-testing) para obter informações sobre como configurar um servidor Web local com um nome de domínio válido.
Ao longo deste guia, presumimos que seu domínio seja [http://playfab.example](http://playfab.example).
## Recuperar a Client ID do título do Battle.net
Comece navegando até o [Battle.net](https://developer.battle.net) e crie uma conta de desenvolvedor do Battle.net. Depois que sua conta for criada, você precisará criar um título e receber Client IDs.
## Instalar o complemento do Battle.net
Acesse a página do **Game Manager** do PlayFab para o seu título.
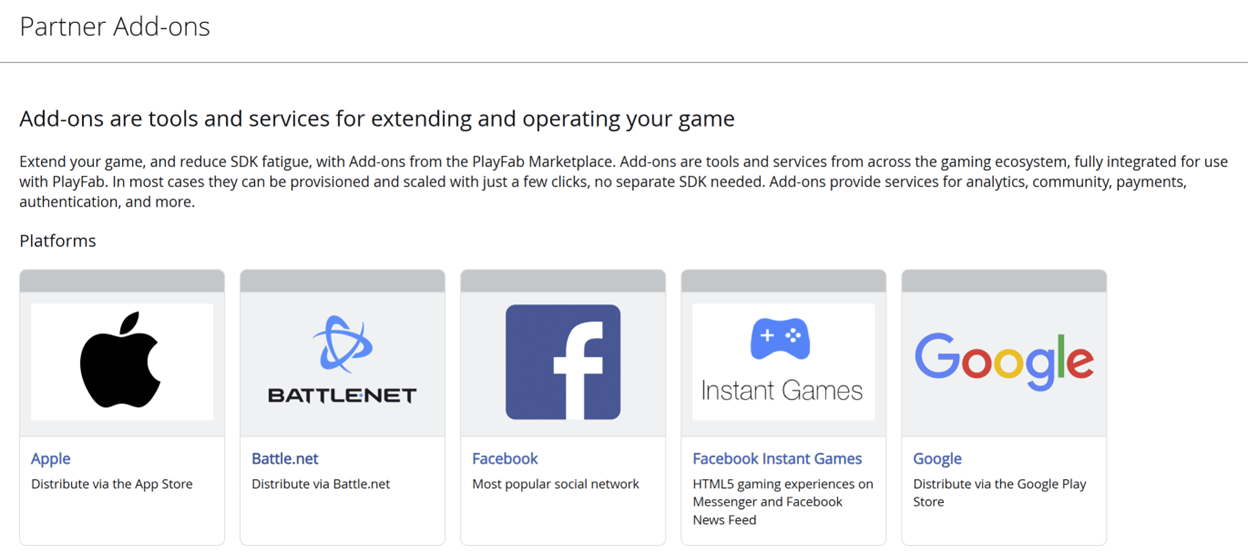
1. Navegue até **Add-ons** no menu.
2. Localize e abra o ícone/link do **complemento do Battle.net**.
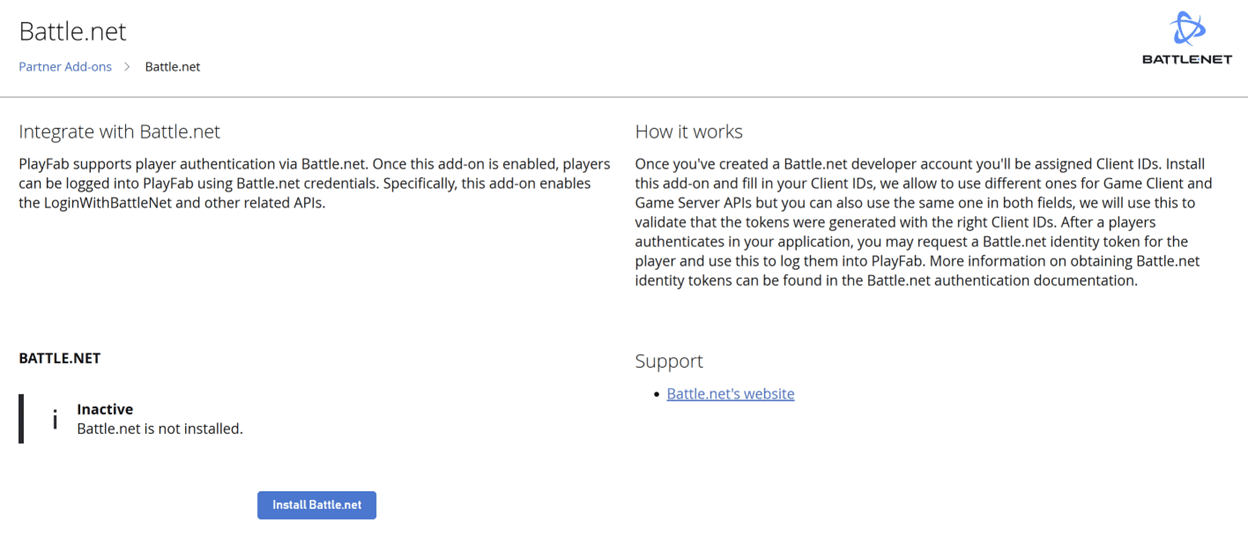
3. Selecione **Install Battle.net**.
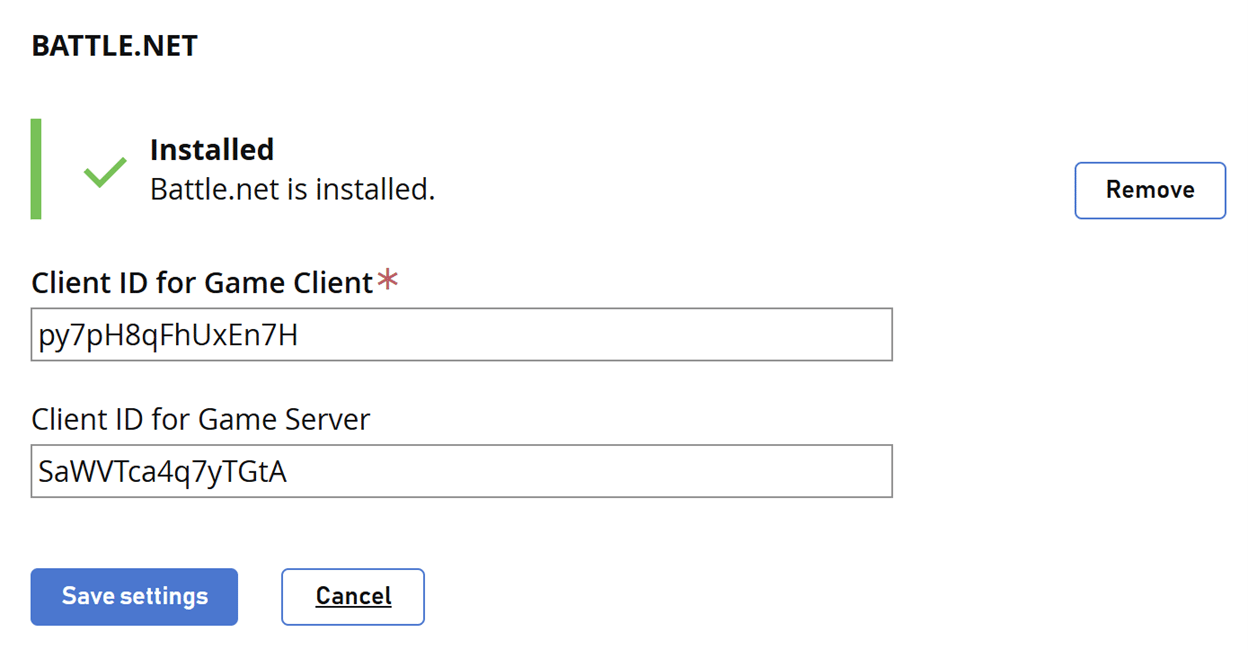
4. Preencha a **Client ID for Game Client**.
5. Opcionalmente, preencha uma **Client ID for Game Server**.
6. Em seguida, selecione o botão **Save settings**.
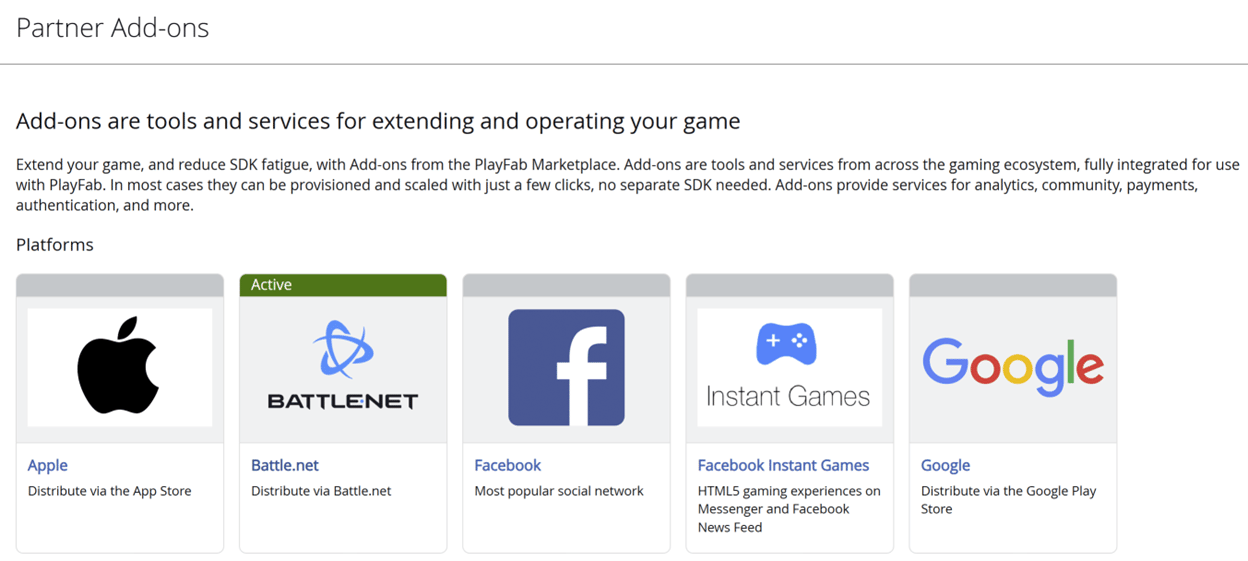
O Battle.net é exibido como ativo na página de complementos.
## Testando com um token de acesso
Neste exemplo, mostramos como testar a API LoginWithBattleNet usando a abordagem clássica de token de acesso. Use o código HTML fornecido para seus testes.
*Certifique-se* de substituir `YOUR_CLIENT_ID`, `YOUR_PLAYFAB_TITLE_ID`, `YOUR_BNET_TITLE_NAME` e `YOUR_CLIENT_SECRET` pelos seus próprios valores.
```html theme={null}
Battle.net SSO Token Demo (Manual Flow)
After login, copy the ST value from the URL (e.g. ST=US-xxxx-xxxx) and paste it here:
Click "Exchange SSO Token for id_token"
Click "Login to PlayFab" to complete the flow
```
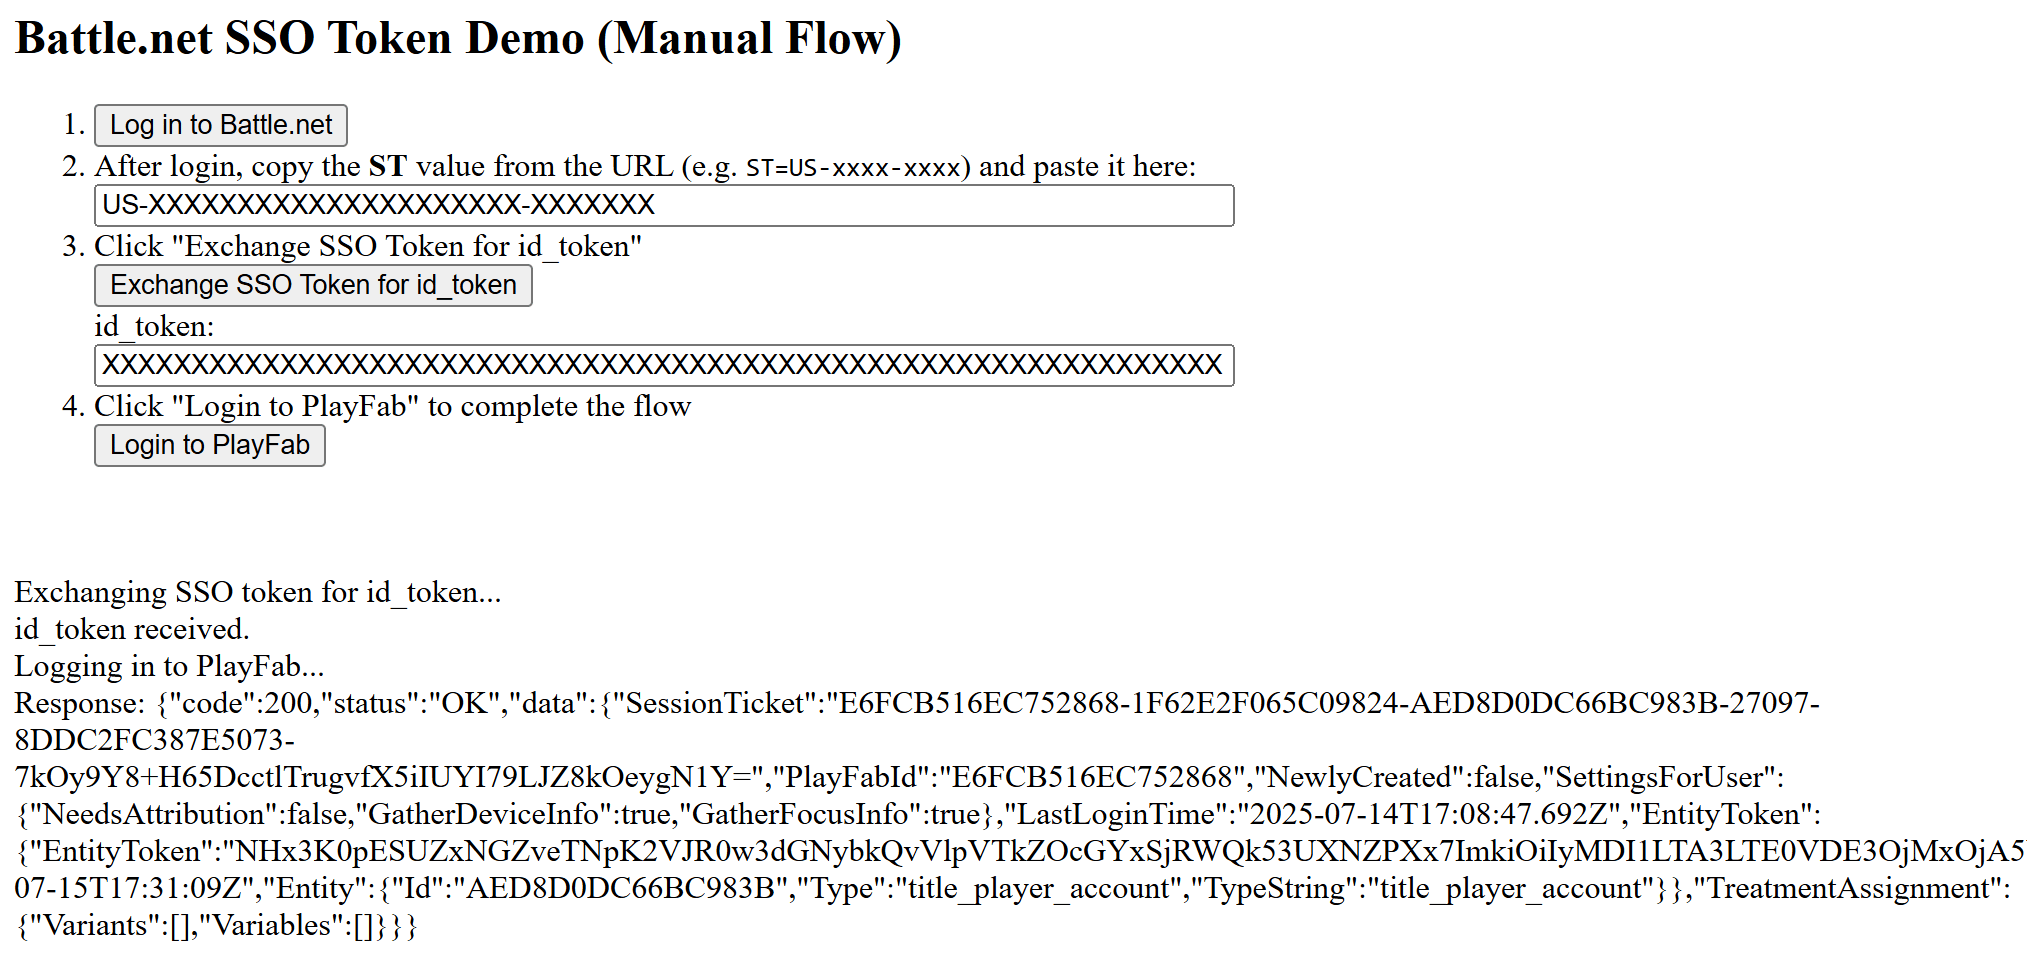
Lembre-se de abrir a página HTML usando seu servidor Web e certifique-se de acessar essa página usando a URL que você especificou.
1. Quando a página abrir, selecione **Log in to Battle.net**.
2. Depois de entrar, copie o valor **ST** da URL (por exemplo: ST=US-xxxx-xxxx) e insira-o na caixa de diálogo.
3. Selecione **Exchange SSO Token for id\_token** e copie o valor na caixa de diálogo.
4. Selecione **Login to PlayFab** para concluir o fluxo de entrada.
5. Quando terminar, o script tentará se autenticar no lado do PlayFab e mostrará o resultado.
## Related topics
- [Obter IDs do PlayFab a partir de IDs de conta do Battle Net](/pt-BR/services/playfab/api-references/rest/server/account-management/get-playfab-ids-from-battle-net-account-ids.md)
- [Configurar a autenticação do PlayFab com aplicativos UWP](/pt-BR/services/playfab/identity/player-identity/platform-specific-authentication/uwp.md)
- [Autenticação do PlayFab com a entrada com o Google Play Games no Unity](/pt-BR/services/playfab/identity/player-identity/platform-specific-authentication/google-sign-in-unity.md)
- [Fazer logon com Battle.net](/pt-BR/services/playfab/api-references/rest/client/authentication/login-with-battle-net.md)
- [Autenticação específica da plataforma](/pt-BR/services/playfab/identity/player-identity/platform-specific-authentication/index.md)
 3. Selecione **Install Battle.net**.
 4. Preencha a **Client ID for Game Client**.
5. Opcionalmente, preencha uma **Client ID for Game Server**.
6. Em seguida, selecione o botão **Save settings**.
4. Preencha a **Client ID for Game Client**.
5. Opcionalmente, preencha uma **Client ID for Game Server**.
6. Em seguida, selecione o botão **Save settings**.
 O Battle.net é exibido como ativo na página de complementos.
 ## Testando com um token de acesso
Neste exemplo, mostramos como testar a API LoginWithBattleNet usando a abordagem clássica de token de acesso. Use o código HTML fornecido para seus testes.
## Testando com um token de acesso
Neste exemplo, mostramos como testar a API LoginWithBattleNet usando a abordagem clássica de token de acesso. Use o código HTML fornecido para seus testes.
 ## Related topics
- [Obter IDs do PlayFab a partir de IDs de conta do Battle Net](/pt-BR/services/playfab/api-references/rest/server/account-management/get-playfab-ids-from-battle-net-account-ids.md)
- [Configurar a autenticação do PlayFab com aplicativos UWP](/pt-BR/services/playfab/identity/player-identity/platform-specific-authentication/uwp.md)
- [Autenticação do PlayFab com a entrada com o Google Play Games no Unity](/pt-BR/services/playfab/identity/player-identity/platform-specific-authentication/google-sign-in-unity.md)
- [Fazer logon com Battle.net](/pt-BR/services/playfab/api-references/rest/client/authentication/login-with-battle-net.md)
- [Autenticação específica da plataforma](/pt-BR/services/playfab/identity/player-identity/platform-specific-authentication/index.md)
## Related topics
- [Obter IDs do PlayFab a partir de IDs de conta do Battle Net](/pt-BR/services/playfab/api-references/rest/server/account-management/get-playfab-ids-from-battle-net-account-ids.md)
- [Configurar a autenticação do PlayFab com aplicativos UWP](/pt-BR/services/playfab/identity/player-identity/platform-specific-authentication/uwp.md)
- [Autenticação do PlayFab com a entrada com o Google Play Games no Unity](/pt-BR/services/playfab/identity/player-identity/platform-specific-authentication/google-sign-in-unity.md)
- [Fazer logon com Battle.net](/pt-BR/services/playfab/api-references/rest/client/authentication/login-with-battle-net.md)
- [Autenticação específica da plataforma](/pt-BR/services/playfab/identity/player-identity/platform-specific-authentication/index.md)