> ## Documentation Index
> Fetch the complete documentation index at: https://devdocs.xbox.com/llms.txt
> Use this file to discover all available pages before exploring further.
# 이중 인증
> 장치의 authenticator 앱을 페어링하여 로그인에 대한 이중 인증 확인을 활성화함으로써 PlayFab Game Manager 계정에 추가 보안 계층을 추가합니다.
이중 인증을 사용하면 인증 프로세스에 한 단계를 더 추가하여 PlayFab Game Manager 계정의 보안을 강화할 수 있습니다.
이는 인증 프로세스에 장치 요소를 추가함으로써 이루어지며, 이 목적을 위해 특별히 등록된 특정 장치를 소유한 경우에만 인증할 수 있습니다.
## 이중 인증 구성
장치에 **이중 인증** 앱을 설치합니다. 직접 애플리케이션을 검색하거나 다음 목록에서 플랫폼을 선택할 수 있습니다.
* [iPhone, iPad, iPod Touch](https://itunes.apple.com/us/app/google-authenticator/id388497605?mt=8)
* [Android 폰 또는 태블릿](https://play.google.com/store/apps/details?id=com.google.android.apps.authenticator2)
* [Windows 폰 또는 태블릿](https://www.windowsphone.com/store/app/authenticator/e7994dbc-2336-4950-91ba-ca22d653759b)
단계는 모든 플랫폼에서 기본적으로 유사합니다. 이 예제는 Android 기반 장치와 Google Authenticator 애플리케이션을 보여줍니다.
애플리케이션을 다운로드했으면:
* 열고 지시를 따릅니다.
* **Begin** 버튼 \*\*(1)\*\*을 선택합니다.
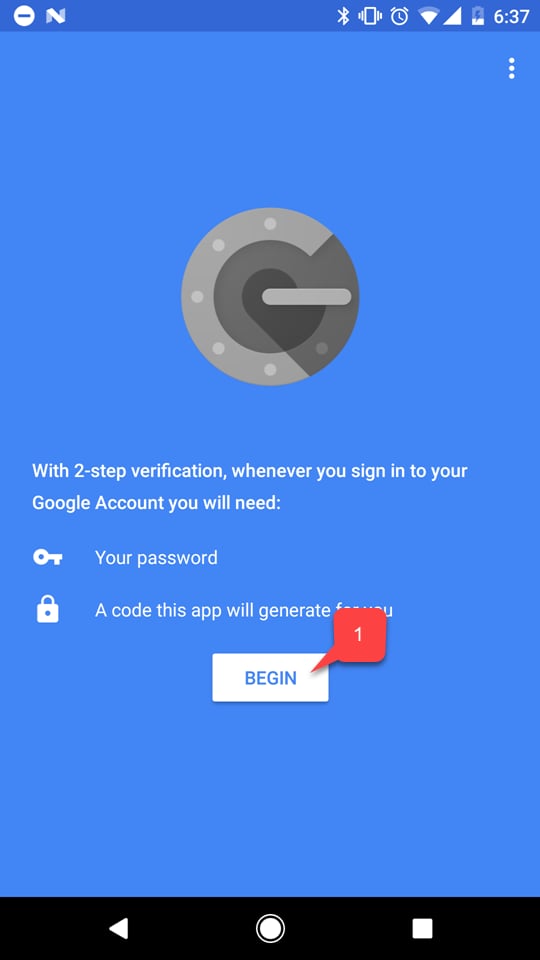 앱에 대한 튜토리얼이 있다면 그것을 따릅니다 **(1)**.
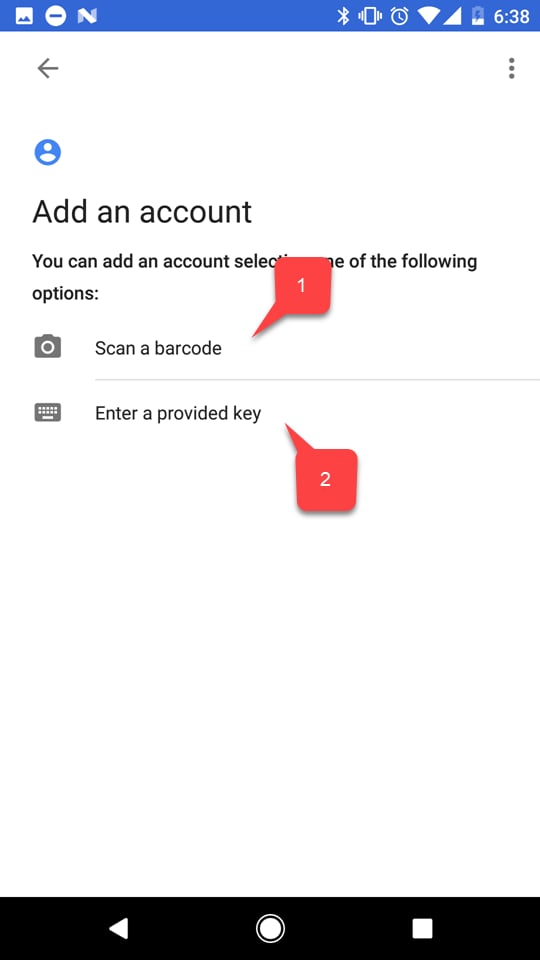
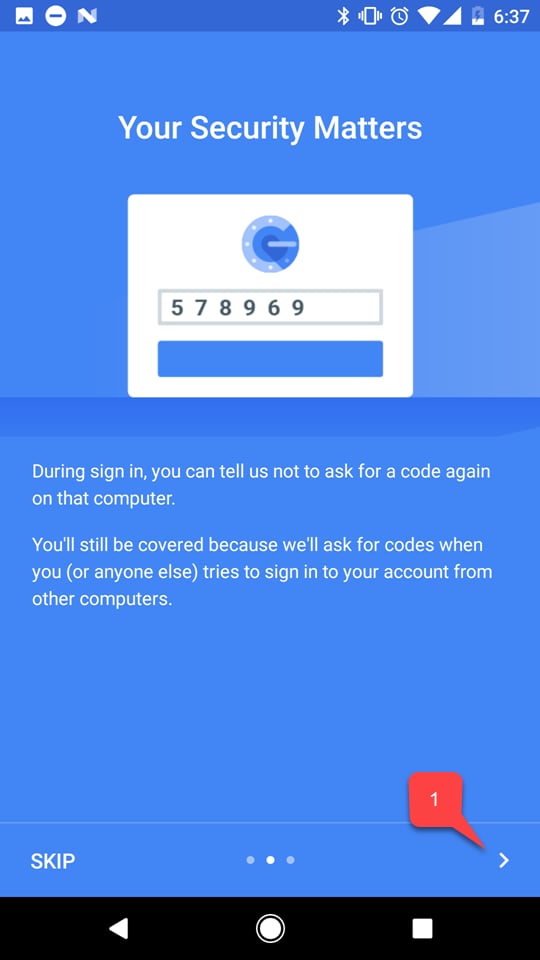 * 그런 다음 PlayFab 계정을 추가하는 두 가지 옵션 중 하나를 선택합니다.
* \*\*바코드 (1)\*\*를 스캔하거나
* **키**를 수동으로 입력합니다 **(2)**.
* 그런 다음 PlayFab 계정을 추가하는 두 가지 옵션 중 하나를 선택합니다.
* \*\*바코드 (1)\*\*를 스캔하거나
* **키**를 수동으로 입력합니다 **(2)**.
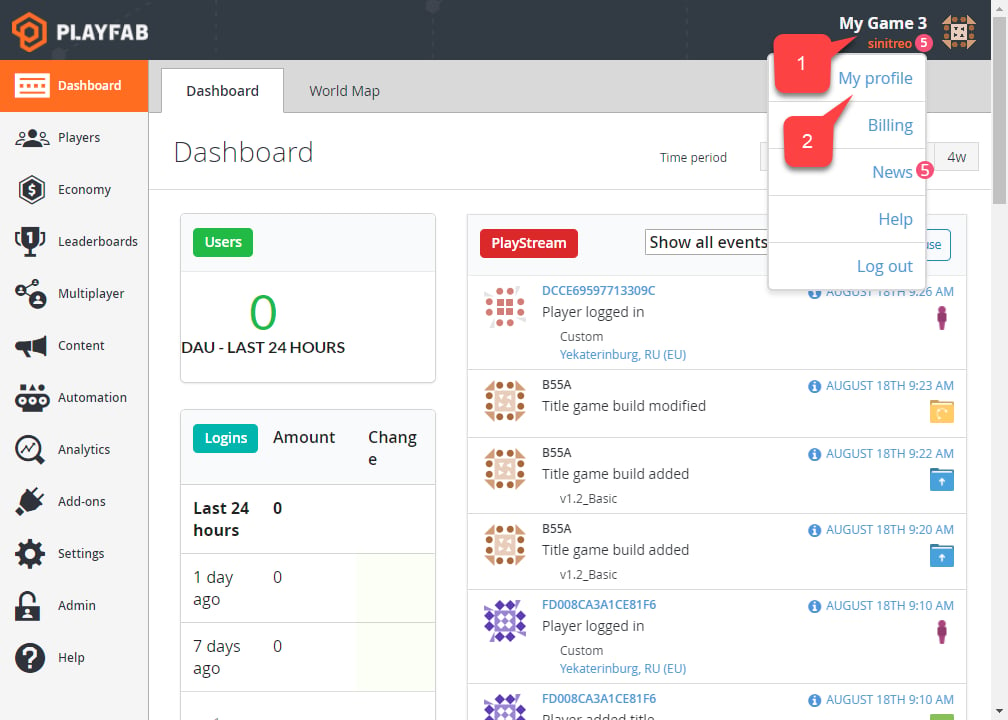
 어떤 옵션을 선택하든 PlayFab 웹 사이트로 이동하여 **Game Manager**로 이동합니다. **Dashboard** 탭에서:
* **Account** 패널 \*\*(1)\*\*을 선택합니다.
* 그런 다음 \*\*My Profile (2)\*\*을 선택합니다.
어떤 옵션을 선택하든 PlayFab 웹 사이트로 이동하여 **Game Manager**로 이동합니다. **Dashboard** 탭에서:
* **Account** 패널 \*\*(1)\*\*을 선택합니다.
* 그런 다음 \*\*My Profile (2)\*\*을 선택합니다.
 **Account** 설정이 열립니다.
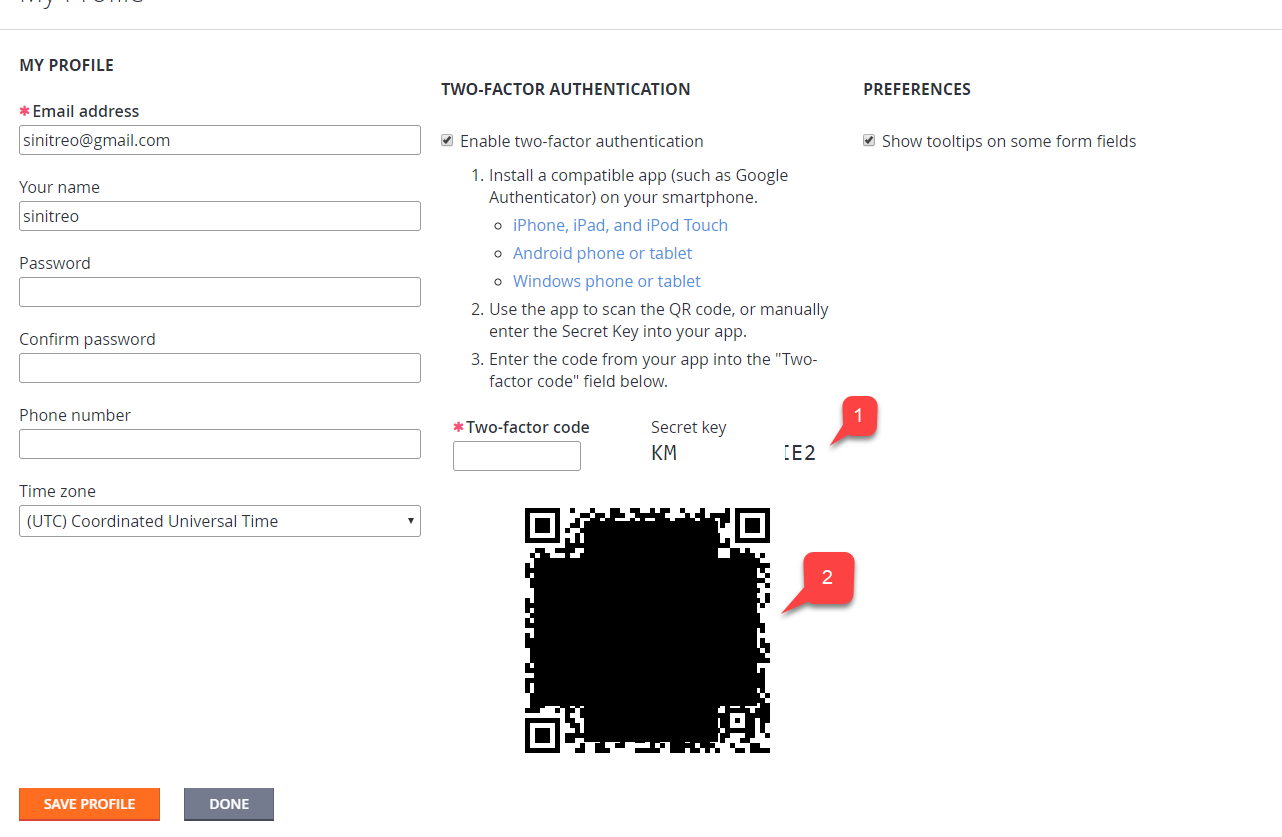
* **Enable two-factor authentication** 확인란이 선택되어 있는지 확인합니다.
* 선택한 옵션에 따라 **코드 (1)** 또는 \*\*바코드 (2)\*\*를 사용하여 장치의 애플리케이션을 사용해 새 계정을 추가합니다.
**Account** 설정이 열립니다.
* **Enable two-factor authentication** 확인란이 선택되어 있는지 확인합니다.
* 선택한 옵션에 따라 **코드 (1)** 또는 \*\*바코드 (2)\*\*를 사용하여 장치의 애플리케이션을 사용해 새 계정을 추가합니다.
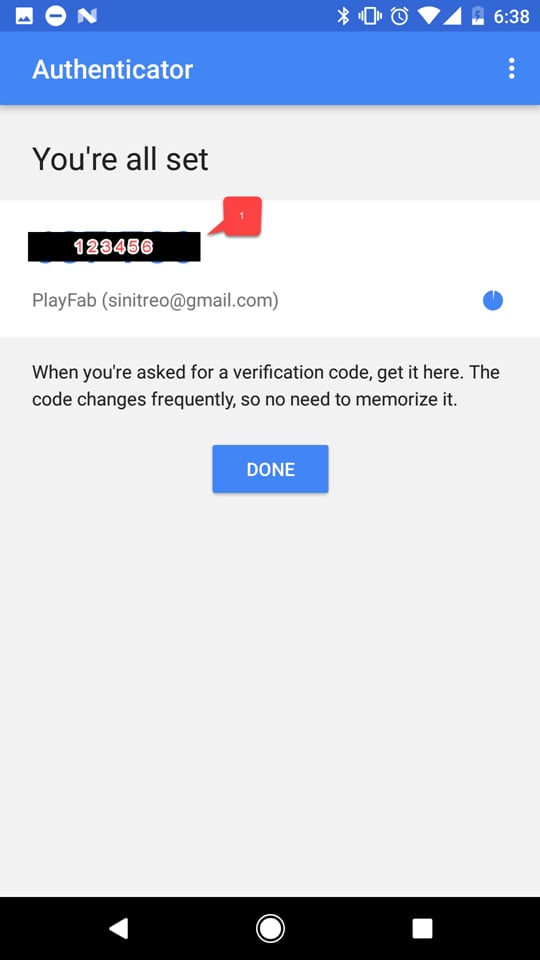
 이 작업을 완료하면 이중 인증 코드를 얻게 됩니다.
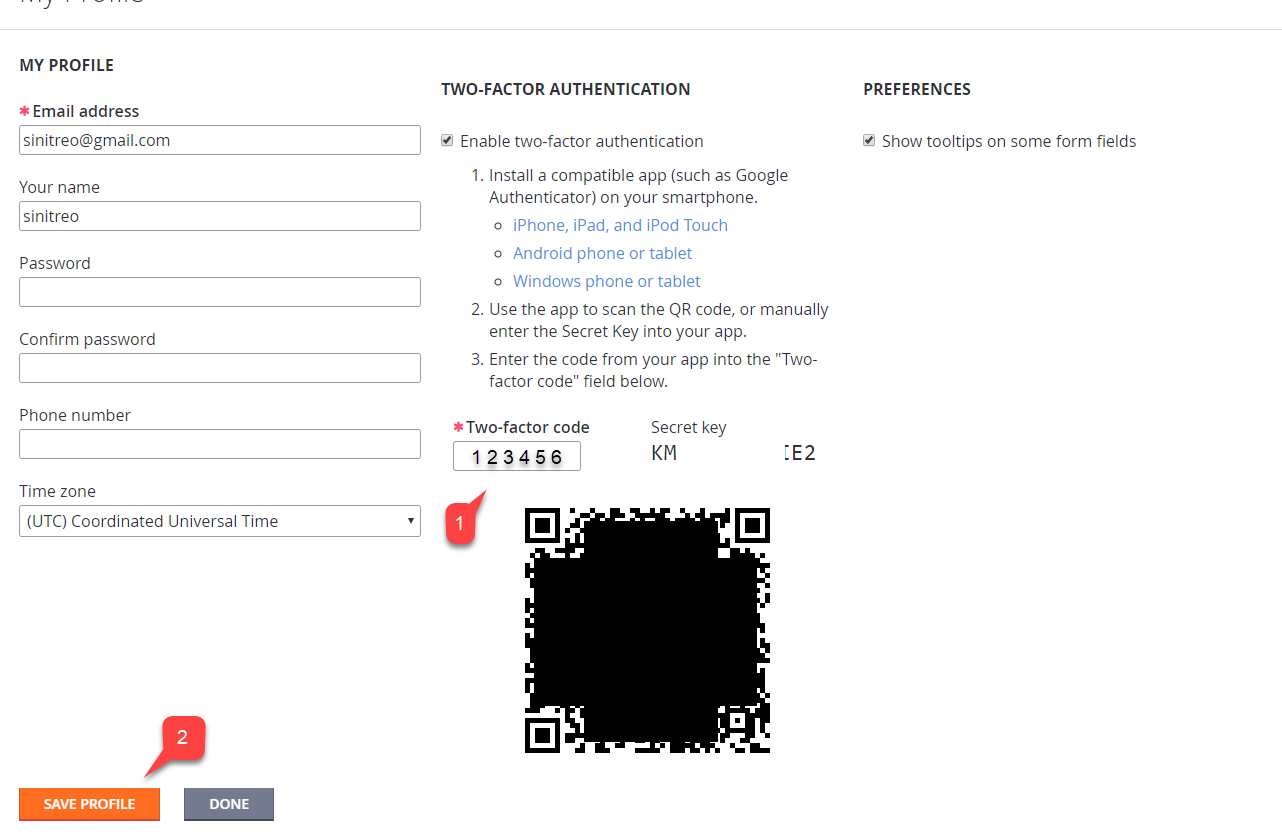
 PlayFab **Game Manager**의 **Profile** 설정으로 돌아갑니다.
* 받은 **코드** \*\*(1)\*\*를 입력합니다.
* **Save Profile** 버튼 \*\*(2)\*\*을 선택합니다.
PlayFab **Game Manager**의 **Profile** 설정으로 돌아갑니다.
* 받은 **코드** \*\*(1)\*\*를 입력합니다.
* **Save Profile** 버튼 \*\*(2)\*\*을 선택합니다.
 ## 테스트
PlayFab 계정에서 로그아웃하고 다시 로그인해 봅니다. 인증 프로세스의 첫 번째 단계는 정상적으로 보입니다(아래 제공된 예 참조).
## 테스트
PlayFab 계정에서 로그아웃하고 다시 로그인해 봅니다. 인증 프로세스의 첫 번째 단계는 정상적으로 보입니다(아래 제공된 예 참조).
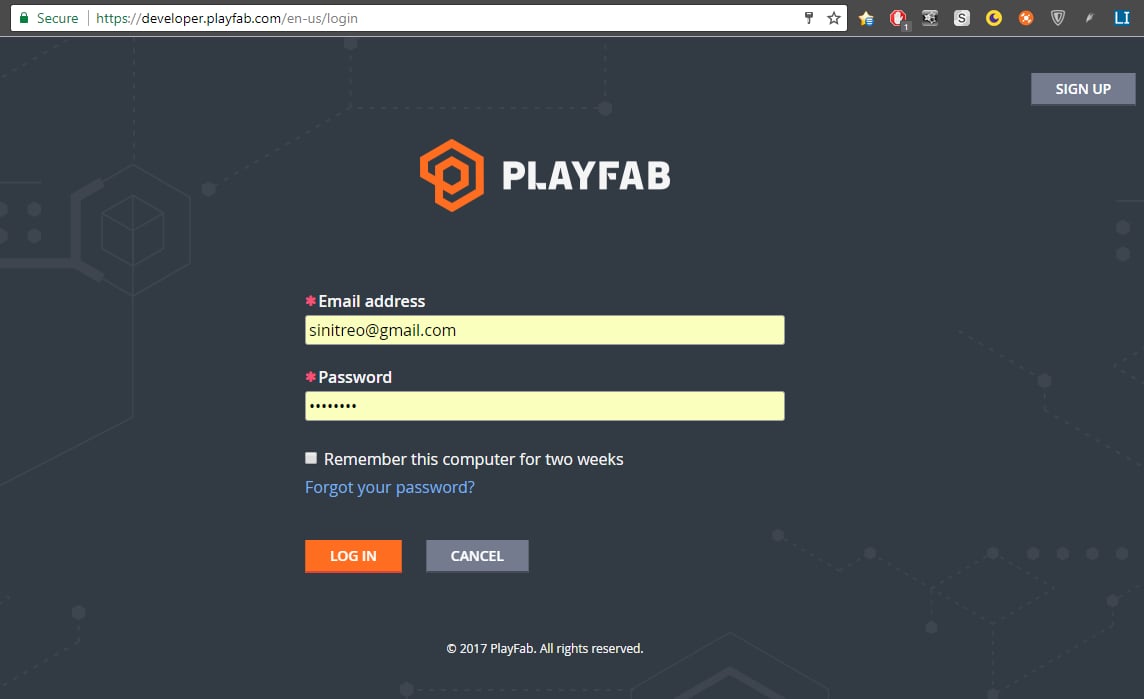 두 번째 단계에서는 이중 인증 코드를 사용해야 합니다. 코드는 언제든지 사용할 수 있으며 장치에 설치한 애플리케이션을 사용해 액세스할 수 있습니다.
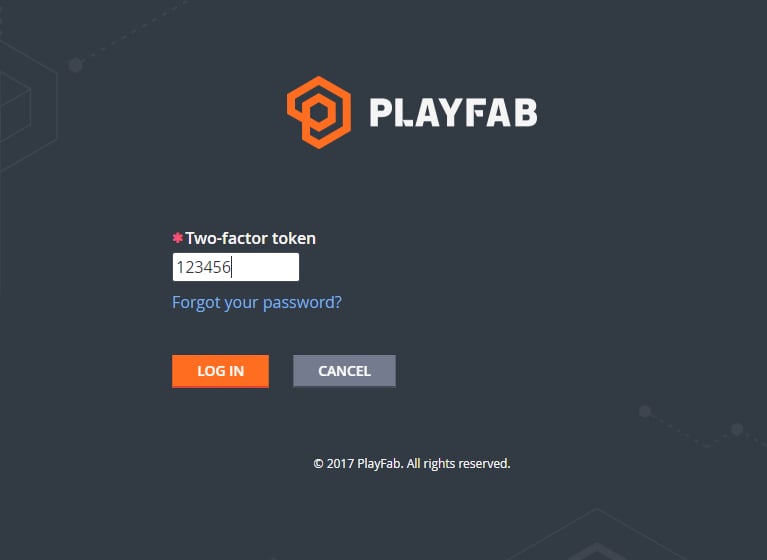 올바른 이중 인증 코드가 입력되면 로그인됩니다.
이것으로 PlayFab에 대한 이중 인증 설정이 완료됩니다.
## Related topics
- [인증 PC BVT 가이드](/ko/publishing/game-publishing/concepts/certification/certification-pc-bvt-guide.md)
- [Game Manager 참조](/ko/services/playfab/live-service-management/gamemanager/reference.md)
- [인증](/ko/services/playfab/identity/player-identity/authentication/index.md)
- [인증(Certify)](/ko/publishing/game-publishing/concepts/certification/certification-overview.md)
- [게임 인증](/ko/publishing/game-publishing/tutorial-xbox-managed/how-to-certify-a-game.md)
올바른 이중 인증 코드가 입력되면 로그인됩니다.
이것으로 PlayFab에 대한 이중 인증 설정이 완료됩니다.
## Related topics
- [인증 PC BVT 가이드](/ko/publishing/game-publishing/concepts/certification/certification-pc-bvt-guide.md)
- [Game Manager 참조](/ko/services/playfab/live-service-management/gamemanager/reference.md)
- [인증](/ko/services/playfab/identity/player-identity/authentication/index.md)
- [인증(Certify)](/ko/publishing/game-publishing/concepts/certification/certification-overview.md)
- [게임 인증](/ko/publishing/game-publishing/tutorial-xbox-managed/how-to-certify-a-game.md)