> ## Documentation Index
> Fetch the complete documentation index at: https://devdocs.xbox.com/llms.txt
> Use this file to discover all available pages before exploring further.
# CloudScript における ES6 機能
> 文字列補間、アロー関数、分割代入といった ECMAScript 6 の機能を使用し、strict モードでよりクリーンな PlayFab CloudScript ハンドラーを記述します。
CloudScript のランタイム環境は、モダンな ECMAScript 6 の機能のほとんどをサポートしています。これらの機能の大半は構文的な工夫ですが、CloudScript コードを改善し整理するために利用できます。
ES6 機能の完全な概要は、この [チート シート](https://devhints.io/es6) で確認できます。
このチュートリアルでは、CloudScript で利用できるいくつかのテクニックを紹介します。
一部の機能は **strict** モードを必要とします。CloudScript ファイルの最初の行に次のコードを配置してこのモードを有効化します: `use strict;`
## 文字列補間
プレイヤーへのメッセージを作成する際、複数行の補間文字列を使いたい場合があります。補間文字列を作成するには *バッククォート記号* を使用します。データは `${ variable }` 構文で文字列に直接挿入できます。
これにより、文字列連結を避け、コードの可読性を向上させることができます。
バッククォートで囲まれた文字列は逐語的で、複数行にわたることがあります。つまり、余分なスペースやタブが文字列に取り込まれるため *すべてのインデント* に注意する必要があります。
```javascript theme={null}
function sendPushNotification(playerName, prizeAmount, newLevel) {
let message = `Congratulations ${playerName}!
You have reached level ${newLevel}.
You get ${prizeAmount} coins for your efforts.`;
// Use message variable and send push notification
// ...
}
```
## 新しいメソッドとアロー関数
ES6 では、アロー演算子 `=>` を使用して関数を定義する *新しい* 構文が導入されました。以下のスニペットは、特定の演算子の使用方法の大まかな対応を示しています。
```javascript theme={null}
// The following snippets:
const add = (a,b) => a+b;
const add = (a,b) => {
return a+b;
}
// Both translate into something like
function add(a, b) {
return a+b;
}
```
この演算子を新しい `Array.findIndex` メソッドと組み合わせると、以下のような見た目のよい簡潔なコードで述語による検索が可能になります。
```javascript theme={null}
const players = [...]; // Suppose this is an array of Player Profiles
// Search by predicate: find item in 'players' that has 'DisplayName' set to 'Bob':
const bobIndex = players.findIndex(p => p.DisplayName === 'Bob');
```
## オブジェクトへの代入
`Object.assign` メソッドを使用すると、任意のオブジェクトを新しいプロパティやメソッドのセットで簡単に拡張できます。
このメソッドは多様な用途がありますが、特に handlers オブジェクトを拡張してハンドラーのグループを作成するのに便利です。
```javascript theme={null}
let TestHandlers = {
TestLeaderboards : (args, ctx) => {
// Test leaderboards code
},
TestPrizes : (args, ctx) => {
// Test prizes code
}
// ...
}
let ProductionHandlers = {
CleanUp : (args, ctx) => {
// System clean up code
},
GrantTournamentAccess : (args, ctx) => {
// Another useful production code
}
// ...
}
// Install both handler groups:
Object.assign(handlers, TestHandlers);
Object.assign(handlers, ProductionHandlers);
// Comment out the group to disable it but keep the relevant code
// Object.assign(handlers, SomeOtherHandlers);
```
これにより、ハンドラー グループを素早く有効化・無効化できるだけでなく、ハンドラーを処理して例外処理などの便利なコードでラップするポイントも得られます。
以下のコードは、前のスニペットに例外の自動ログ記録を追加したものです。例として問題をログに記録していますが (常に有用というわけではありません)、動作は好みに合わせて拡張できます。
```javascript theme={null}
// Handlers installer wraps the handler to catch error
function installHandlers(handlersObject) {
for (let property in handlersObject) {
handlersObject[property] = wrapHandler(handlersObject,property)
}
Object.assign(handlers, handlersObject);
}
// Utility
function wrapHandler(obj, key) {
if (obj.hasOwnProperty(key) && typeof obj[key] === 'function') {
let original = obj[key]; // Take the original function
return function() { // return a new function that
try { // Wraps the original invocation with try
return original.apply(null,arguments); // Do not forget to pass arguments
} catch (error) { // If error occurs
log.error(error); // We log it, but you may want to retry / do something else
throw error; // Rethrow to keep the original behaviour
}
}
} else { // If property is not a function, ignore it
return obj[key];
}
}
// Install handler groups:
installHandlers(TestHandlers);
installHandlers(ProductionHandlers);
```
## ゲッター
「ゲッター」を使うと、一般的な API 呼び出しをより構文的に洗練された形にカプセル化できます。次の **Title Data** の状態を考えてみてください。
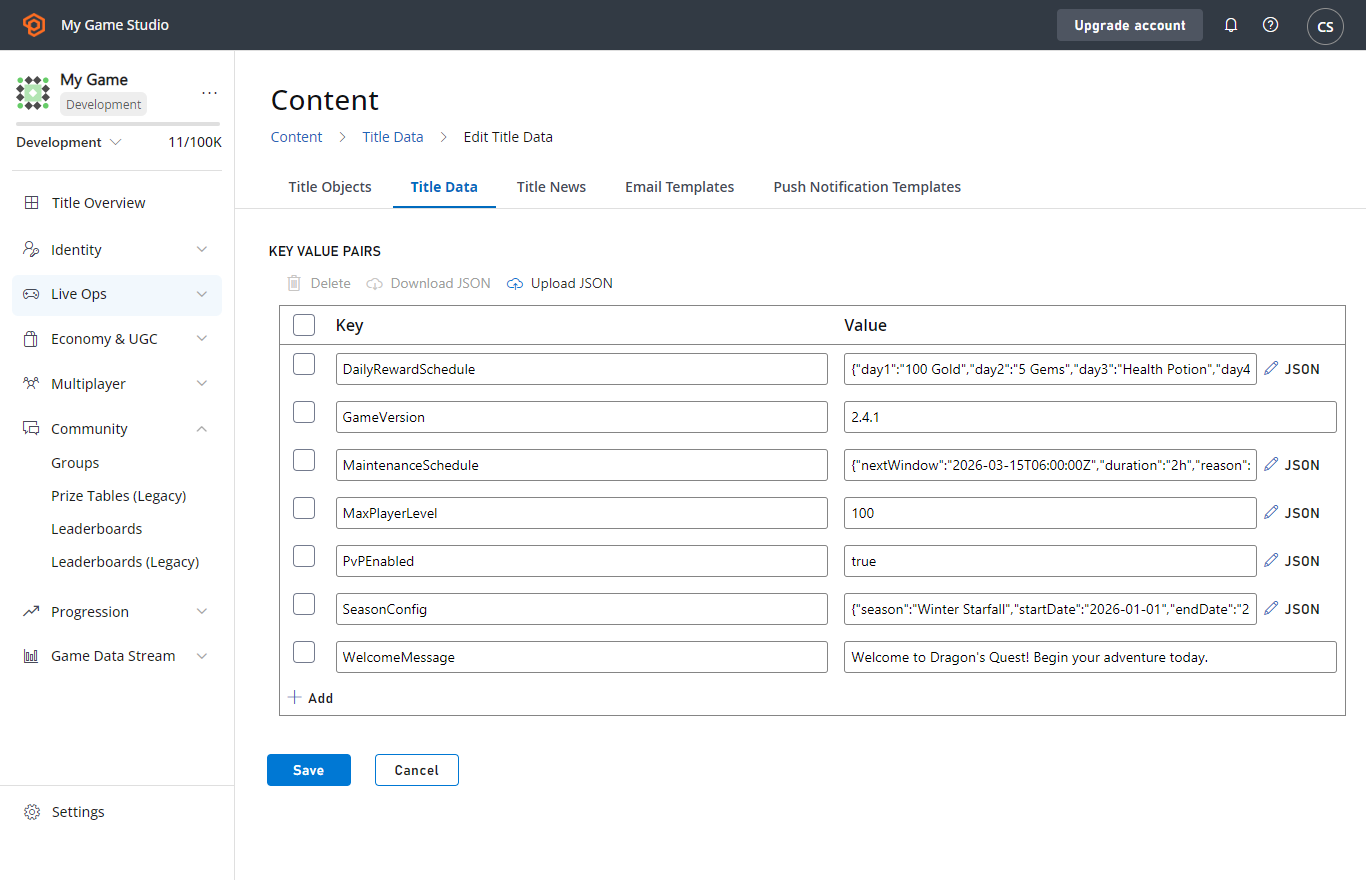 以下のスニペットは、`TitleData` から `Foo` と `Bar` のデータを取得し、非常にわかりやすい方法で利用する方法を示しています。
```javascript theme={null}
'use strict'
// Define
let App = {
get TitleData() {
// Please, consider limiting the query by defining certain keys that you need
return server.GetTitleData({}).Data;
},
}
// Use
handlers.TestFooBar = () => {
// Client code is clean and does not show the fact of calling any functions / making api request
var titleData = App.TitleData; // Note that this implementation makes an API call every time it's accessed
log.debug(titleData.Foo);
log.debug(titleData.Bar);
}
```
## Related topics
- [CloudScript](/ja-jp/services/playfab/live-service-management/service-gateway/automation/cloudscript/index.md)
- [XBOX Game Development Kit のコンソール機能](/ja-jp/build/console-features/index.md)
- [XBOX および PC タイトル向けの共通 GDK 機能](/ja-jp/build/core-features/common/index.md)
- [GDK と XDK における Web リクエストの相違点](/ja-jp/build/console-features/networking/xdk-migration/xdk-migration-web-requests-networking.md)
- [カスタム CloudScript の作成](/ja-jp/services/playfab/live-service-management/service-gateway/automation/cloudscript/writing-custom-cloudscript.md)
以下のスニペットは、`TitleData` から `Foo` と `Bar` のデータを取得し、非常にわかりやすい方法で利用する方法を示しています。
```javascript theme={null}
'use strict'
// Define
let App = {
get TitleData() {
// Please, consider limiting the query by defining certain keys that you need
return server.GetTitleData({}).Data;
},
}
// Use
handlers.TestFooBar = () => {
// Client code is clean and does not show the fact of calling any functions / making api request
var titleData = App.TitleData; // Note that this implementation makes an API call every time it's accessed
log.debug(titleData.Foo);
log.debug(titleData.Bar);
}
```
## Related topics
- [CloudScript](/ja-jp/services/playfab/live-service-management/service-gateway/automation/cloudscript/index.md)
- [XBOX Game Development Kit のコンソール機能](/ja-jp/build/console-features/index.md)
- [XBOX および PC タイトル向けの共通 GDK 機能](/ja-jp/build/core-features/common/index.md)
- [GDK と XDK における Web リクエストの相違点](/ja-jp/build/console-features/networking/xdk-migration/xdk-migration-web-requests-networking.md)
- [カスタム CloudScript の作成](/ja-jp/services/playfab/live-service-management/service-gateway/automation/cloudscript/writing-custom-cloudscript.md)