> ## Documentation Index
> Fetch the complete documentation index at: https://devdocs.xbox.com/llms.txt
> Use this file to discover all available pages before exploring further.

# PlayFab で Sign In with Battle.net をセットアップする

> Blizzard アプリのセットアップ、OAuth フロー、プレイヤー サインイン統合を含め、HTML5 と JavaScript を使用して Battle.net で PlayFab 認証を構成します。

# Battle.net で PlayFab 認証をセットアップする

このチュートリアルでは、Battle.net と HTML5/JavaScript を使用して PlayFab 認証をセットアップするプロセスを説明します。

## 要件

必要なもの:

* テスト用の [Battle.net アカウント](https://developer.battle.net)。
* 登録済みの [PlayFab](https://developer.playfab.com/) タイトル。
* [ログインの基本とベスト プラクティス](/services/playfab/identity/player-identity/login/login-basics-best-practices) に精通していること。
* 静的 HTML ファイルとして機能する、有効なドメイン名を持つサーバー。セットアップ方法については、[テスト用の HTTP サーバーの実行](/services/playfab/identity/player-identity/platform-specific-authentication/running-an-http-server-for-testing) チュートリアルを参照してください。

## サーバーとドメイン

このガイドに従うには、有効なドメインを持つサーバーが必要です。登録済みドメインとリモート Web サーバーがまだない場合は、[テスト用の HTTP サーバーの実行](/services/playfab/identity/player-identity/platform-specific-authentication/running-an-http-server-for-testing) チュートリアルに従って、有効なドメイン名でローカル Web サーバーを実行する方法を確認してください。

このガイド全体を通じて、ドメインは [http://playfab.example](http://playfab.example) であると想定しています。

## Battle.net タイトル クライアント ID を取得する

まず、[Battle.net](https://developer.battle.net) に移動し、Battle.net 開発者アカウントを作成します。アカウントを作成したら、タイトルを作成してクライアント ID を割り当てる必要があります。

## Battle.net アドオンをインストールする

タイトルの PlayFab **Game Manager** ページに移動します。

1. メニューの **Add-ons** に移動します。
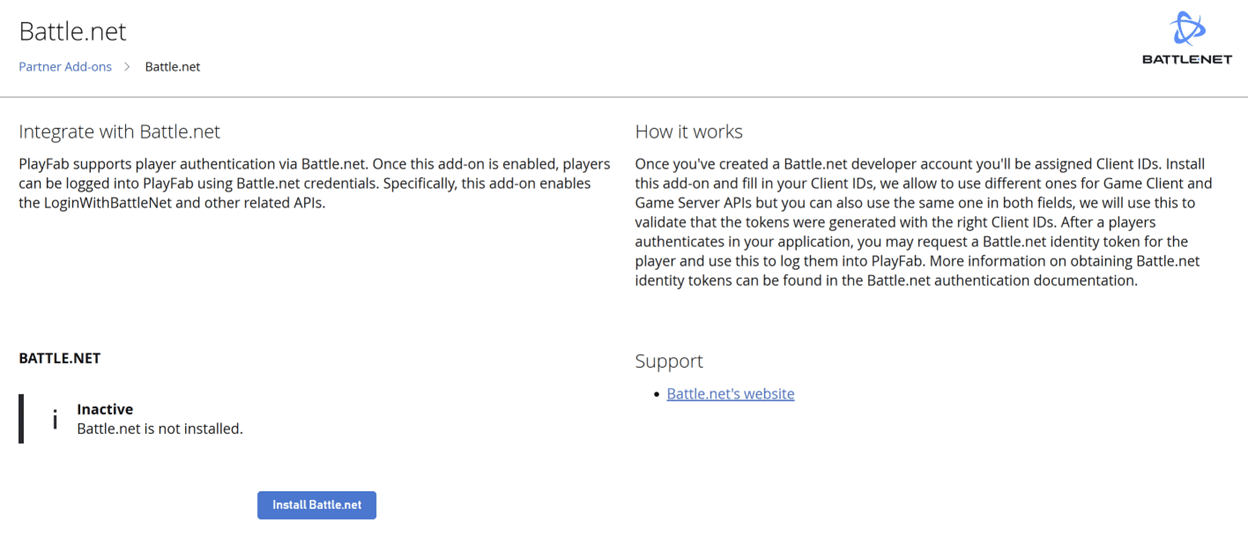
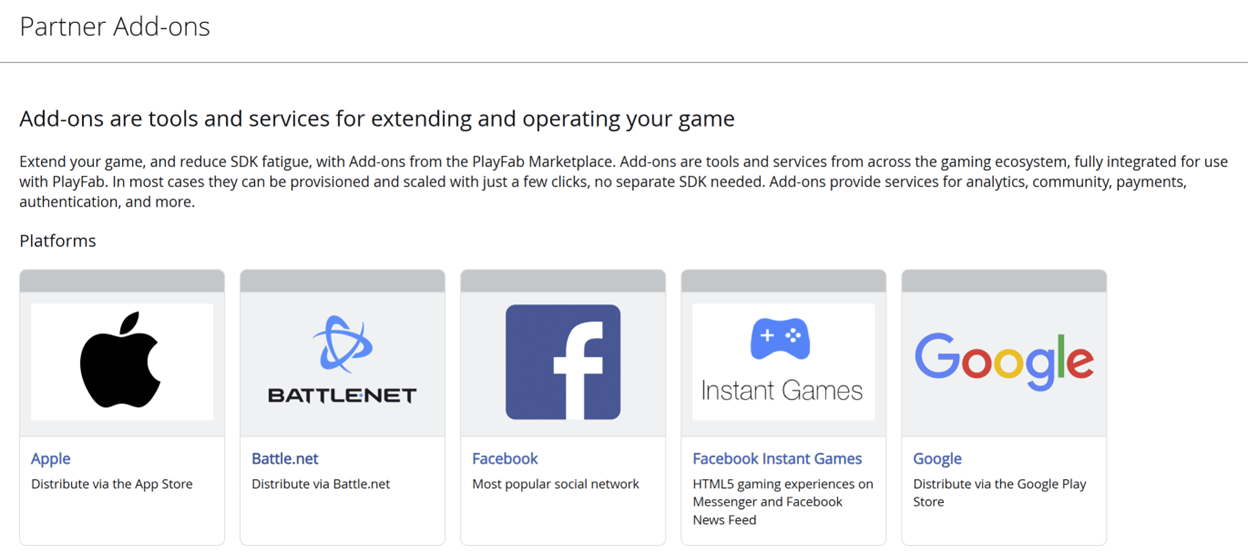
2. **Battle.net アドオン** のアイコン/リンクを見つけて開きます。

<img src="https://mintcdn.com/microsoft-4404708b/mLCHf0iQv3VidfBe/images/playfab/identity/player-identity/platform-specific-authentication/tutorials/battlenet/battlenet-partner-add-on-page.png?fit=max&auto=format&n=mLCHf0iQv3VidfBe&q=85&s=de4613079755faeb998407ac4158da89" alt="PlayFab Game Manager アドオン" width="1248" height="555" data-path="images/playfab/identity/player-identity/platform-specific-authentication/tutorials/battlenet/battlenet-partner-add-on-page.png" />

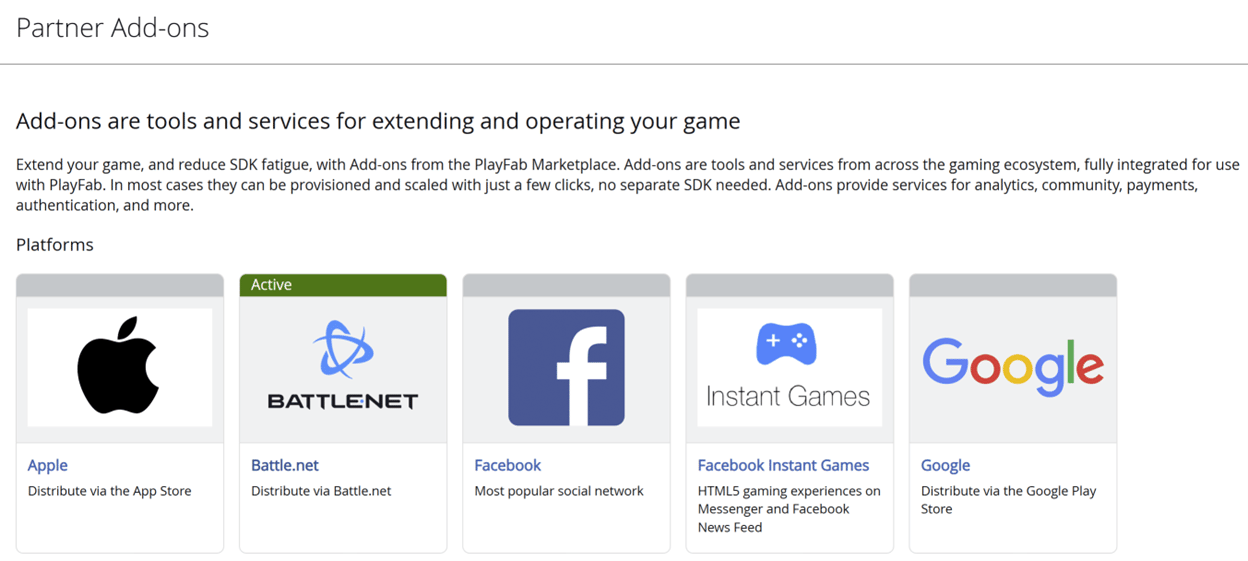
3. **Install Battle.net** を選択します。

<img src="https://mintcdn.com/microsoft-4404708b/mLCHf0iQv3VidfBe/images/playfab/identity/player-identity/platform-specific-authentication/tutorials/battlenet/battlenet-add-on.png?fit=max&auto=format&n=mLCHf0iQv3VidfBe&q=85&s=f9828e789c2285bbde0d456d7f307102" alt="PlayFab Game Manager Battle.net アドオン" width="1248" height="545" data-path="images/playfab/identity/player-identity/platform-specific-authentication/tutorials/battlenet/battlenet-add-on.png" />

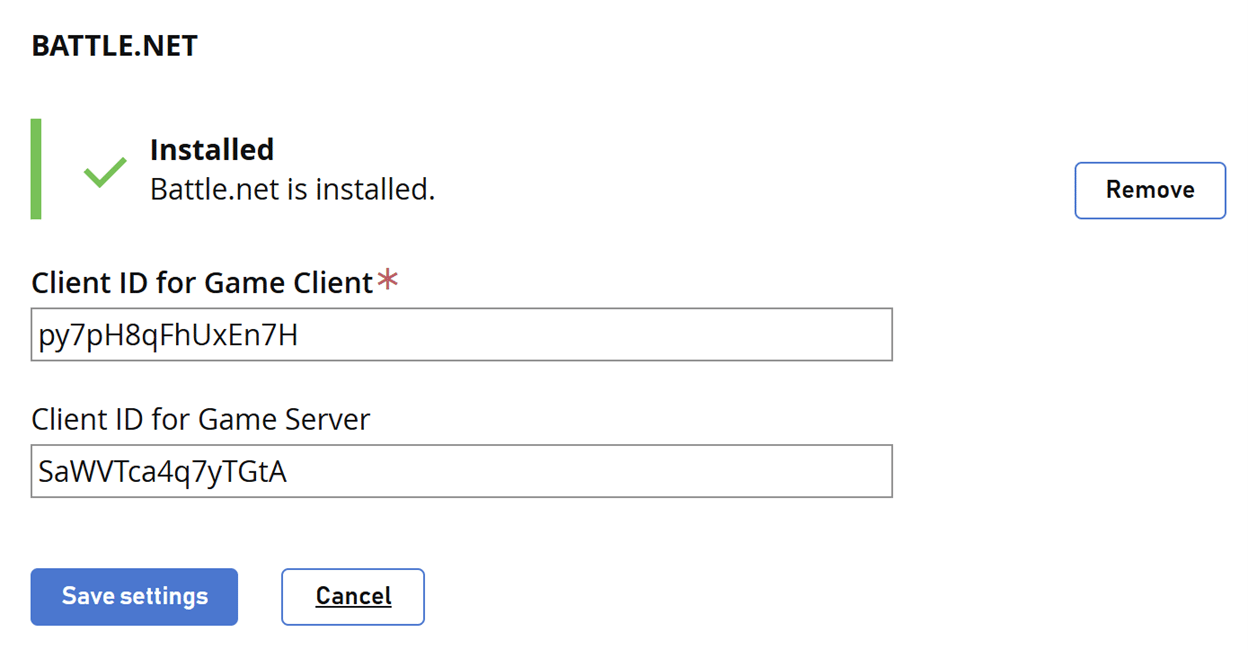
4. **Client ID for Game Client** を入力します。
5. 必要に応じて **Client ID for Game Server** も入力します。
6. 次に **Save settings** ボタンを選択します。
<img src="https://mintcdn.com/microsoft-4404708b/mLCHf0iQv3VidfBe/images/playfab/identity/player-identity/platform-specific-authentication/tutorials/battlenet/battlenet-validated.png?fit=max&auto=format&n=mLCHf0iQv3VidfBe&q=85&s=1fe7a49156f04e31ae204c6f7ce6a9ef" alt="PlayFab Game Manager Battle.net アドオン クライアント ID" width="1248" height="650" data-path="images/playfab/identity/player-identity/platform-specific-authentication/tutorials/battlenet/battlenet-validated.png" />

アドオン ページで Battle.net がアクティブとして表示されます。

<img src="https://mintcdn.com/microsoft-4404708b/mLCHf0iQv3VidfBe/images/playfab/identity/player-identity/platform-specific-authentication/tutorials/battlenet/battlenet-partner-add-on-page-active.png?fit=max&auto=format&n=mLCHf0iQv3VidfBe&q=85&s=42e07d365b7f93b5e3014039e91ac91b" alt="PlayFab Game Manager Battle.net アドオン アクティブ" width="1248" height="561" data-path="images/playfab/identity/player-identity/platform-specific-authentication/tutorials/battlenet/battlenet-partner-add-on-page-active.png" />

## アクセス トークンを使用したテスト

この例では、従来のアクセス トークン方式を使用して LoginWithBattleNet API をテストする方法を示します。以下に提供されている HTML コードをテスト用に使用してください。

<Note>
  `YOUR_CLIENT_ID`、`YOUR_PLAYFAB_TITLE_ID`、`YOUR_BNET_TITLE_NAME`、および `YOUR_CLIENT_SECRET` は必ずご自身の値に置き換えてください。
</Note>

```html theme={null}
<!DOCTYPE html>
<html>
<head>
    <script src="https://cdn.jsdelivr.net/npm/axios/dist/axios.min.js"></script>
</head>
<body>
    <h2>Battle.net SSO Token Demo (Manual Flow)</h2>
    <ol>
        <li>
            <button onclick="openBattleNetLogin()">Log in to Battle.net</button>
        </li>
        <li>
            After login, copy the <b>ST</b> value from the URL (e.g. <code>ST=US-xxxx-xxxx) and paste it here:
            

            <input type="text" id="ssoToken" size="80" placeholder="Paste SSO token (ST=...)" />
        </li>
        <li>
            Click "Exchange SSO Token for id_token"

            <button onclick="exchangeSSOToken()">Exchange SSO Token for id_token</button>
            

            <label>id_token:</label>

            <input type="text" id="idToken" size="80" placeholder="id_token will appear here" />
        </li>
        <li>
            Click "Login to PlayFab" to complete the flow

            <button onclick="loginWithPlayFab()">Login to PlayFab</button>
        </li>
    </ol>
    

    <div id="log"></div>
    <script>
        // Demo configuration variables
        const BNET_TITLE_NAME = 'YOUR_BNET_TITLE_NAME';
        const PLAYFAB_TITLE_ID = 'YOUR_PLAYFAB_TITLE_ID';
        const CLIENT_ID = 'YOUR_CLIENT_ID';
        const CLIENT_SECRET = 'YOUR_CLIENT_SECRET';

        function openBattleNetLogin() {
            const url = `http://account.battle.net/login/en/?app=${encodeURIComponent(BNET_TITLE_NAME)}`;
            window.open(url, '_blank');
        }

        function exchangeSSOToken() {
            const ssoToken = document.getElementById('ssoToken').value.trim();
            if (!ssoToken) {
                logLine("Please enter the SSO token.");
                return;
            }
            logLine("Exchanging SSO token for id_token...");
            // Prepare the request for the token exchange
            const params = new URLSearchParams();
            params.append('scope', 'account.basic openid');
            params.append('grant_type', 'urn:ietf:params:oauth:grant-type:token-exchange');
            params.append('subject_token', ssoToken);
            params.append('subject_token_type', 'urn:blizzard:params:oauth:token-type:sso');
            params.append('requested_token_type', 'urn:ietf:params:oauth:token-type:jwt');

            // Basic Auth header
            const authHeader = 'Basic ' + btoa(CLIENT_ID + ':' + CLIENT_SECRET);

            fetch('https://oauth.battle.net/token', {
                method: 'POST',
                headers: {
                    'Content-Type': 'application/x-www-form-urlencoded',
                    'Authorization': authHeader
                },
                body: params
            })
            .then(res => res.json())
            .then(data => {
                if (data.id_token) {
                    document.getElementById('idToken').value = data.id_token;
                    logLine("id_token received.");
                } else {
                    logLine("Error: " + JSON.stringify(data));
                }
            })
            .catch(err => logLine("Error: " + err));
        }

        function loginWithPlayFab() {
            const idToken = document.getElementById('idToken').value.trim();
            if (!idToken) {
                logLine("Please exchange for an id_token first.");
                return;
            }
            logLine("Logging in to PlayFab...");
            axios.post(
                `https://${PLAYFAB_TITLE_ID}.playfabapi.com/Client/LoginWithBattleNet`,
                {
                    TitleId: PLAYFAB_TITLE_ID,
                    IdentityToken: idToken,
                    CreateAccount: true
                },
                {
                    headers: {
                        'Content-Type': 'application/json'
                    }
                }
            )
            .then(response => logLine("Response: " + JSON.stringify(response.data)))
            .catch(error => logLine("Error: " + JSON.stringify(error.response ? error.response.data : error)));
        }

        function logLine(message) {
            const logDiv = document.getElementById('log');
            logDiv.innerHTML += message + "
";
        }
    </script>
</body>
</html></code>
```

Web サーバーを使用して HTML ページを開くことを忘れないでください。また、指定した URL を使用してこのページにアクセスするようにしてください。

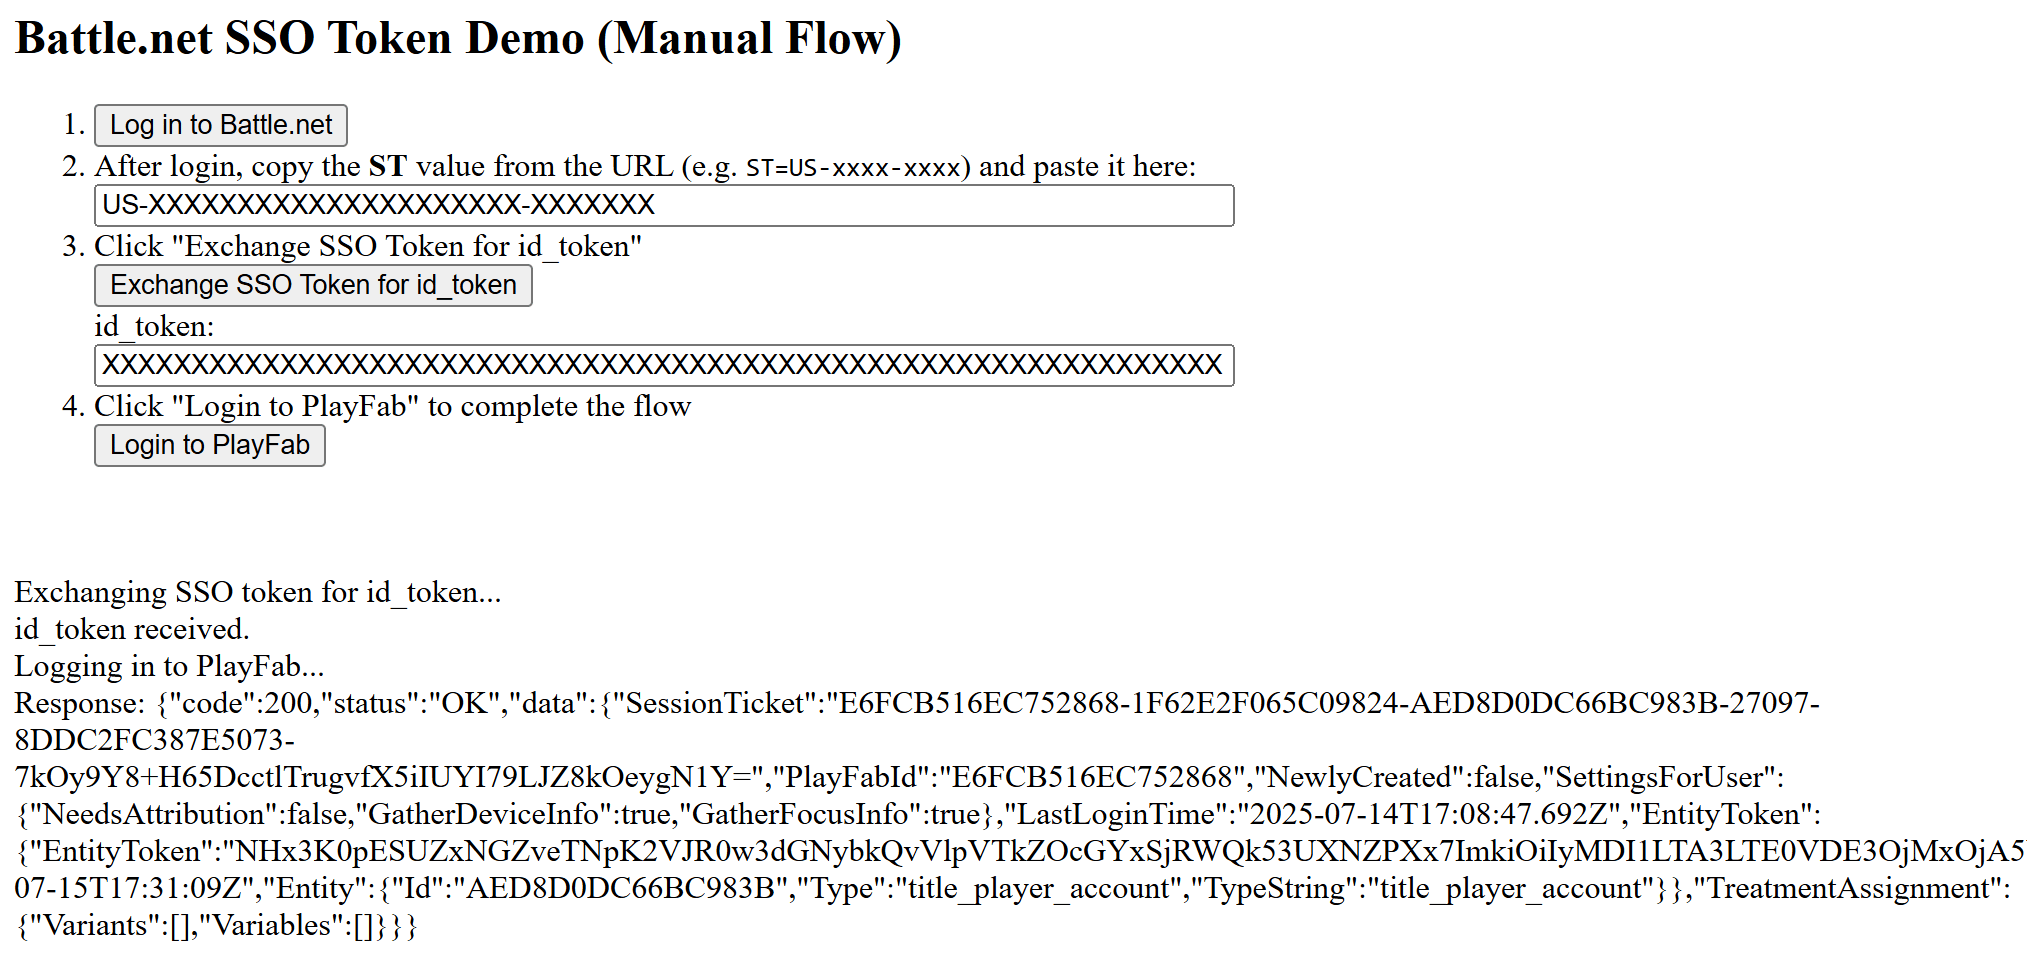
1. ページが開いたら、**Log in to Battle.net** を選択します。
2. サインイン後、URL から **ST** 値をコピーし (例: ST=US-xxxx-xxxx)、ダイアログ ボックスに入力します。
3. **Exchange SSO Token for id\_token** を選択し、値をダイアログ ボックスにコピーします。
4. **Login to PlayFab** を選択して、サインイン フローを完了します。
5. 完了すると、スクリプトが PlayFab 側で認証を試み、結果を表示します。

<img src="https://mintcdn.com/microsoft-4404708b/mLCHf0iQv3VidfBe/images/playfab/identity/player-identity/platform-specific-authentication/tutorials/battlenet/battlenet-token-demo.png?fit=max&auto=format&n=mLCHf0iQv3VidfBe&q=85&s=6436d543b2543a12c1842bb36ad4021d" alt="Battle.net Auth Example" width="2027" height="961" data-path="images/playfab/identity/player-identity/platform-specific-authentication/tutorials/battlenet/battlenet-token-demo.png" />


## Related topics

- [PlayFab で Sign In with Apple をセットアップする](/ja-jp/services/playfab/identity/player-identity/platform-specific-authentication/apple-open-id/overview.md)
- [Partner Center で XBOX 製品をセットアップする](/ja-jp/publishing/game-publishing/publishing-processes/managed-creators/publishing-processes-product-onboarding-and-configuration.md)
- [クラフト ゲーム パート 1 - セットアップ](/ja-jp/services/playfab/economy-monetization/economy-v2/tutorials/craftingGame/crafting-game-environment.md)
- [Partner Center で組織をセットアップする](/ja-jp/home/onboarding-access/setup-organization.md)
- [ストリーミング用に XBOX 開発キットをセットアップする](/ja-jp/build/core-features/common/game-streaming/game-streaming-setup-xbox-developer-kit.md)