> ## Documentation Index
> Fetch the complete documentation index at: https://devdocs.xbox.com/llms.txt
> Use this file to discover all available pages before exploring further.
# Configurer la connexion avec Battle.net pour PlayFab
> Configurez l'authentification PlayFab avec Battle.net à l'aide de HTML5 et JavaScript, notamment la configuration de l'application Blizzard, le flux OAuth et l'intégration de la connexion des joueurs.
# Configurer l'authentification PlayFab avec Battle.net
Ce tutoriel vous guide tout au long du processus de configuration de l'authentification PlayFab à l'aide de Battle.net et HTML5/JavaScript.
## Configuration requise
Vous avez besoin des éléments suivants :
* Un [compte Battle.net](https://developer.battle.net) pour les tests.
* Un titre [PlayFab](https://developer.playfab.com/) inscrit.
* Une connaissance des [notions de base et bonnes pratiques de connexion](/fr/services/playfab/identity/player-identity/login/login-basics-best-practices).
* Un serveur doté d'un nom de domaine valide pour servir un fichier HTML statique. Consultez le tutoriel [Exécution d'un serveur HTTP pour les tests](/fr/services/playfab/identity/player-identity/platform-specific-authentication/running-an-http-server-for-testing) pour savoir comment en configurer un.
## Serveur et domaine
Pour suivre ce guide, vous avez besoin d'un serveur doté d'un domaine valide. Si vous ne disposez pas encore d'un domaine inscrit et d'un serveur web distant, suivez notre tutoriel [Exécution d'un serveur HTTP pour les tests](/fr/services/playfab/identity/player-identity/platform-specific-authentication/running-an-http-server-for-testing) pour savoir comment configurer un serveur web local avec un nom de domaine valide.
Tout au long de ce guide, nous supposons que votre domaine est [http://playfab.example](http://playfab.example).
## Récupérer le Client ID du titre Battle.net
Commencez par accéder à [Battle.net](https://developer.battle.net) et créez un compte de développeur Battle.net. Une fois votre compte créé, vous devez créer un titre et vous voir attribuer des Client IDs.
## Installer le module complémentaire Battle.net
Accédez à la page **Game Manager** de PlayFab pour votre titre.
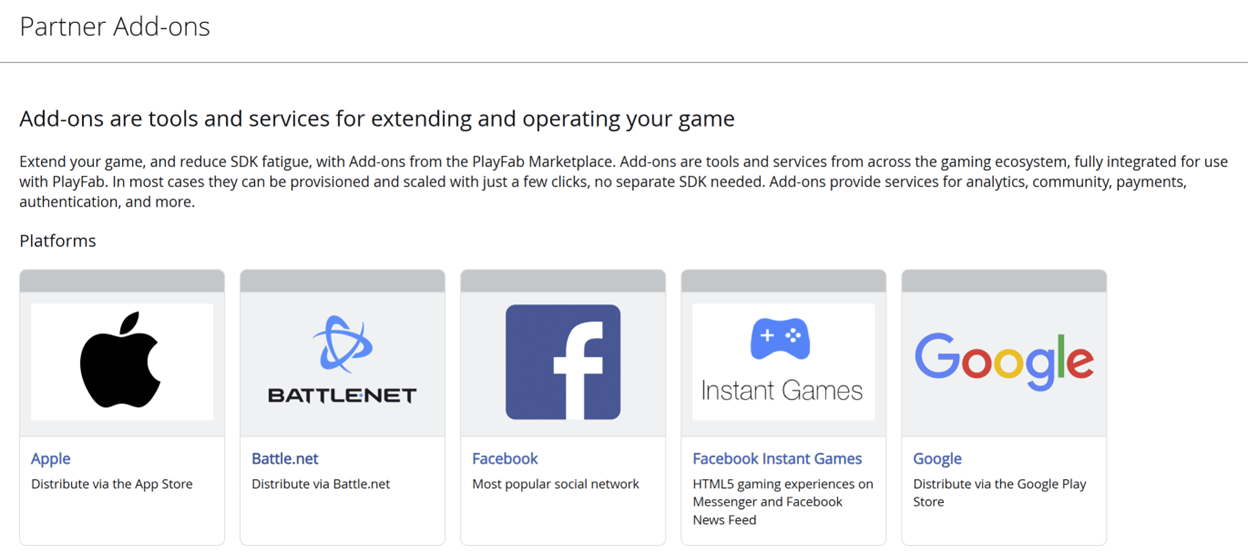
1. Accédez à **Add-ons** dans le menu.
2. Recherchez et ouvrez l'icône/le lien **Battle.net Add-on**.
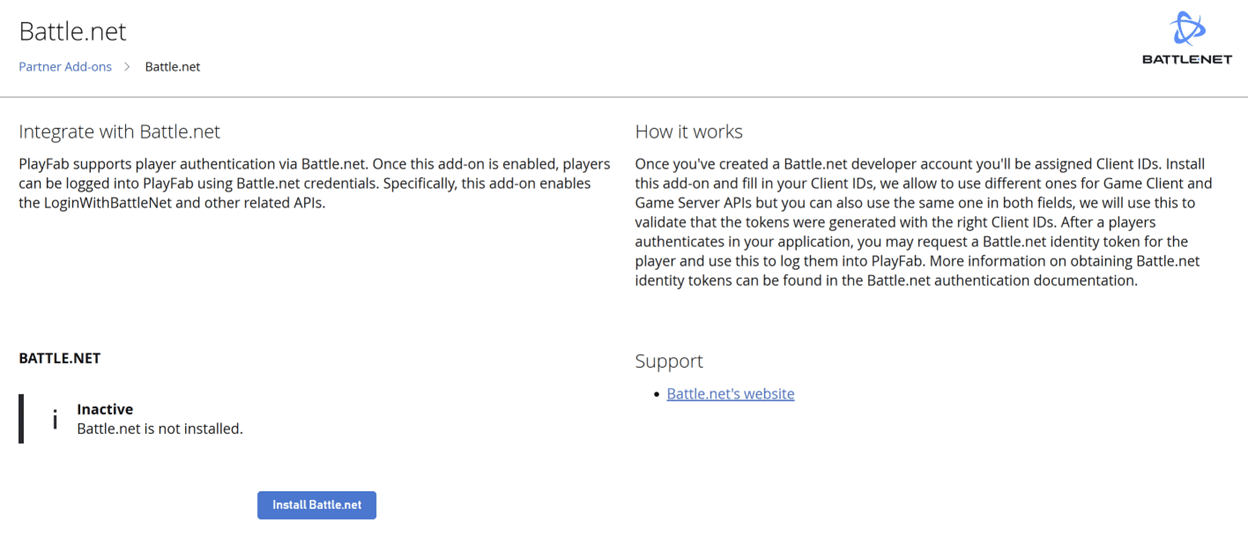
3. Sélectionnez **Install Battle.net**.
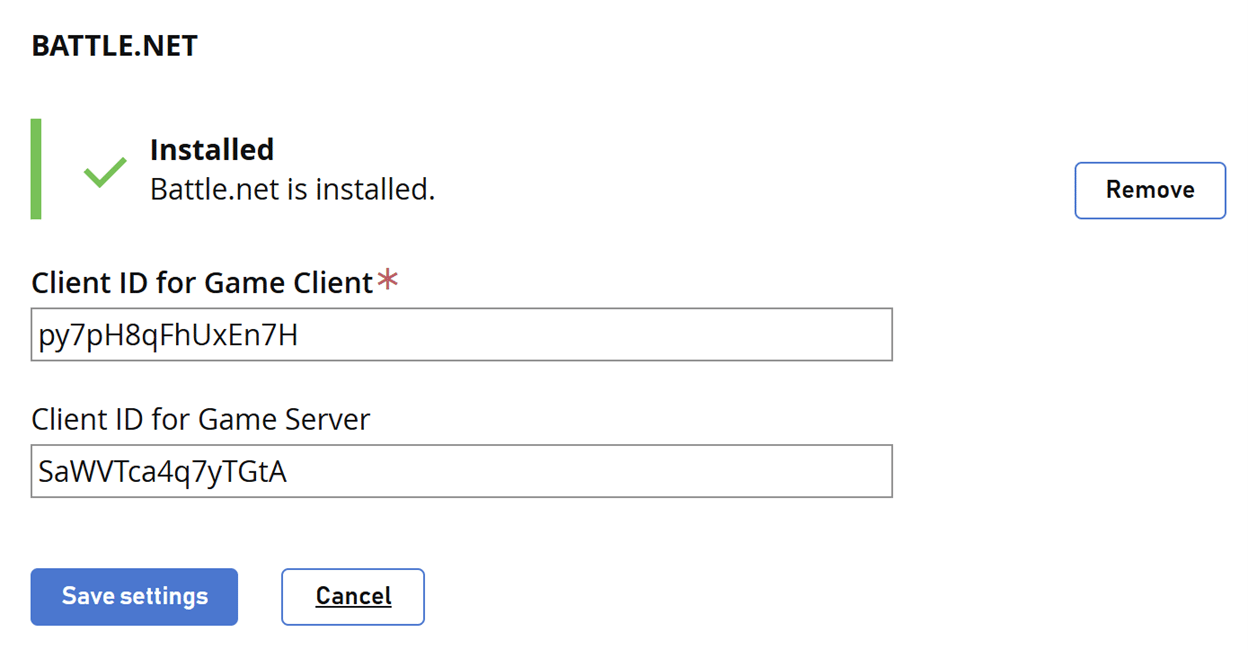
4. Renseignez le champ **Client ID for Game Client**.
5. Si vous le souhaitez, renseignez le champ **Client ID for Game Server**.
6. Sélectionnez ensuite le bouton **Save settings**.
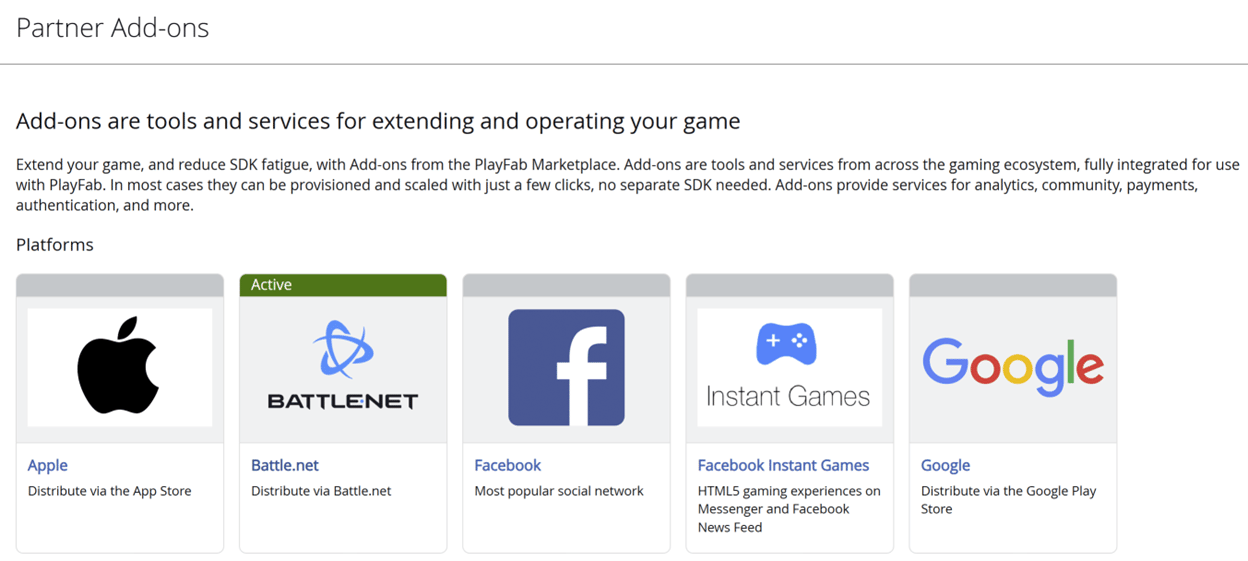
Battle.net apparaît comme actif dans la page des modules complémentaires.
## Test à l'aide d'un jeton d'accès
Dans cet exemple, nous montrons comment tester l'API LoginWithBattleNet à l'aide de l'approche classique par jeton d'accès. Utilisez le code HTML fourni pour vos tests.
*Veillez* à remplacer `YOUR_CLIENT_ID`, `YOUR_PLAYFAB_TITLE_ID`, `YOUR_BNET_TITLE_NAME` et `YOUR_CLIENT_SECRET` par vos propres valeurs.
```html theme={null}
Battle.net SSO Token Demo (Manual Flow)
After login, copy the ST value from the URL (e.g. ST=US-xxxx-xxxx) and paste it here:
Click "Exchange SSO Token for id_token"
Click "Login to PlayFab" to complete the flow
```
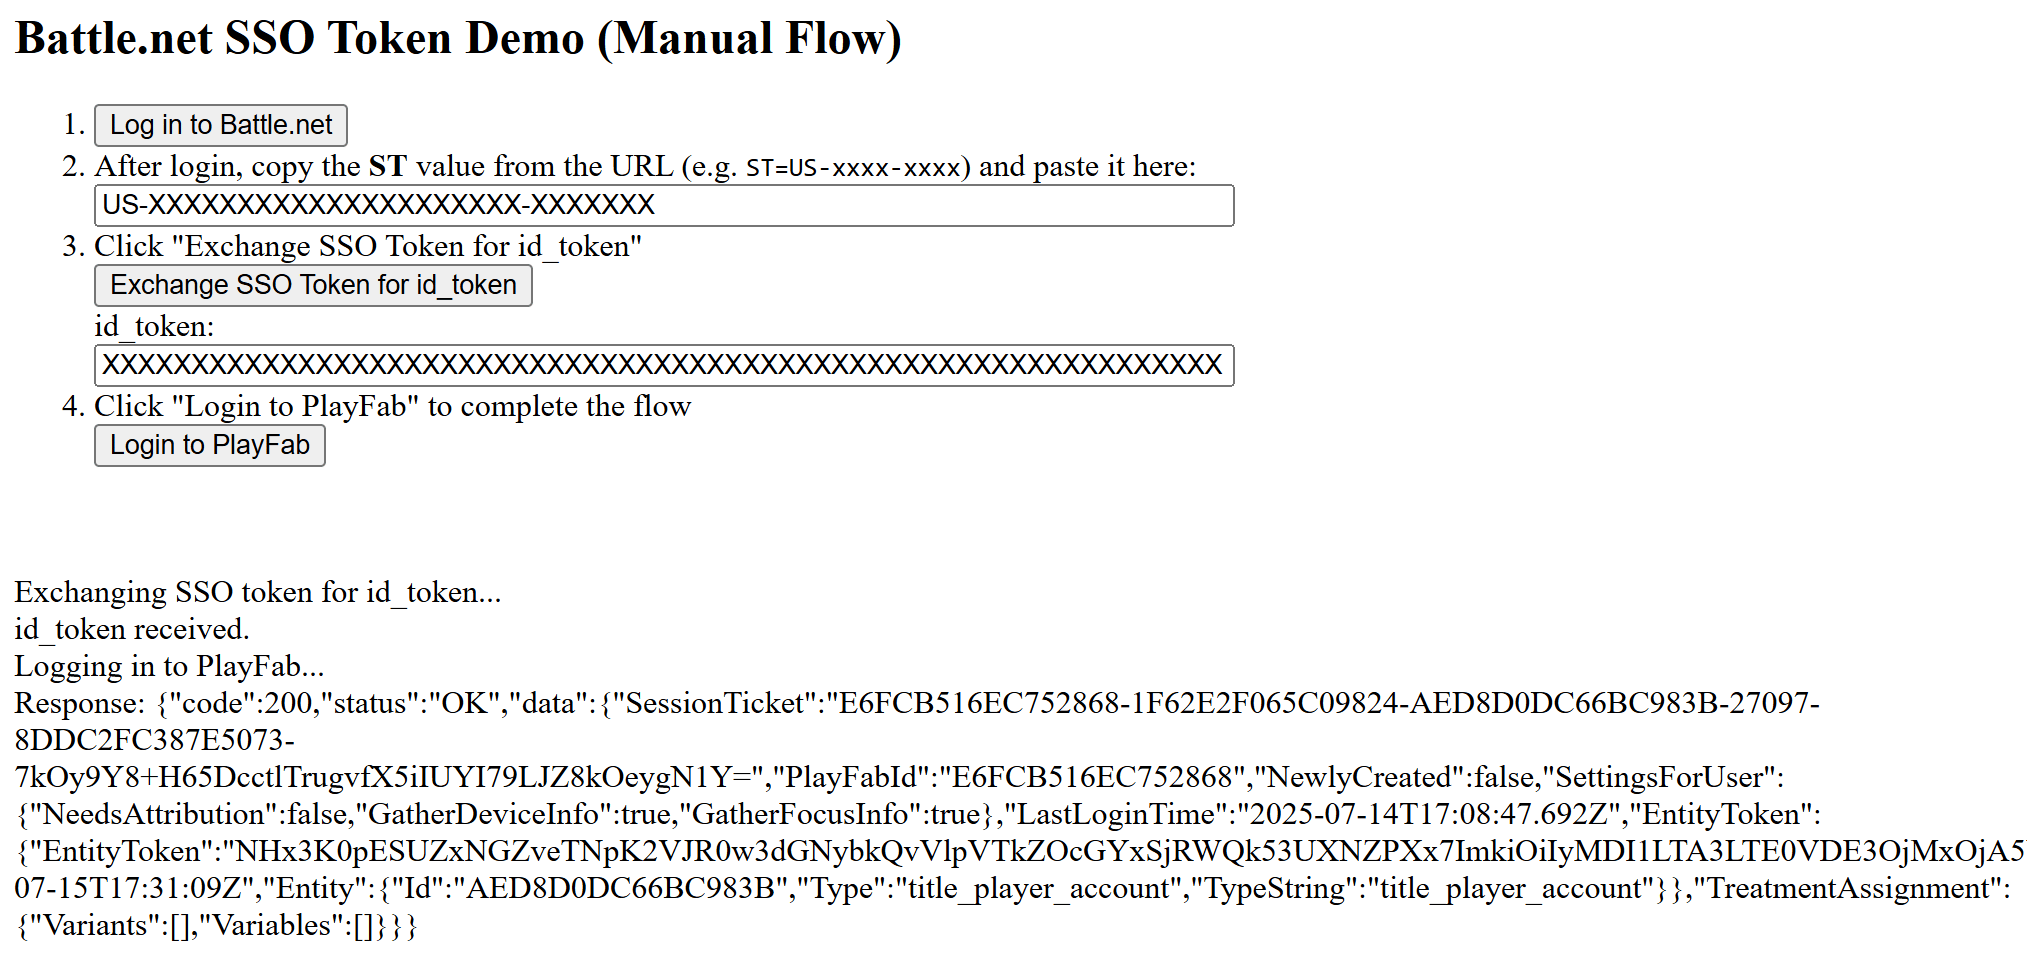
N'oubliez pas d'ouvrir la page HTML à l'aide de votre serveur web, et veillez à accéder à cette page à l'aide de l'URL que vous avez spécifiée.
1. Une fois la page ouverte, sélectionnez **Log in to Battle.net**.
2. Après vous être connecté, copiez la valeur **ST** à partir de l'URL (par exemple : ST=US-xxxx-xxxx) et saisissez-la dans la zone de dialogue.
3. Sélectionnez **Exchange SSO Token for id\_token** et copiez la valeur dans la zone de dialogue.
4. Sélectionnez **Login to PlayFab** pour terminer le flux de connexion.
5. Une fois terminé, le script tente de s'authentifier côté PlayFab et affiche le résultat.
## Related topics
- [Configurer Se connecter avec Apple pour PlayFab](/fr/services/playfab/identity/player-identity/platform-specific-authentication/apple-open-id/overview.md)
- [Authentification PlayFab avec la connexion Google Play Games dans Unity](/fr/services/playfab/identity/player-identity/platform-specific-authentication/google-sign-in-unity.md)
- [Se connecter avec Battle Net](/fr/services/playfab/api-references/rest/client/authentication/login-with-battle-net.md)
- [Notes de version du SDK PlayFab Services 2025](/fr/services/playfab/release-notes/2025.md)
- [Version v0.2.0 de l'exemple XBOX Godot](/fr/build/gdk-and-engines/godot-release-notes/godot-release-notes-0-2-0.md)
 3. Sélectionnez **Install Battle.net**.
 4. Renseignez le champ **Client ID for Game Client**.
5. Si vous le souhaitez, renseignez le champ **Client ID for Game Server**.
6. Sélectionnez ensuite le bouton **Save settings**.
4. Renseignez le champ **Client ID for Game Client**.
5. Si vous le souhaitez, renseignez le champ **Client ID for Game Server**.
6. Sélectionnez ensuite le bouton **Save settings**.
 Battle.net apparaît comme actif dans la page des modules complémentaires.
 ## Test à l'aide d'un jeton d'accès
Dans cet exemple, nous montrons comment tester l'API LoginWithBattleNet à l'aide de l'approche classique par jeton d'accès. Utilisez le code HTML fourni pour vos tests.
## Test à l'aide d'un jeton d'accès
Dans cet exemple, nous montrons comment tester l'API LoginWithBattleNet à l'aide de l'approche classique par jeton d'accès. Utilisez le code HTML fourni pour vos tests.
 ## Related topics
- [Configurer Se connecter avec Apple pour PlayFab](/fr/services/playfab/identity/player-identity/platform-specific-authentication/apple-open-id/overview.md)
- [Authentification PlayFab avec la connexion Google Play Games dans Unity](/fr/services/playfab/identity/player-identity/platform-specific-authentication/google-sign-in-unity.md)
- [Se connecter avec Battle Net](/fr/services/playfab/api-references/rest/client/authentication/login-with-battle-net.md)
- [Notes de version du SDK PlayFab Services 2025](/fr/services/playfab/release-notes/2025.md)
- [Version v0.2.0 de l'exemple XBOX Godot](/fr/build/gdk-and-engines/godot-release-notes/godot-release-notes-0-2-0.md)
## Related topics
- [Configurer Se connecter avec Apple pour PlayFab](/fr/services/playfab/identity/player-identity/platform-specific-authentication/apple-open-id/overview.md)
- [Authentification PlayFab avec la connexion Google Play Games dans Unity](/fr/services/playfab/identity/player-identity/platform-specific-authentication/google-sign-in-unity.md)
- [Se connecter avec Battle Net](/fr/services/playfab/api-references/rest/client/authentication/login-with-battle-net.md)
- [Notes de version du SDK PlayFab Services 2025](/fr/services/playfab/release-notes/2025.md)
- [Version v0.2.0 de l'exemple XBOX Godot](/fr/build/gdk-and-engines/godot-release-notes/godot-release-notes-0-2-0.md)